
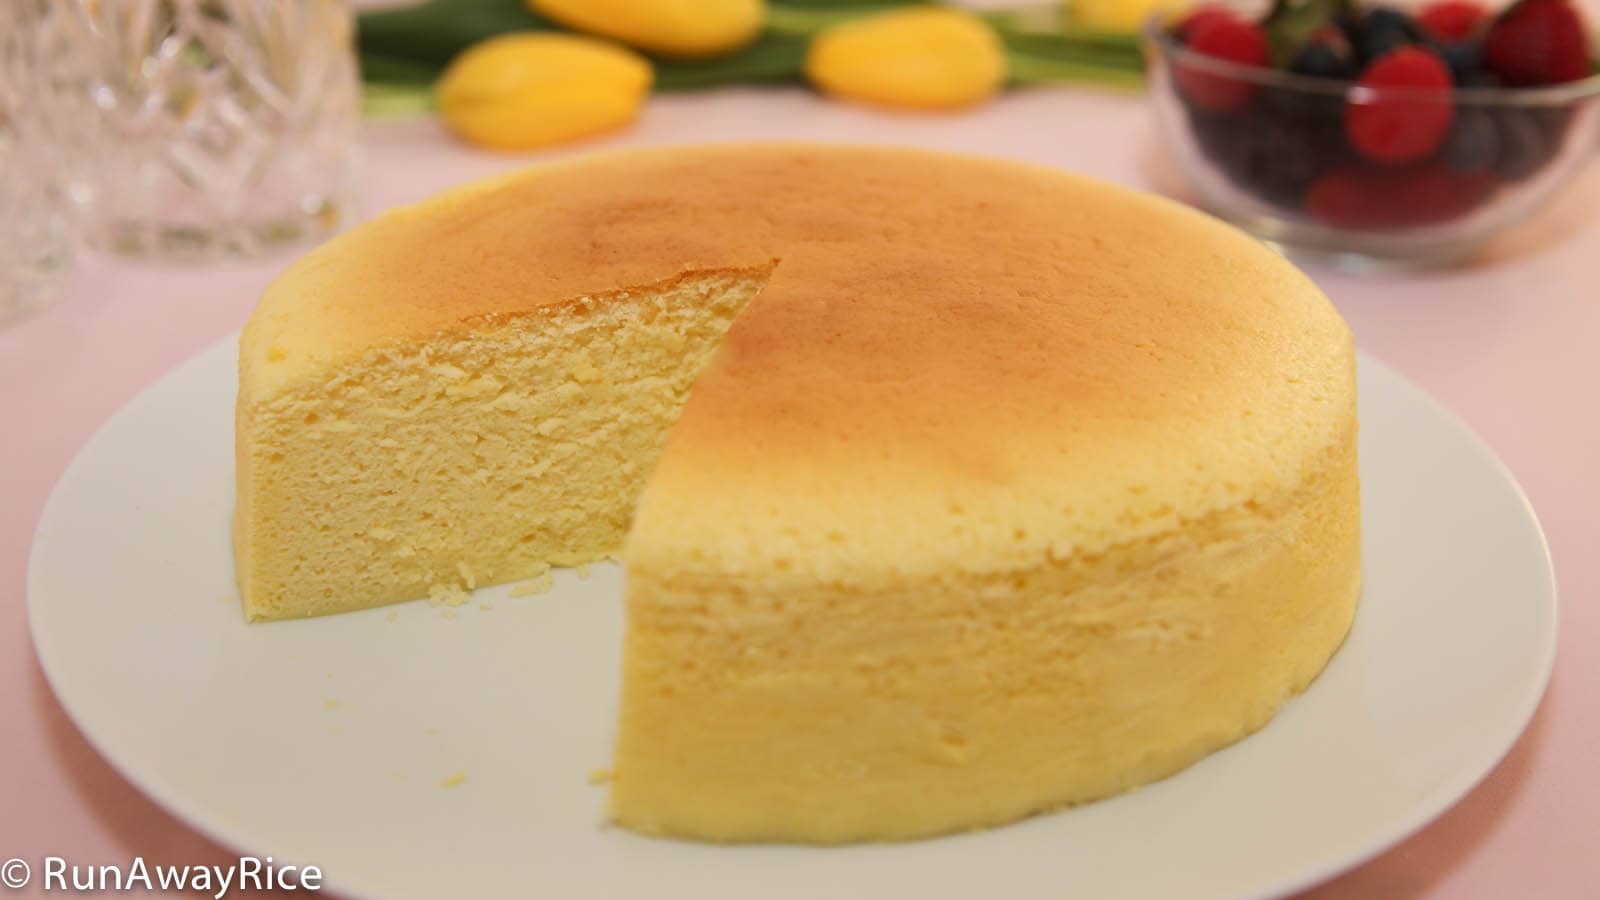
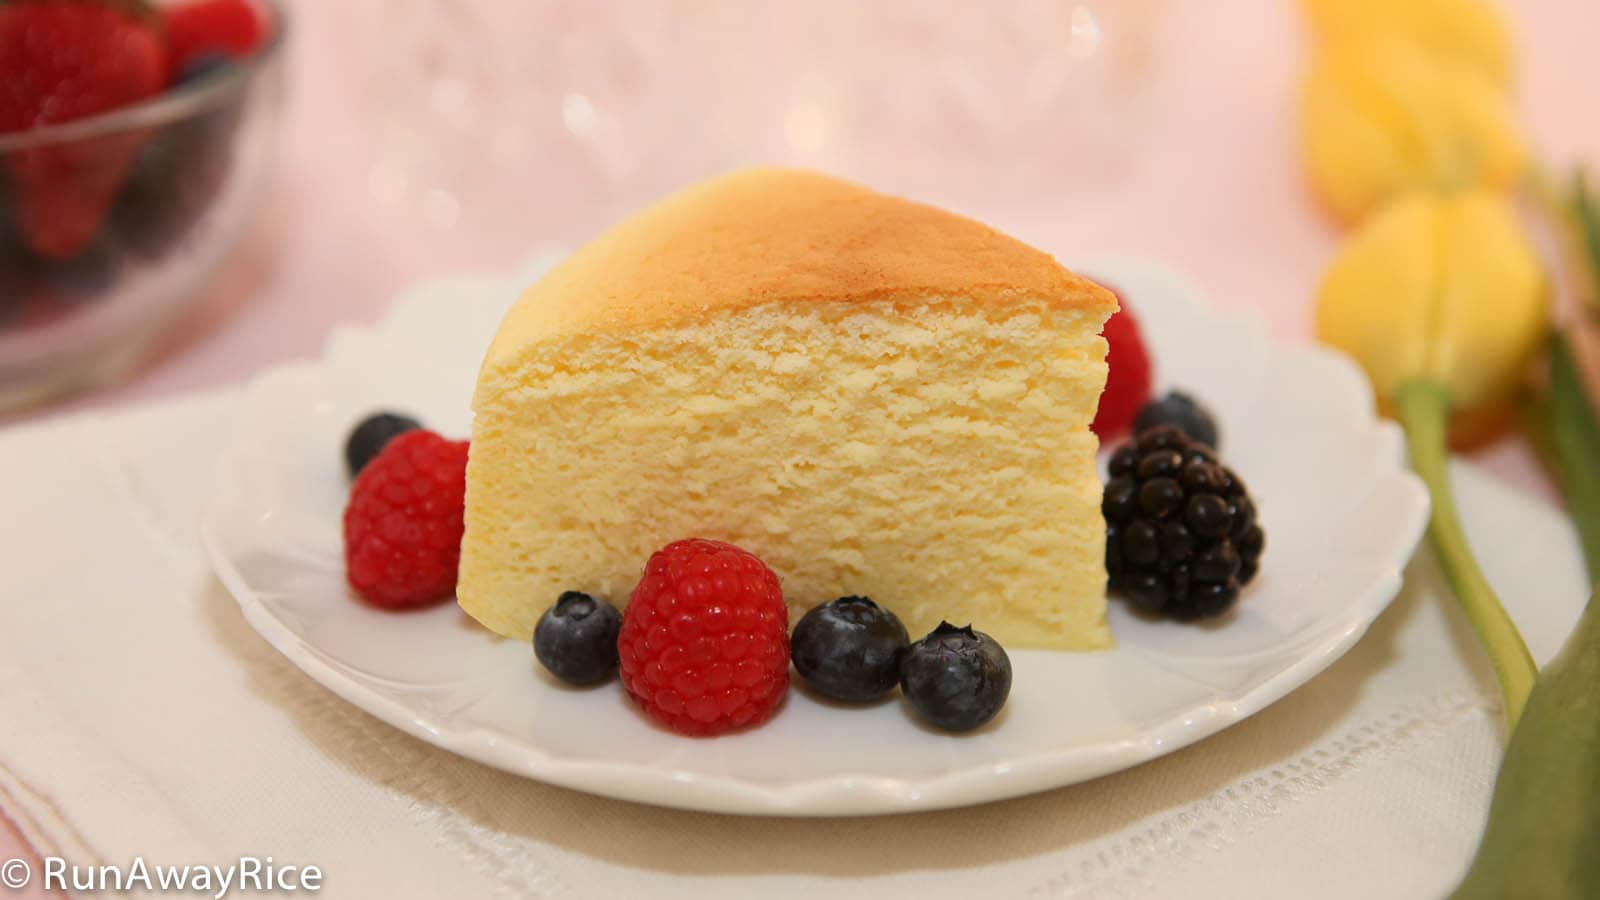
Cotton Cheesecake / Japanese Cheesecake is my new favorite dessert and after you try this recipe, it will become your favorite too! It’s the perfect combination of sponge cake and cheesecake in both taste and texture. What I love about this scrumptious cake is it’s not overly sweet as some cakes can be. The combination of fluffy cake with slightly tart cream cheese is absolutely heavenly. I hope you enjoy this Cotton Cheesecake / Japanese Cheesecake recipe as much as I do. Please note this recipe can be a bit tricky. Watch the video and follow the steps exactly. Happy Baking!
Watch the video for instructions.

Notes on the Cotton Cheesecake Recipe, Tips and Tricks
As the cream cheese, eggs and butter need to be at room temperature, advanced planning is required. About 2 hours before making the cake, remove the cream cheese and butter from the refrigerator. About 1 hour before, take the eggs out of the fridge. The cream cheese and butter should be soft and spreadable for this recipe. If the ingredients are not quite ready, pop them in the microwave on Low power for about 15-20 seconds.
Eggs are easiest to separate when they are cold. Egg whites are best beaten at room temperature to achieve the fluffiest texture. Separate the eggs while they are cold and then let them come to room temperature as you prep the remaining ingredients for the recipe.
Use an 8 inch by 3 inch round springform pan. Line the pan so the parchment paper extends about 2 inches above the pan. The parchment paper wall provides support since the cake rises to about 3 inches tall during baking. Keep the paper to no more than 5 inches tall. Too much paper will prevent the top of the cake from browning nicely.
The water bath is essential for keeping the cake moist. As the cake bakes for longer than the typical cake, the water bath is crucial. Additionally, the water bath insulates the cake and allows it to bake at a consist temperature. These factors are important for achieving the fluffy and moist texture for the cake.
Be sure to fold the egg whites into the batter. Do not beat or mix vigorously as this will deflate the egg whites. (If you’re not familiar with the fold technique, check out how I do it in the video.)
As oven temperatures vary, check to see if the cake is done (by using a toothpick) after 1 hour of baking. Then bake the cake until the top is golden brown. This is one recipe where over-baking the cake is ok. You won’t ruin the cake! Depending on your oven it may take up to 1 1/2 hours. Again, this is just fine.
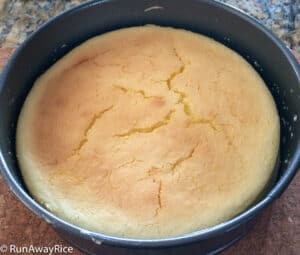
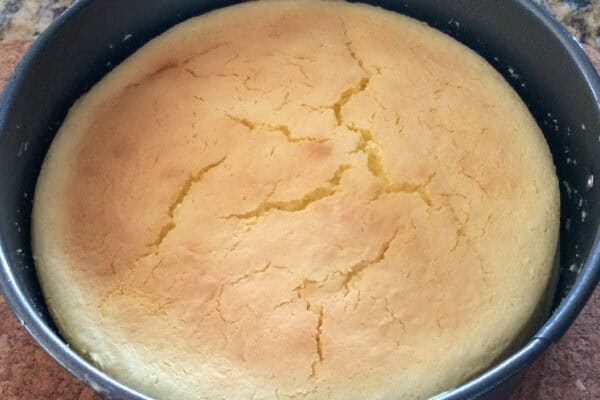
If your cake cracks on top, the heat is too high or the cake is too close to the heating element. Make note of this and adjust these things the next time.
The Cotton Cheesecake will shrink (about 1/2 inch or so) after cooling so please don’t despair. Leaving the cake in the oven after it’s done baking helps to minimize some of the deflating.
Refrigerate the Cotton Cheesecake for at least 4 hours before eating. The cold air sets the cream cheese and greatly improves the flavor and texture.
Store any remaining cake in the refrigerator for up to 1 week. To freeze, wrap the cake securely with plastic wrap and then a layer of foil. Freeze for up to 3 months.
✨✨I just shared a post on the most common challenges with making Cotton Cheesecake / Japanese Cheesecake and I explain all the details with pictures of my past frustrations. If you’re new to making this cheesecake or have made it without much success, check out the post before starting the recipe!
 Cotton Cheesecake Challenges: Deflation, Cracks, and Water Bath Issues
If you enjoy this Cotton Cheesecake / Japanese Cheesecake recipe, you may also like:
Chocolate Cotton Cheesecake / Japanese Cheesecake
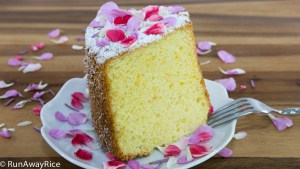
Orange Chiffon Cake with Edible Flowers
Cotton Cheesecake / Japanese Cheesecake
Ingredients
5 large eggs, at room temperature
1/4 tsp cream of tartar
1/2 cup sugar, divided
8 oz cream cheese, at room temperature
1/2 cup low-fat milk
1/4 cup unsalted butter, at room temperature
1 Tbsp lemon juice
1/4 cup all-purpose flour
2 Tbsp corn starch
Directions
Line the bottom and side of the springform pan with parchment paper. Wrap the springform pan with several sheets of foil, sealing it completely.
Fill a large baking pan halfway with water. Place it in the oven on the lowest rack. Preheat the oven to 315 F (157 C).
Separate the eggs and place the egg whites into a mixing bowl and the yolks into a measuring cup.
Beat the egg whites on Low speed for 30 seconds. Increase the speed to Medium Low and beat for another 30 seconds or until foamy. Add the cream of tartar. Increase the speed to Medium High and beat until the egg whites just start to thicken. Add 1/4 cup sugar gradually. Continue beating until the egg whites reach the soft peaks stage (approximately 3 minutes using a stand mixer).
In a separate bowl, add the cream cheese and milk. Mix on Low speed until creamy and smooth (approximately 2-3 minutes). Add the butter, remaining 1/4 cup sugar and lemon juice and beat for 1 minute. Add the flour and corn starch and mix for another minute. Finally add the egg yolks and mix for 1 more minute. Strain the batter using a sieve.
Add 1/3 of the egg whites and gently fold into the batter until mostly incorporated. Add another 1/3 and gently fold. Add the remaining 1/3 and gently fold.
Pour the batter into the lined springform pan. Spread the batter evenly into the pan and smooth out the top using a spatula. Holding the side of the pan, gently lift and drop the pan on the counter about 6 times to remove any big air bubbles.
Place the springform pan into the water bath and bake the cake for 1 hour and 10 minutes. Check the cake for doneness by inserting a toothpick into the center of the cake. (It should come out clean.) Bake the cake for an additional 10-15 minutes to brown the top.
Turn off the oven, open the oven door slightly (about 2-3 inches) and let the Cotton Cheesecake cool in the oven for 1 hour.
Remove the Cotton Cheesecake from the pan. Place on a plate and refrigerate for at least 4 hours.
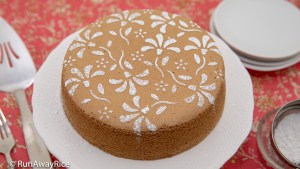
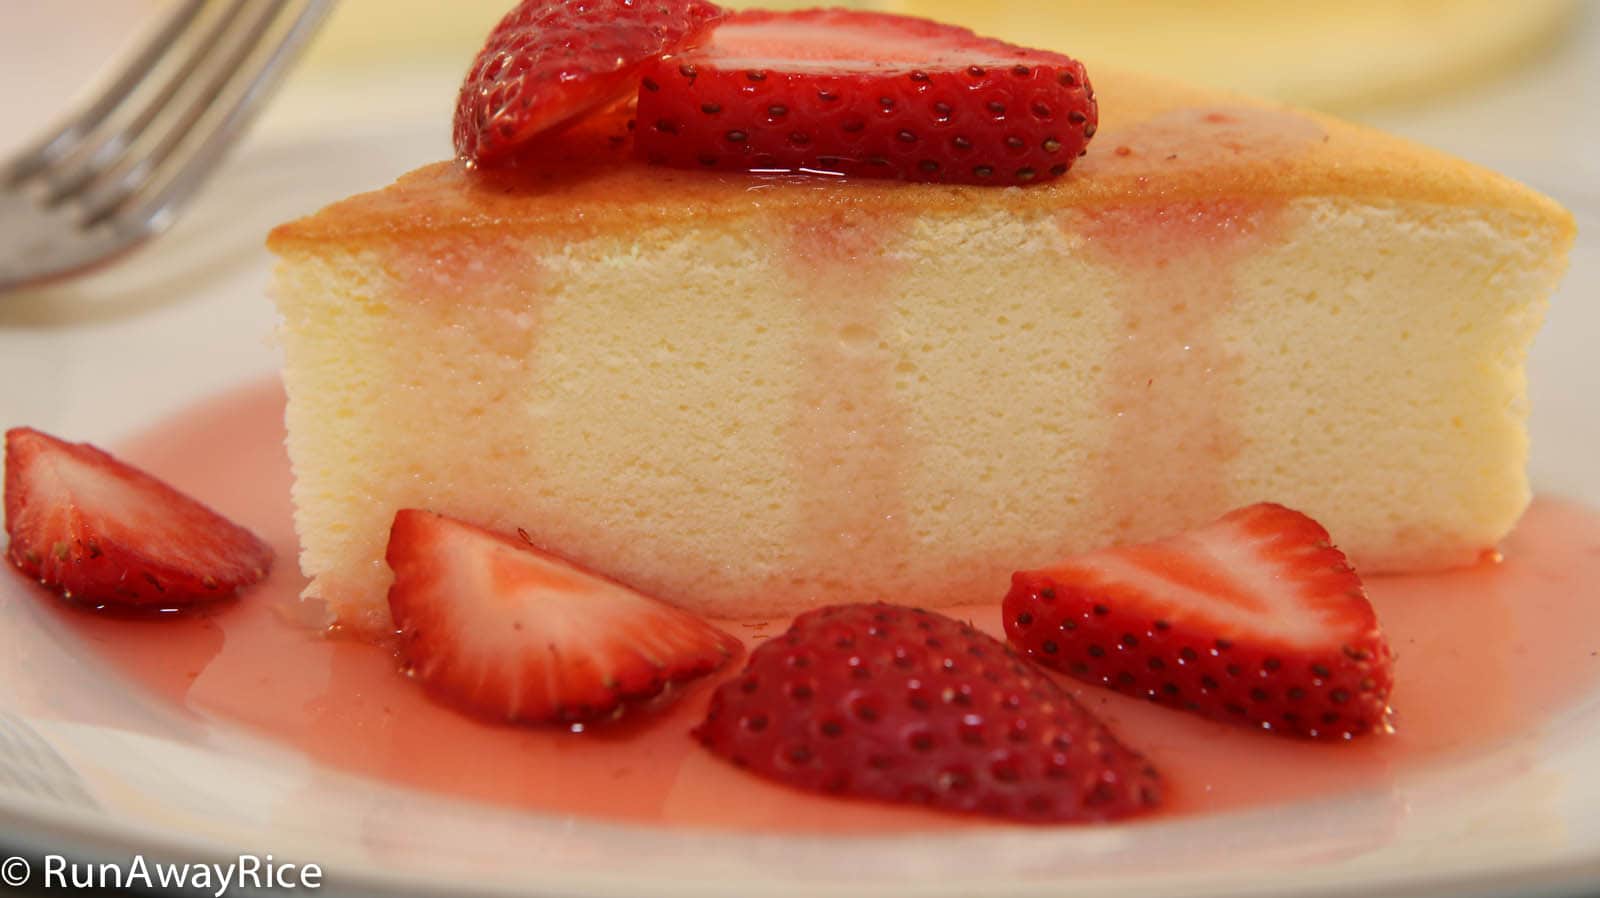
Serve with fresh fruit, fruit puree, chocolate sauce, whipped cream, etc.
Cover and refrigerate any remaining portions. Enjoy the Cotton Cheesecake within the week.
Yields: 8 servings

Cotton Cheesecake / Japanese Cheesecake
Cotton Cheesecake / Japanese Cheesecake is my new favorite dessert and after you try this recipe, it will become your favorite too. It's the perfect combination of sponge cake and cheesecake in both taste and texture. What I love about this scrumptious cake is it's not overly sweet as some cakes can be. The combination of fluffy cake with slightly tart cream cheese is absolutely heavenly. I hope you enjoy the recipe as much as I do. Please note this recipe can be a bit tricky. Watch the video and follow the steps exactly. Happy Baking!
Ingredients
- 5 large eggs , at room temperature
- 1/4 tsp cream of tartar
- 1/2 cup sugar , divided
- 8 oz cream cheese , at room temperature
- 1/2 cup low-fat milk
- 1/4 cup unsalted butter , at room temperature
- 1 Tbsp lemon juice
- 1/4 cup all-purpose flour
- 2 Tbsp corn starch
Bakeware
- 8 inch round springform pan
Instructions
-
Line the bottom and side of the springform pan with parchment paper. Wrap the springform pan with several sheets of foil, sealing it completely.
-
Fill a large baking pan halfway with water. Place it in the oven on the lowest rack. Preheat the oven to 315 F (157 C).
-
Separate the eggs and place the egg whites into a mixing bowl and the yolks into a measuring cup.
-
Beat the egg whites on Low speed for 30 seconds. Increase the speed to Medium Low and beat for another 30 seconds or until foamy. Add the cream of tartar. Increase the speed to Medium High and beat until the egg whites just start to thicken. Add 1/4 cup sugar gradually. Continue beating until the egg whites reach the soft peaks stage (approximately 3 minutes using a stand mixer).
-
In a separate bowl, add the cream cheese and milk. Mix on Low speed until creamy and smooth (approximately 2-3 minutes). Add the butter, remaining 1/4 cup sugar and lemon juice and beat for 1 minute. Add the flour and corn starch and mix for another minute. Finally add the egg yolks and mix for 1 more minute. Strain the batter using a sieve.
-
Add 1/3 of the egg whites and gently fold into the batter until mostly incorporated. Add another 1/3 and gently fold. Add the remaining 1/3 and gently fold.
-
Pour the batter into the lined springform pan. Spread the batter evenly into the pan and smooth out the top using a spatula. Holding the side of the pan, gently lift and drop the pan on the counter about 6 times to remove any big air bubbles.
-
Place the springform pan into the water bath and bake the cake for 1 hour and 10 minutes. Check the cake for doneness by inserting a toothpick into the center of the cake. (It should come out clean.) Bake the cake for an additional 10-15 minutes to brown the top.
-
Turn off the oven and open the oven door slightly (about 2-3 inches) and let the Cotton Cheesecake cool in the oven for 1 hour.
-
Remove the Cotton Cheesecake from the pan. Place on a plate and refrigerate for at least 4 hours.
-
Serve with fresh fruit, fruit puree, chocolate sauce, whipped cream, etc.
-
Cover and refrigerate any remaining portions. Enjoy the Cotton Cheesecake within the week.
Recipe Video
Notes, Tips & Tricks
- As the cream cheese, eggs and butter need to be at room temperature, advanced planning is required. About 2 hours before making the cake, remove the cream cheese and butter from the refrigerator. About 1 hour before take the eggs out of the fridge. The cream cheese and butter should be soft and spreadable for this recipe. If these ingredients are not quite ready, pop them in the microwave on Low power for about 15-20 seconds.
- Eggs are easiest to separate when they are cold. Egg whites are best beaten at room temperature to achieve the fluffiest texture. Separate the eggs while they are cold and then let them come to room temperature as you prep the remaining ingredients for the recipe.
- Use an 8 inch by 3 inch round springform pan. Line the pan so the parchment paper extends about 2 inches above the pan. The parchment paper wall provides support since the cake rises to about 3 inches tall during baking. Keep the paper to no more than 5 inches tall. Too much paper will prevent the top of the cake from browning nicely.
- The water bath is essential for keeping the cake moist. As the cake bakes for longer than the typical cake, the water bath is crucial. Additionally, the water bath insulates the cake and allows it to cook at a consist temperature. These factors are important for achieving the fluffy and moist texture for the cake.
- Be sure to fold the egg whites into the batter. Do not beat or mix vigorously as this will deflate the egg whites. (If you’re not familiar with the fold technique, check out how I do it in the video.)
- As oven temperatures vary, check to see if the cake is done (by using a toothpick) after 1 hour of baking. Then bake the cake until the top is golden brown. This is one recipe where over-baking the cake is ok. You won’t ruin the cake! Depending on your oven it may take up to 1 1/2 hours. Again, this is just fine.
- If your cake cracks on top, the heat is too high or the cake is too close to the heating element. Make note of this and adjust these things the next time.
- This cake will shrink (about 1/2 inch or so) after cooling so please don’t despair. Leaving the cake in the oven after it’s done baking helps to minimize some of the deflating.
- Refrigerate the cake for at least 4 hours before eating. The cold air sets the cream cheese and greatly improves the flavor and texture.
Nutrition FactsCotton Cheesecake / Japanese CheesecakeAmount Per ServingCalories 265 Calories from Fat 162% Daily Value*Fat 18g28%Saturated Fat 10g63%Cholesterol 149mg50%Sodium 138mg6%Potassium 113mg3%Carbohydrates 19g6%Sugar 14g16%Protein 6g12%Vitamin A 720IU14%Vitamin C 0.7mg1%Calcium 63mg6%Iron 0.8mg4%* Percent Daily Values are based on a 2000 calorie diet.
Want to learn more about making Cotton Cheesecake / Japanese Cheesecake and the common challenges? Check out this post where I detail the most common frustrations and how to fix them.
Cotton Cheesecake Challenges: Deflation, Cracks, and Water Bath Issues


My cake is in the oven, it looks great and smells wonderful! I can’t wait to taste it as I am sure it’s a success, finally! Thank a bunch Trang.
Hi Tiana,
I hope the cake turned out beautifully for you! Thanks for trying the recipe. 🙂
Thank you for the recipe where yours was by the far the easiest of ingredients and directions.
I had to use a 10 inch pan as I wanted to ensure there’d be enough for 8 people…therefore I simply doubled the recipe. I should have just tripled the recipe because it was such a hit at my family dinner.
It was my first time making the cake, and I guess you could say I stressed and fretted the entire 2 hours of baking and cooling….trying not to yank open the oven door to see the progress was an effort. It came out with a great success where the cake is very moist and delicious. I paired the it with rose infused whipped cream and champagned strawberries. This one will be going into my receipt book and will definitely be making again.
Hi Chelsea,
I am thrilled you and your family enjoyed the recipe. I have not tried doubling the recipe and can imagine it must have been a lot of cake! Kudos to you for making it successful on your first try. The pairing with rose-infused whipped cream and champagne strawberries sounds so elegant and delicious. Thanks for taking the time to share your results! 🙂
Hi Trang,
1st attempt with water bath at 155 but the surface broken like volcano erruption and water leaked into the tray. The surface break around 40 min from baking. The stick is still sticky after 1 hr 10 min and I therefore baked it for 1 hr & 40min. The surface shrinked still but dry where the bottom is cheesy but a bit wet still (water leak)
2nd attempt, I put a tray filled with water at the base, 145 degree & baked it without water bath; still surface broken at 40 min, raised 3-4″ in height, I reduced to 140 & baked for totak of 1 hr 20 min. The stick is cleared this time but why is my cake surface is not flat as yours? My oven is the conventional with fan.
Thanks.
Hi Fran,
Cakes dome in the middle when the sides of the cake touching the metal pan cooks faster, setting the cake, while the center still continues to bake and rise. An oven that is too hot often makes the cake dome. Also, if you are using dark-colored pans, this may contribute to the volcano effect. Try lighter-colored or silicone pans if you have them. Alternatively, you can wrap the sides of the pan with moistened cake pan strips. You can buy these or cut-up an old towel and wrap around the pans. Don’t give it, you’re really close! 🙂 Let me know if you have any questions.
I failed in my first attempt wit other recipe and I noticed the recipe was some mistakes. Eg corn flour same portion as cake flour.
Managed to get your website after few videos.
Everything is just fine and perfect but the cake shrink down more than half after cool down. What cause this? Really hope can solve this as I do not like to keep on wasting the ingredients.
Hi Irene,
This cake shrinking when it cools is actually quite normal. You’ll notice my cake shrank too. However, there are some things that may cause the cake to shrink by a lot: over-beating the eggs or over-mixing the batter which adds too much air and when the air leaves, the cake shrinks, not cooking the cake long enough and so the cake does not have the structure to hold the weight of the cake, cooking the cake at too high a temperature–cake bakes too quickly and again doesn’t have the structure to hold the cake up. Oven temperatures vary so try reducing the oven temperature and baking the cake for longer. Don’t give it, this may take a few tries before you perfect it.
Hi Trang,
Its me again, I cant wait 4 hrs hihi.. Tried and it is beautiful. However the way it looks not as yours. I baked in 2 rectangular tin and they looks not flat at outside like yours. If I give it more corn flour will it be ok? Thanks for your advice
Hi Van,
This cake shrinks once it cools but that’s normal. Why do you think you need to add more corn flour/corn starch?
Hi Trang,
My older sister recommend me your website as she is very happy with her result. Now its my turn, the cake still in the oven but I am very happy already. Thank you very much.
Hi Van,
Welcome and I am glad you’re giving this Cotton Cheesecake recipe a try. It’s one of my favorite recipes!
Hi Trang,
I’ve just tried you recipe and it tasted so good. However, i failed with the water bath. The bottom half of my cake is like a steamed cake while the top half was just perfect. What’s wrong with it? Can you please suggest?
Thanks in advance 🙂
Hi Ning,
It’s possible the water tray was too close to the heating element and the cake was steamed rather than baked. If your oven doesn’t accommodate leaving more room, you may want to try placing little bowls of water around the cake instead of using the water bath. This way the cake still gets moisture from the steam. Give it a try and let me know how it works out for you. Good Luck!
Hi Trang, thanks for the wonderful recipe ! I tried making this last Thursday and it turned out so yummy that I made another one on the following day ! (Yes, it went out really fast coz it’s so yummy!)
Hi Genie,
That’s awesome! I am so happy to hear this recipe turned out well for you. Thanks for taking the time to share your results 🙂
This was my first attempt to make a Japanese cake. Thanks for your clear and easy-to-follow instructions, the cake turned out wonderful!
However, I noticed when I was ready to fold the beaten egg white into the batter, the egg white was kind of separated and became watery. Was this normal? or I waited too long? Or the egg white wasnt beaten enough?
I hope I can get this step right, and I can make a fluffier cake next time.
Hi Grace,
Wonderful! I am glad to hear the cake turned out well for you. If the egg whites separated, they may have been over-whipped. If the egg whites are a bit a liquidy but just on the bottom, then they weren’t whipped enough. Also, the egg whites shouldn’t sit for more than 10-15 minutes otherwise they will start to break-down. Good Luck the next time. You’ll perfect it for sure 🙂
Hi Trang,
Thanks for your reply. I made the cake again and it turned out better than last time. Thanks for your tips!
However, I ran into a different problem. The top of the cake wrinkled a lot after it cooled down. I believed it’s caused by too much air escaped from the cake. How can I correct this?
Many thanks for your professional advices.
Hi Grace,
Yes, the wrinkling is due to the cake shrinking as it cools. There are many reasons why a cake shrinks but generally it’s caused by the cake cooling too quickly (make sure to let it cool gradually in the oven), over-beating the egg whites (when the air leaves the cake, it flattens) and baking the cake too quickly (this makes the structure unstable and then it can’t support the height of the cake.
I hope that helps. Please let me know if you have further questions.
Hi! I tried baking this type of cake many times before but using a different recipe and it always results in this second rubbery waxy layer at the bottom. I read through some of the comments here on your site and decided to try putting the water bath underneath the pan instead of the pan directly in the water bath just in case water seeped in. However, the same thing happened again to my cake and I don’t really know what I’m doing wrong. Thanks!
Hi Ellen,
With the water pan just underneath the cake, I think what’s happening is the bottom of the cake is being steamed rather than baked which is causing the waxy layer. If you use the water pan method, don’t place it directly underneath the cake. Give it a try and let me know how that works out for you. Good Luck!
I have the same problems as well, I tried both way but it still turn out very damp. The cake rises but it collapse once I turn off the temperature, I don’t take the cake out but it still go flat and damp. Is it because I beat the egg york/cream cheese for too long?