
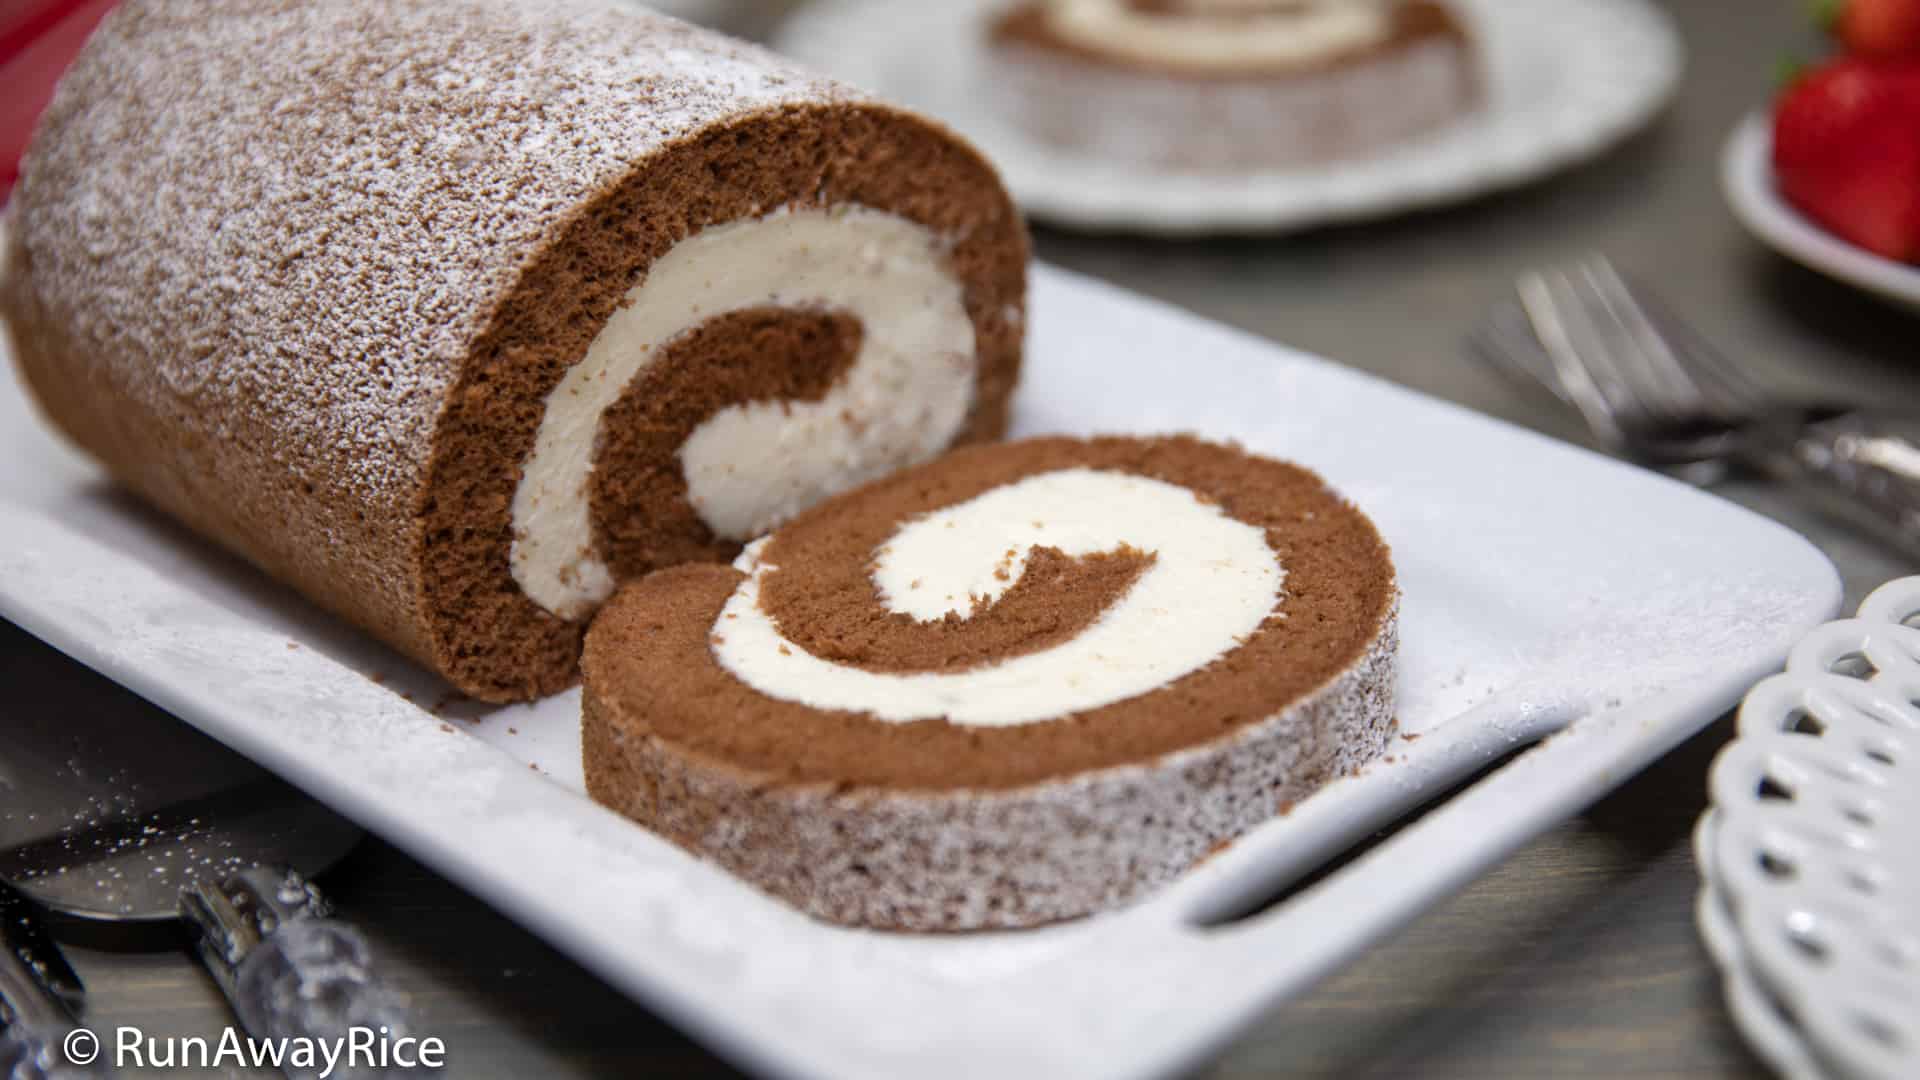
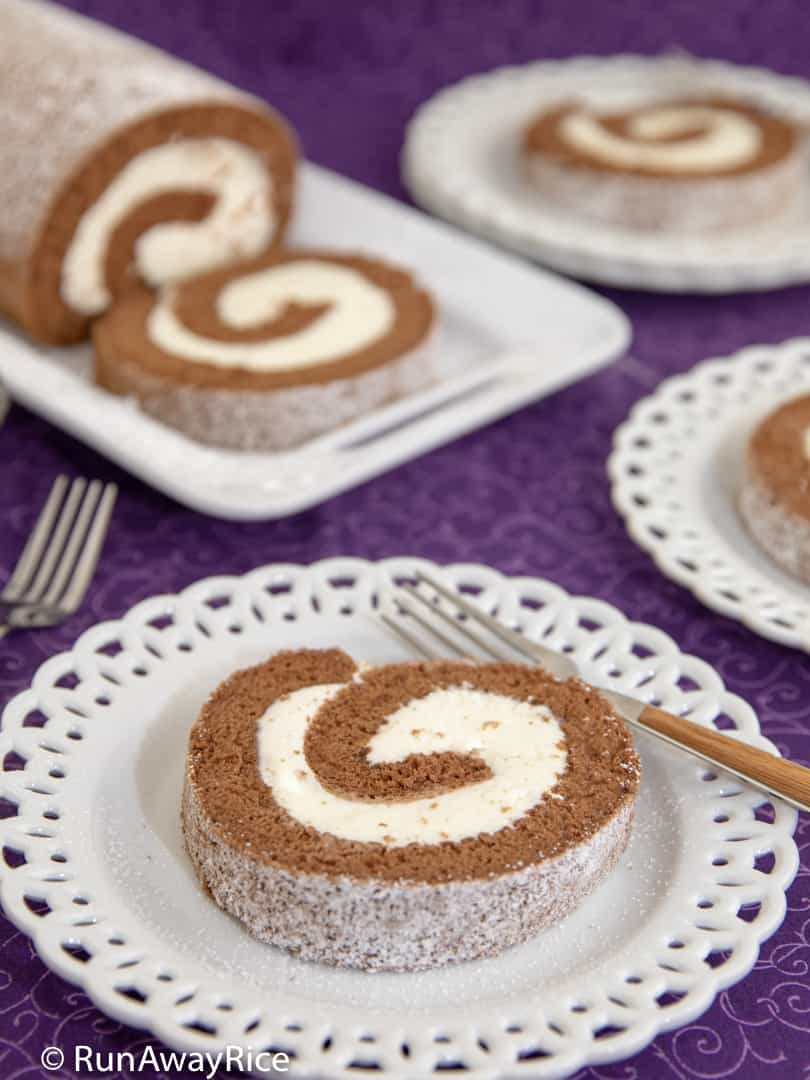
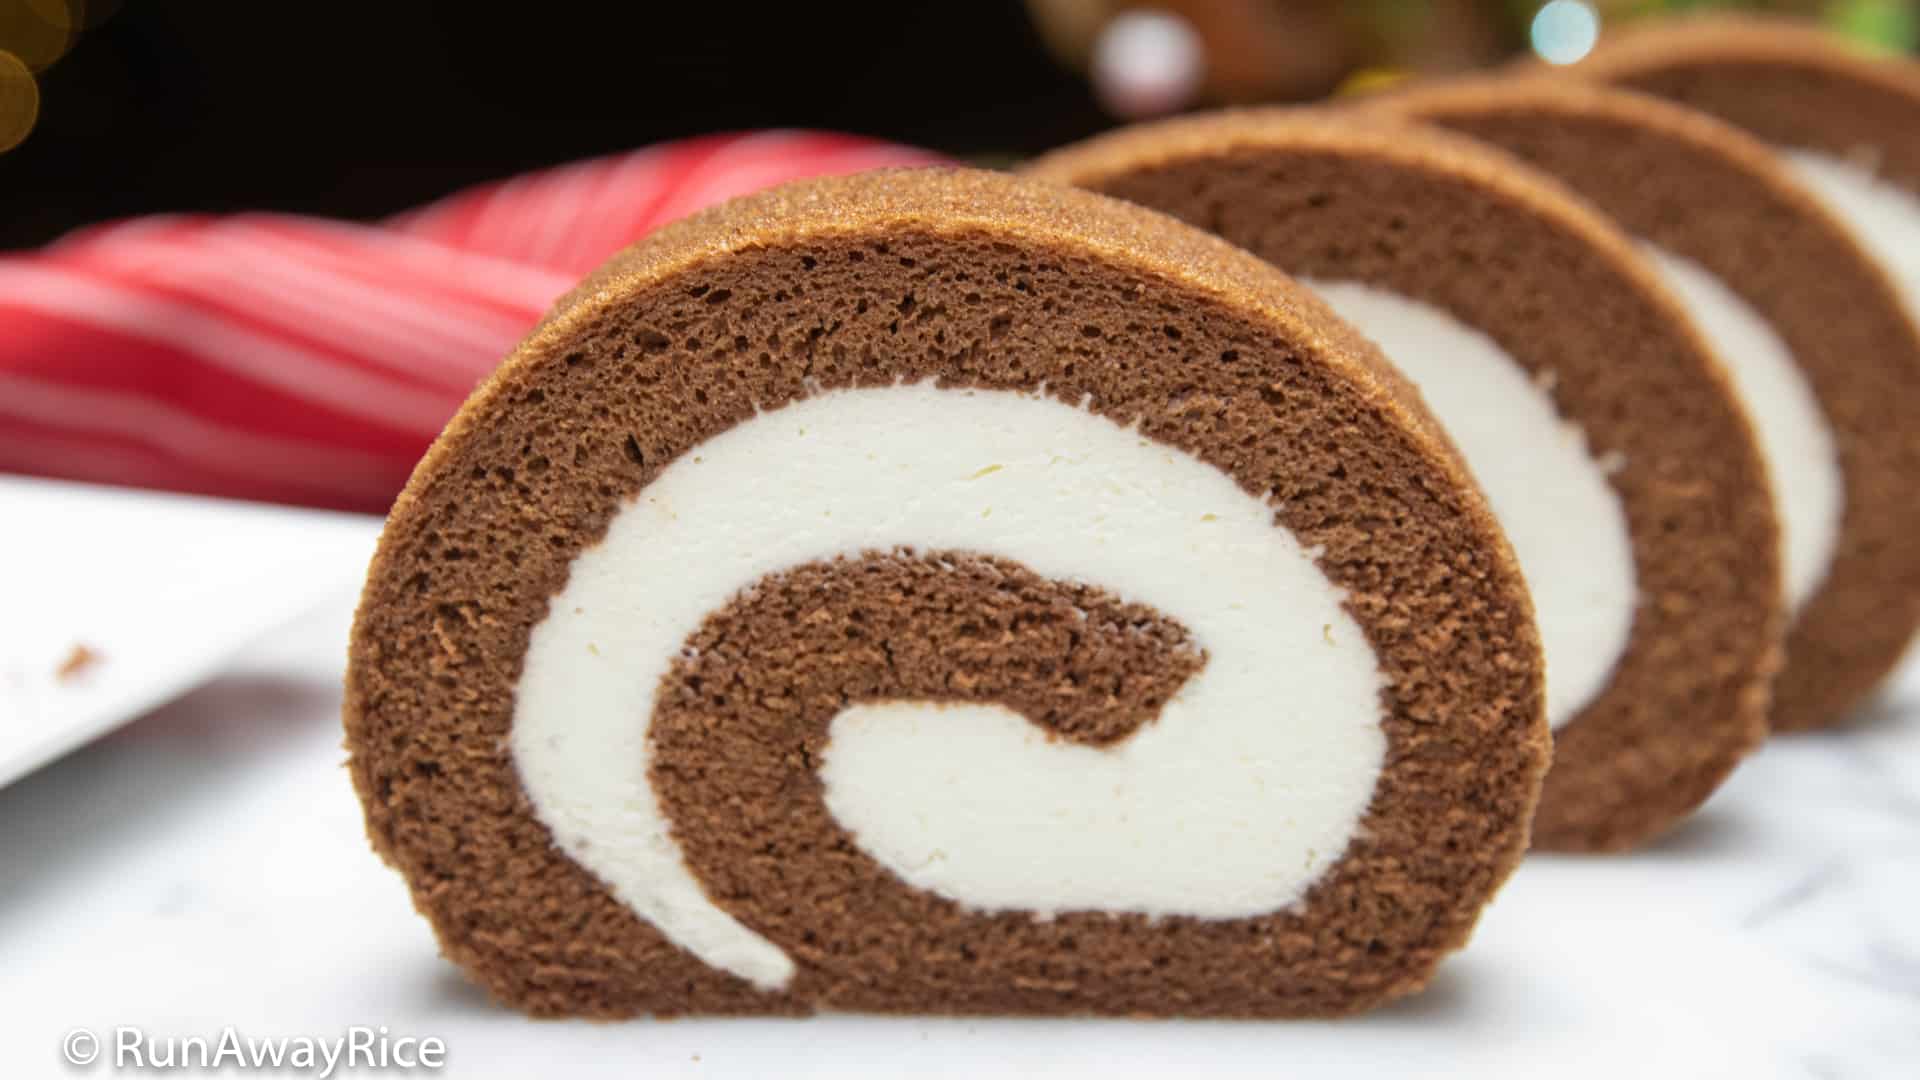
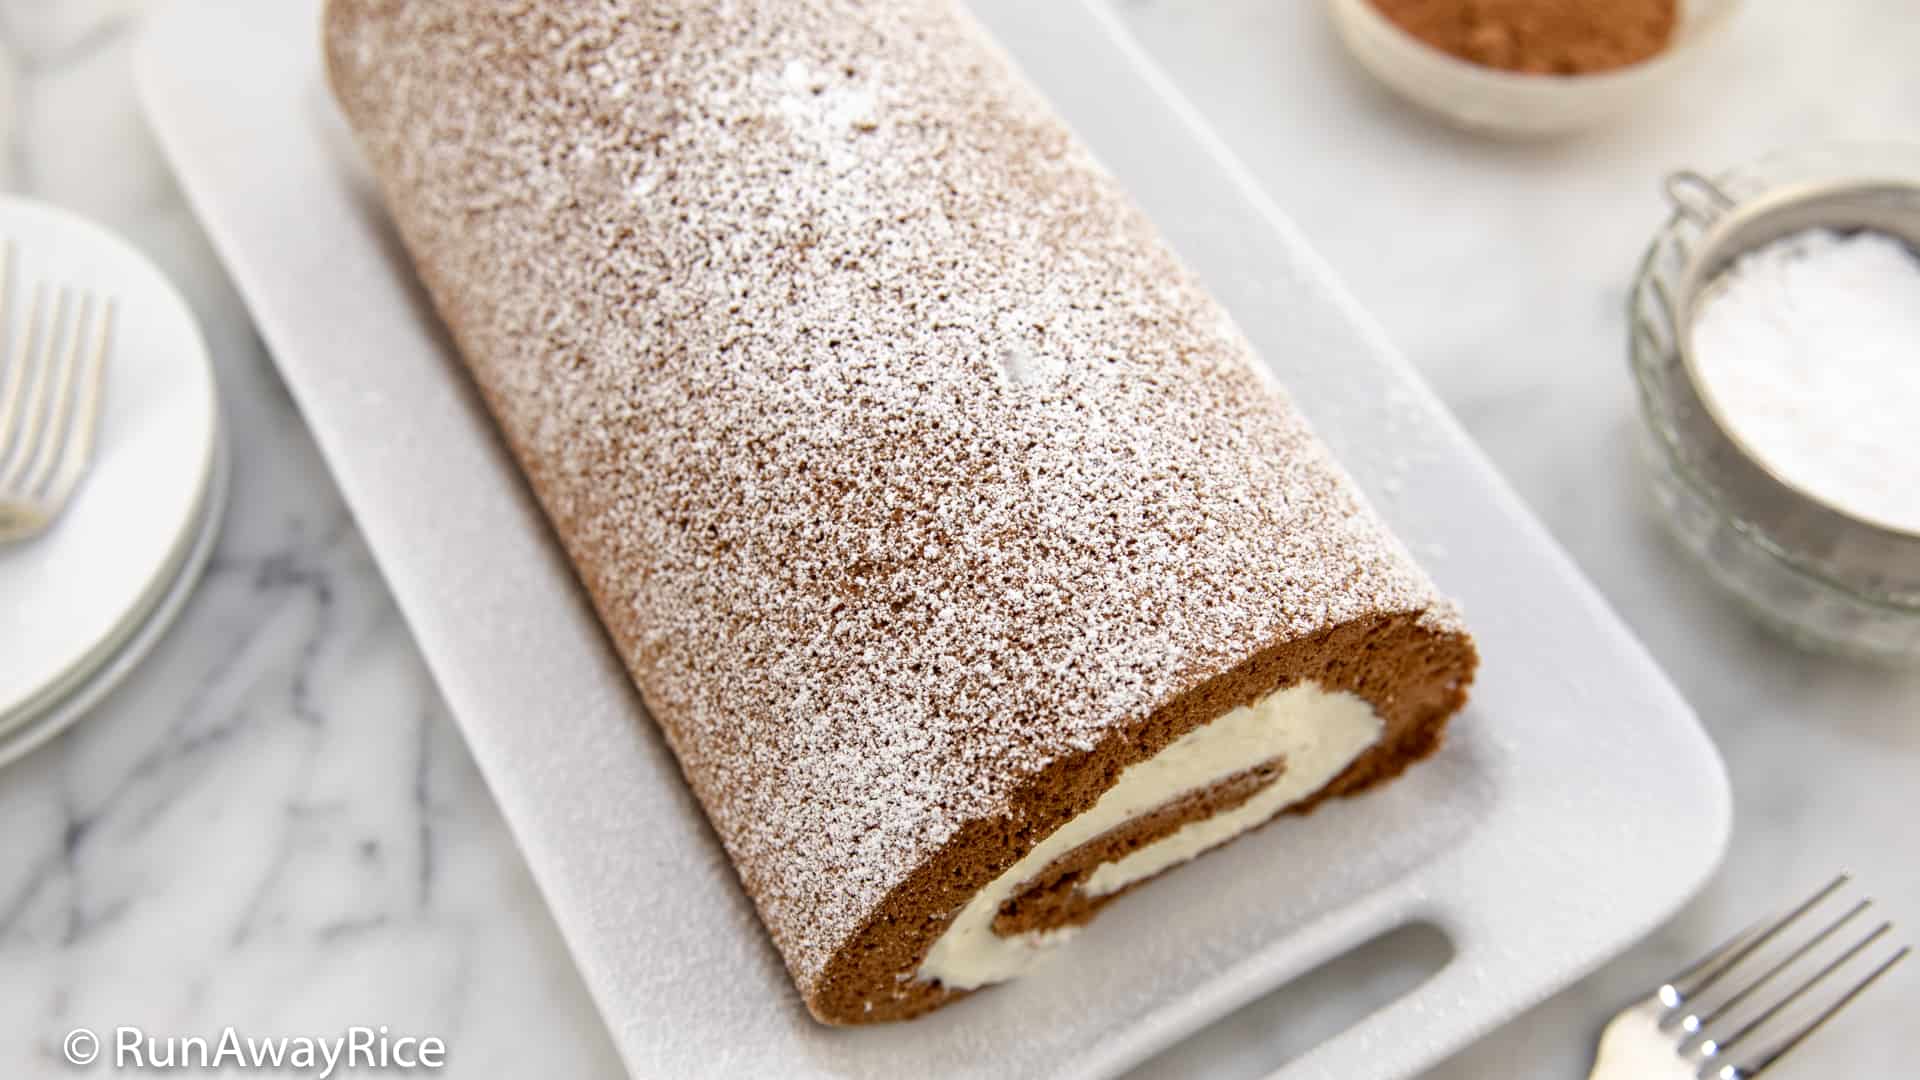
This from-scratch recipe for Chocolate Roll Cake (Banh Cuon Chocolate) makes moist, spongy chocolate cake swirled around a light and fluffy cream filling. If you’re a fan of Asian-style baked goods, you’ll adore this luscious chocolaty treat. Not too rich or sweet like some desserts, this Chocolate Roll Cake is both elegant and delicious. Make this wonderful Chocolate Roll Cake to enjoy during your next get-together or holiday celebration. It’s sure to make the occasion special!


Notes on the Chocolate Roll Cake (Banh Cuon Chocolate) Recipe, Tips and Tricks
Bake the Chocolate Roll Cake in a 12 inch by 18 inch baking sheet also called a half sheet pan.
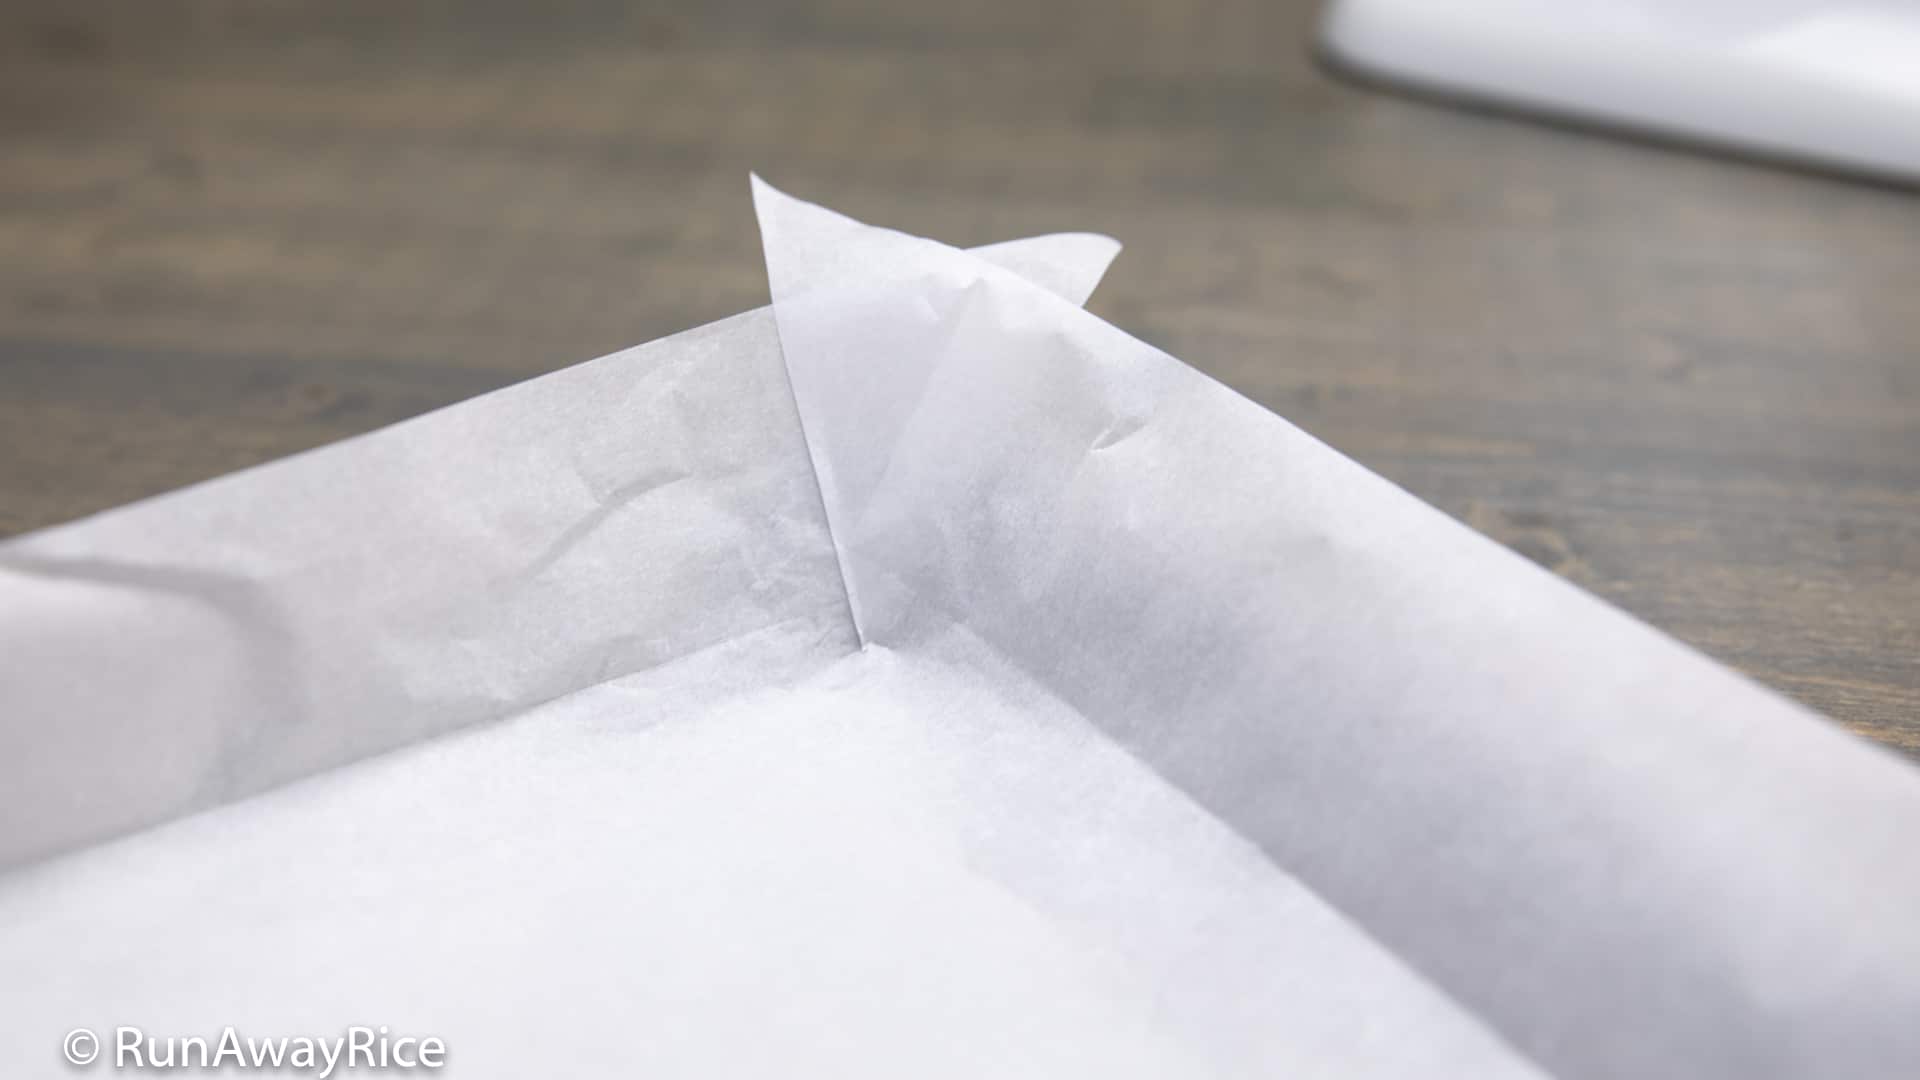
Crease the parchment paper to help it stay in the sheet pan. In each corner of the parchment paper, make a diagonal cut to help the paper lay in the pan without bunching.
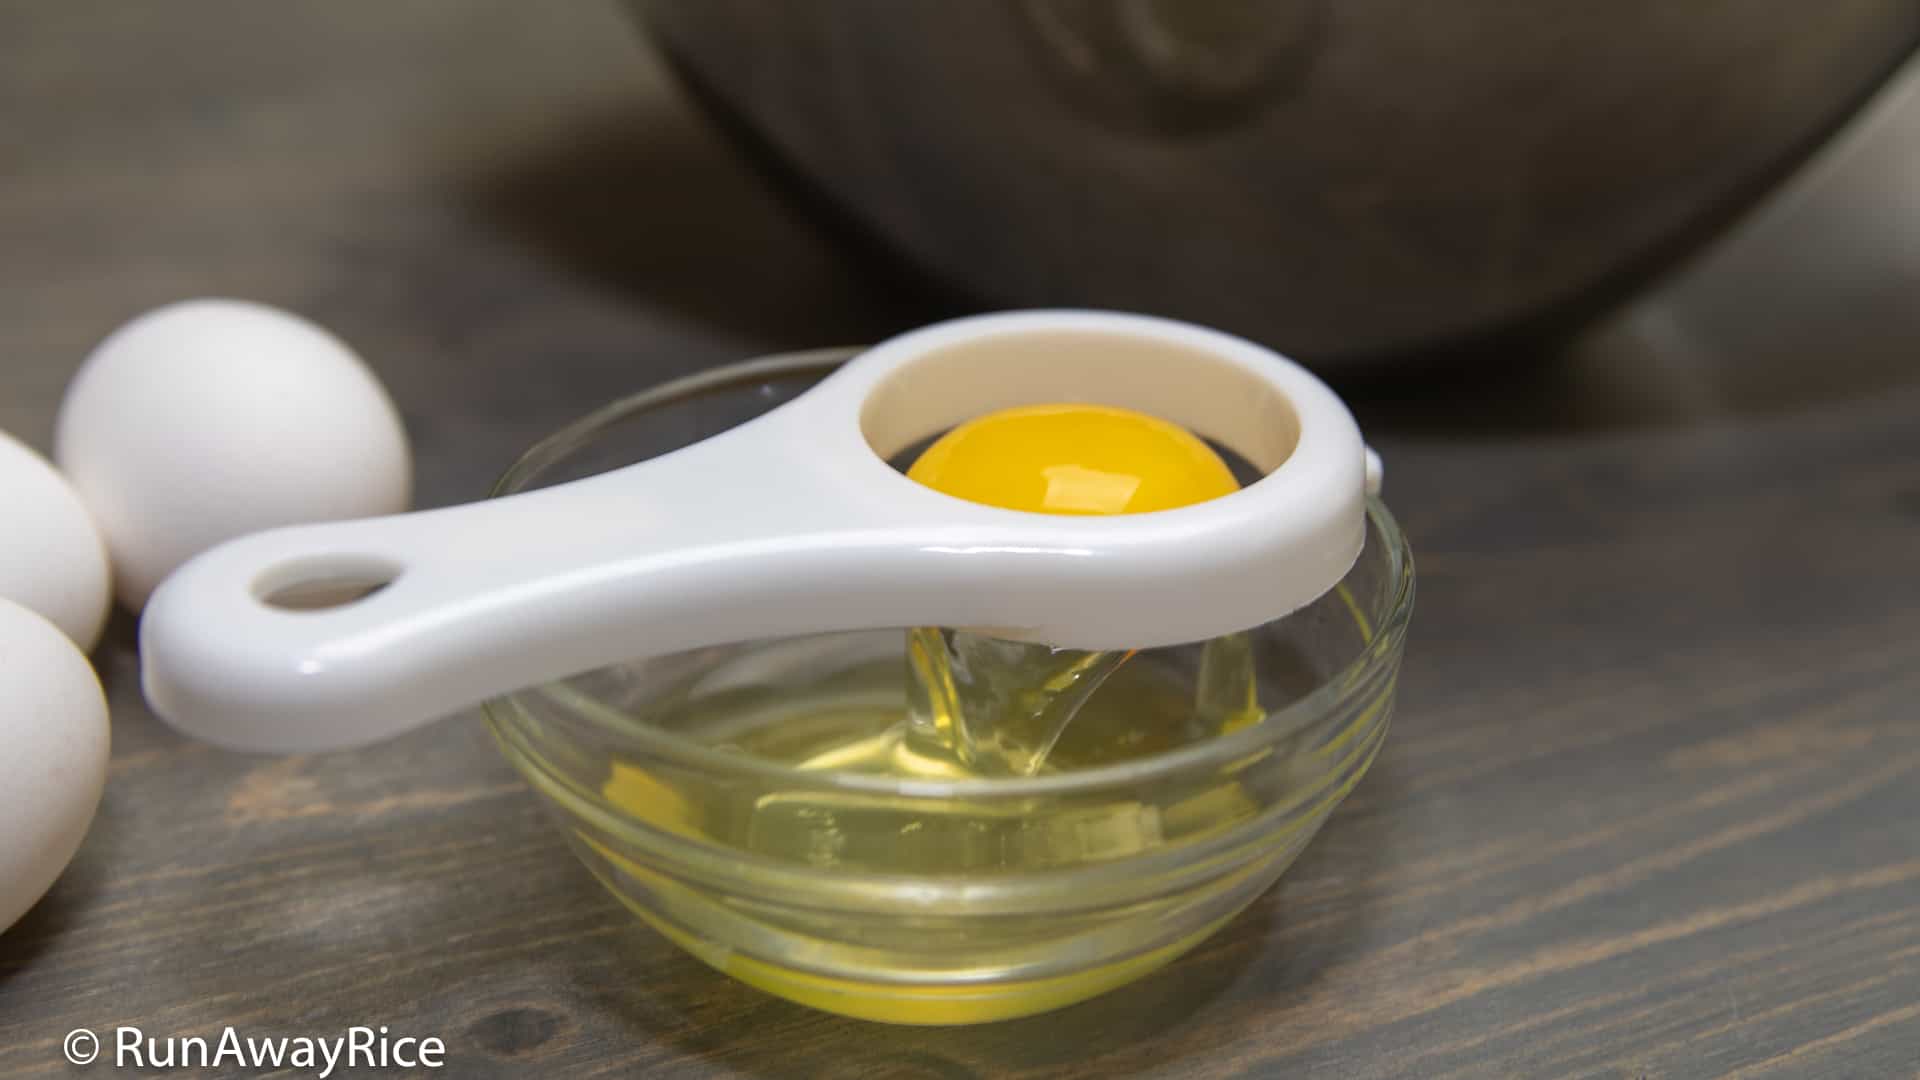
Eggs are easiest to separate when cold and best when use at room temperature. A room temperature egg is easily incorporated. The same goes for the egg whites; Egg whites achieve the most volume when beaten at room temperature. Separate the eggs while they are cold and then let come to room temperature before using.
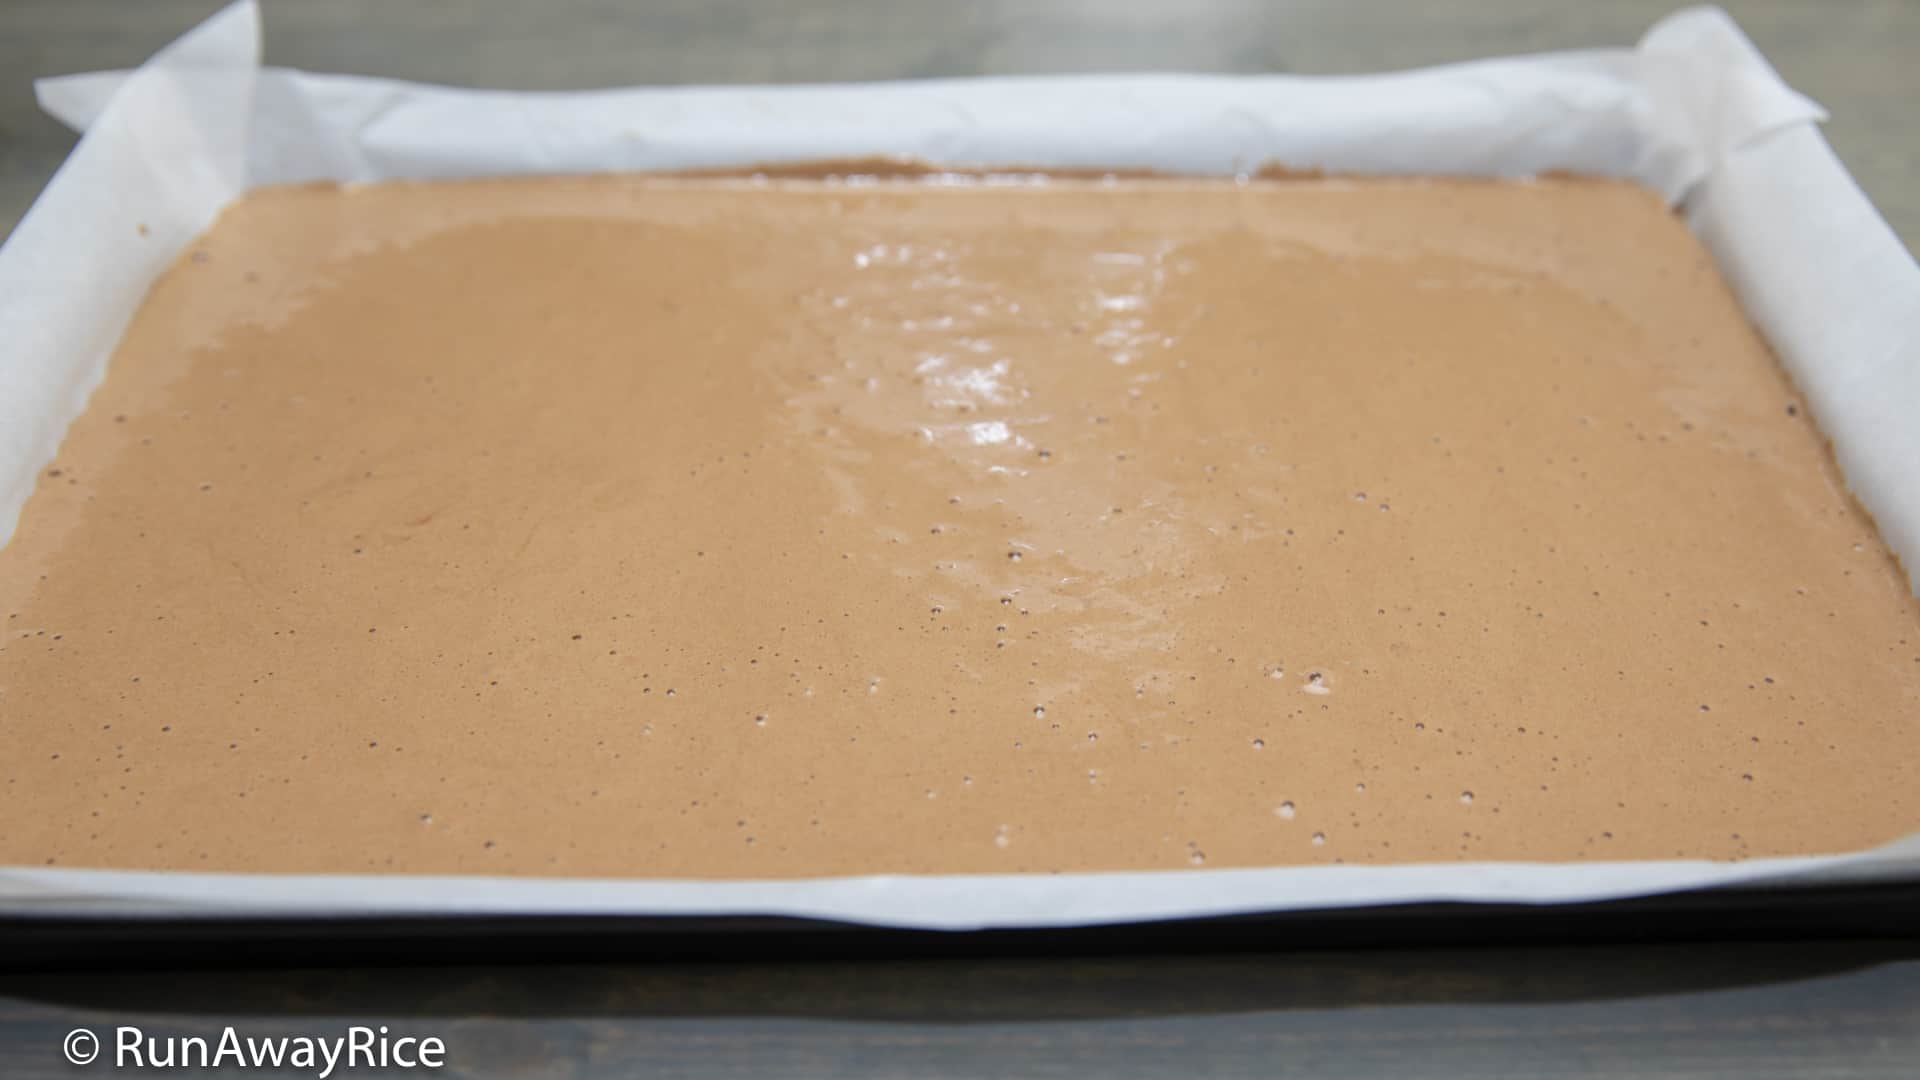
Be sure to spread the batter evenly in the pan including the corners. This helps the Chocolate Roll Cake to be a uniform thickness. The cake will look really pretty when rolled.
If your oven heats unevenly, rotate the cake after 7 minutes and bake for the remainder of the time.
Test the cake for doneness by touching the cake lightly with your index finger and it should spring back. Optionally, insert a toothpick into the cake and it should come out clean. Do not over-bake the cake. This will make it dry and cause it to crack or fall apart when rolled.
The gelatin helps to stabilize the whipped cream so it doesn’t melt so quickly. It should be a liquid, approximately 85 F (29 C), when added to the whipped cream. If the gelatin cools too much and and turns solid, microwave for 5-10 seconds to return to a liquid state. Cool again in cold water if needed. Do not add hot gelatin to the whipped cream as this will melt the cream.
If making the Chocolate Roll Cake a day ahead, cover the cake well so it doesn’t dry out in the refrigerator. Store the cake in the refrigerator until it’s time to serve. The cake will hold-up at room temperature for about 2-3 hours.
The Chocolate Roll Cake is a moist cake with tender crumbs. If you’d like to get crumb-free, clean cuts, refrigerate the cake overnight before slicing. Of course, if you can’t wait, then by all means, enjoy the cake right away! 🙂
Watch the video for instructions.
Chocolate Roll Cake (Banh Cuon Chocolate)
Chocolate Roll Cake / Banh Cuon Chocolate
This from-scratch recipe for Chocolate Roll Cake (Banh Cuon Chocolate) makes moist, spongy chocolate cake swirled around a light and fluffy cream filling. If you're a fan of Asian-style baked goods, you'll adore this luscious chocolaty treat. Not too rich or sweet like some desserts, this Chocolate Roll Cake is both elegant and delicious. Make this wonderful Chocolate Roll Cake to enjoy during your next get-together or holiday celebration. It's sure to make the occasion special!
Ingredients
Chocolate Cake
- 5 large eggs , at room temperature
- 3/4 cup sugar , divided
- 1/4 cup vegetable oil
- 1/4 cup milk , whole, low-fat or milk alternative
- 1 tsp vanilla extract
- 3/4 cup cake flour
- 1/4 cup cocoa powder
- 1 tsp baking powder
- 1/2 tsp baking soda
- 1/4 tsp salt
- 1/4 tsp cream of tartar
- 2 Tbsp powdered sugar , for dusting cake
Cream Filling
- 1/4 cup water
- 2 tsp unflavored gelatin
- 2 cups heavy whipping cream , cold
- 1 cup powdered sugar
Instructions
Making the Chocolate Cake
-
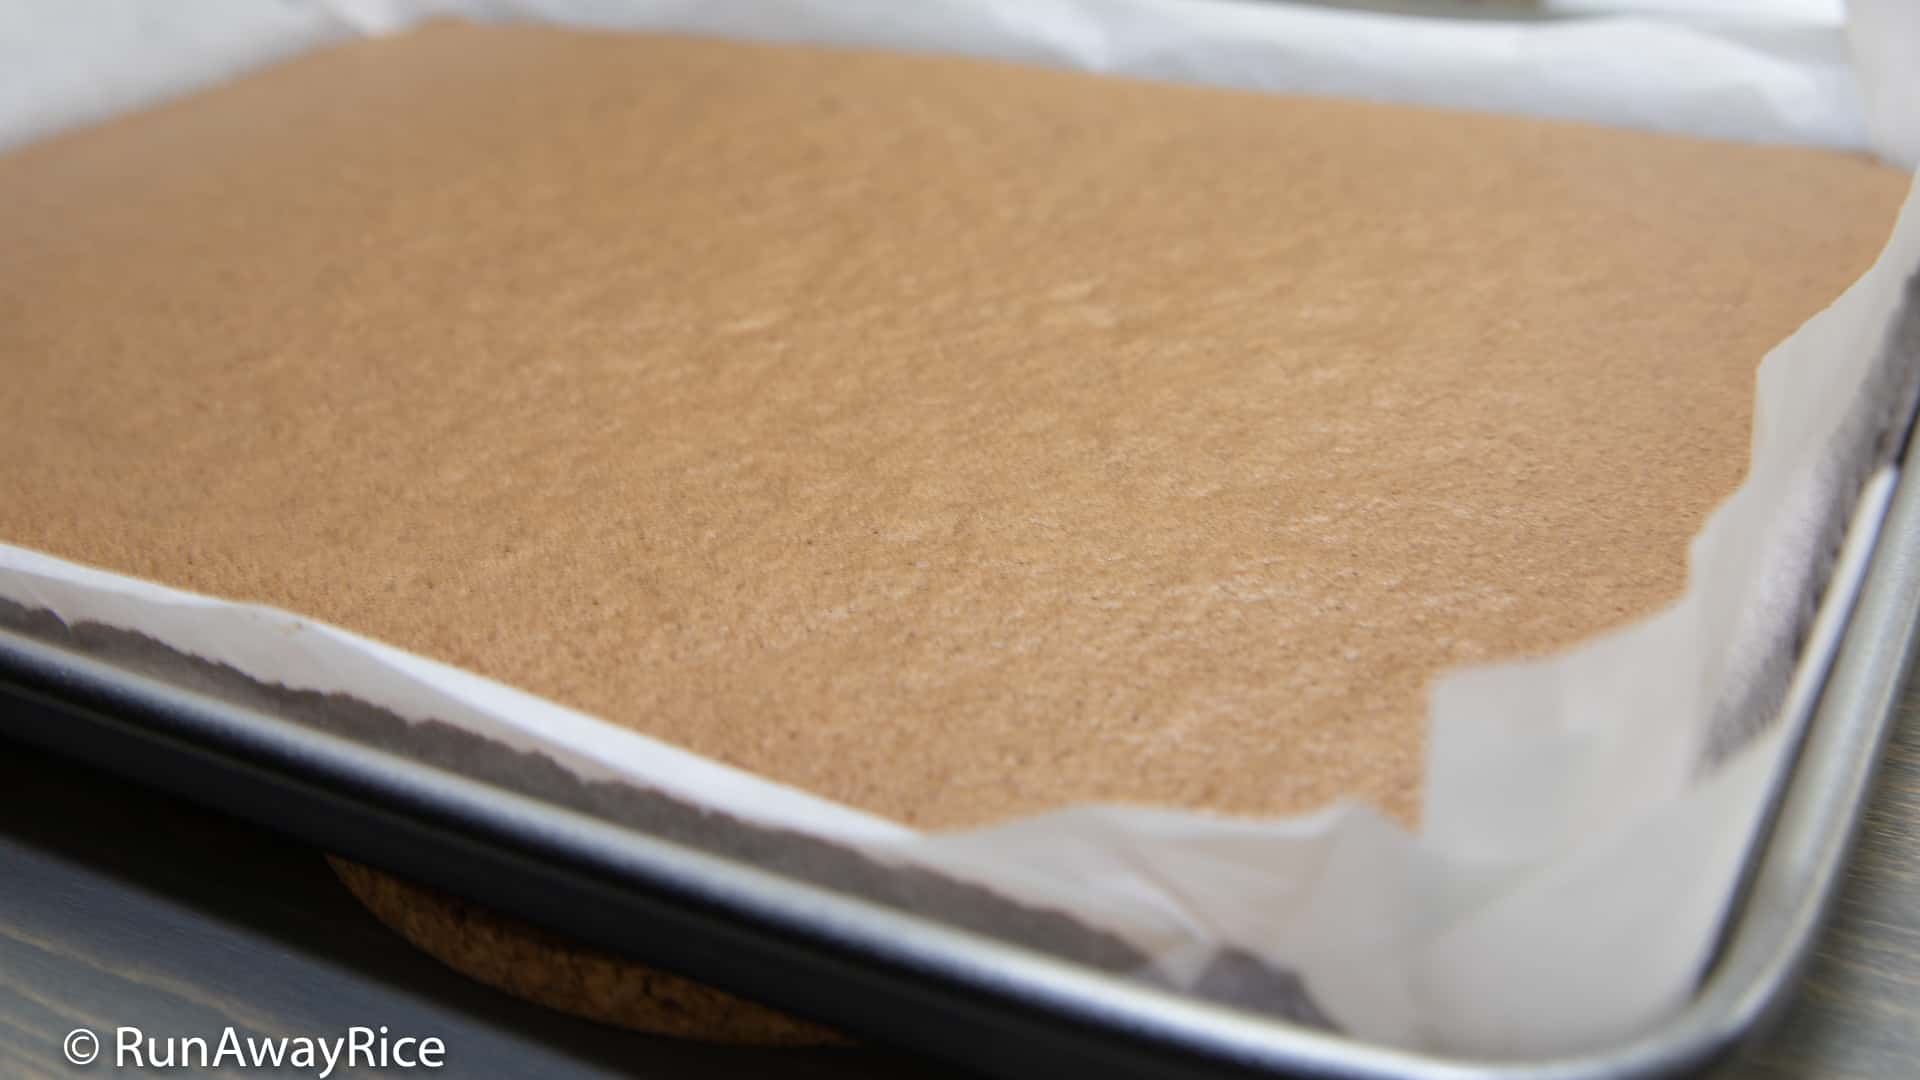
Line a 12 inch by 18 inch sheet pan with parchment paper.
-
Preheat the oven to 350 F (177 C).
-
Separate the egg yolks from the whites. Transfer the yolks into a large bowl. Transfer the whites into the bowl of a stand mixer.
-
Using a hand mixer, beat the egg yolks on Low speed for 30 seconds or until combined. Using Medium speed, continue beating the egg yolks while gradually adding 1/2 cup sugar. (Add about 1 Tbsp sugar every 30 seconds and mix.) The mixture should be pale yellow and thick once done.
-
Add the vegetable oil, milk and vanilla extract. Mix on Low speed until all wet ingredients are incorporated.
-
Sift together the dry ingredients: cake flour, cocoa powder, baking powder, baking soda and salt.
-
Add 1/3 of the dry ingredients to the wet ingredients and mix on Low speed until mostly incorporated. Add another 1/3 dry ingredients and continue mixing. Add the remaining 1/3 dry ingredients and mix until fully incorporated. Scrape down the bowl, working in any remaining dry ingredients.
-
Using the whisk attachment for the stand mixer, beat the egg whites on Low speed for 30 seconds. Increase the speed slightly and beat for another 30 seconds or until the egg whites are foamy. Add the cream of tartar. Using Medium speed, beat the egg whites until they thicken. Gradually add the remaining 1/4 cup sugar. Continue beating on Medium High speed until the egg whites reach a firm peaks stage. (This takes a total of 3 - 3 1/2 minutes.)
-
Add 1/3 beaten egg whites to the batter and gently fold until mostly incorporated. Add another 1/3 egg whites and continue folding. Add the remaining 1/3 egg whites and fold until fully incorporated.
-
Transfer the batter into the lined sheet pan. Spread out the batter, pushing it to the corners of the pan. Smooth and even-out the batter using an offset spatula. Tap the pan against the counter a few times to release the air bubbles.
-
Bake for 10-12 minutes. Check for doneness by touching the cake lightly with your index finger and it should spring back. Also check by inserting a toothpick and it should come out clean.
-
Remove the cake from the oven. Pull the parchment paper away from the sides of the cake. Let cool for 5 minutes.
-
Lay a clean kitchen towel on the work surface. Cover the towel with a generous amount of powdered sugar. Place the cake on top of the towel. Carefully remove the parchment paper by rolling it under the cake.
-
Coat the cake with a generous amount of powdered sugar. Using light pressure, roll the towel and cake into a spiral. Transfer the cake with the seam-side down to a wire rack and let cool for 1 hour.
Making the Cream Filling
-
Chill the mixing bowl and whisk in the refrigerator for 30 minutes.
-
In a heat-safe measuring cup, add the water. Sprinkle the unflavored gelatin and let rest for 1 minute. Combine together. Microwave for 15 seconds. Place the cup in a bowl of cold water and let cool until the temperature is around 85 F (29 C).
-
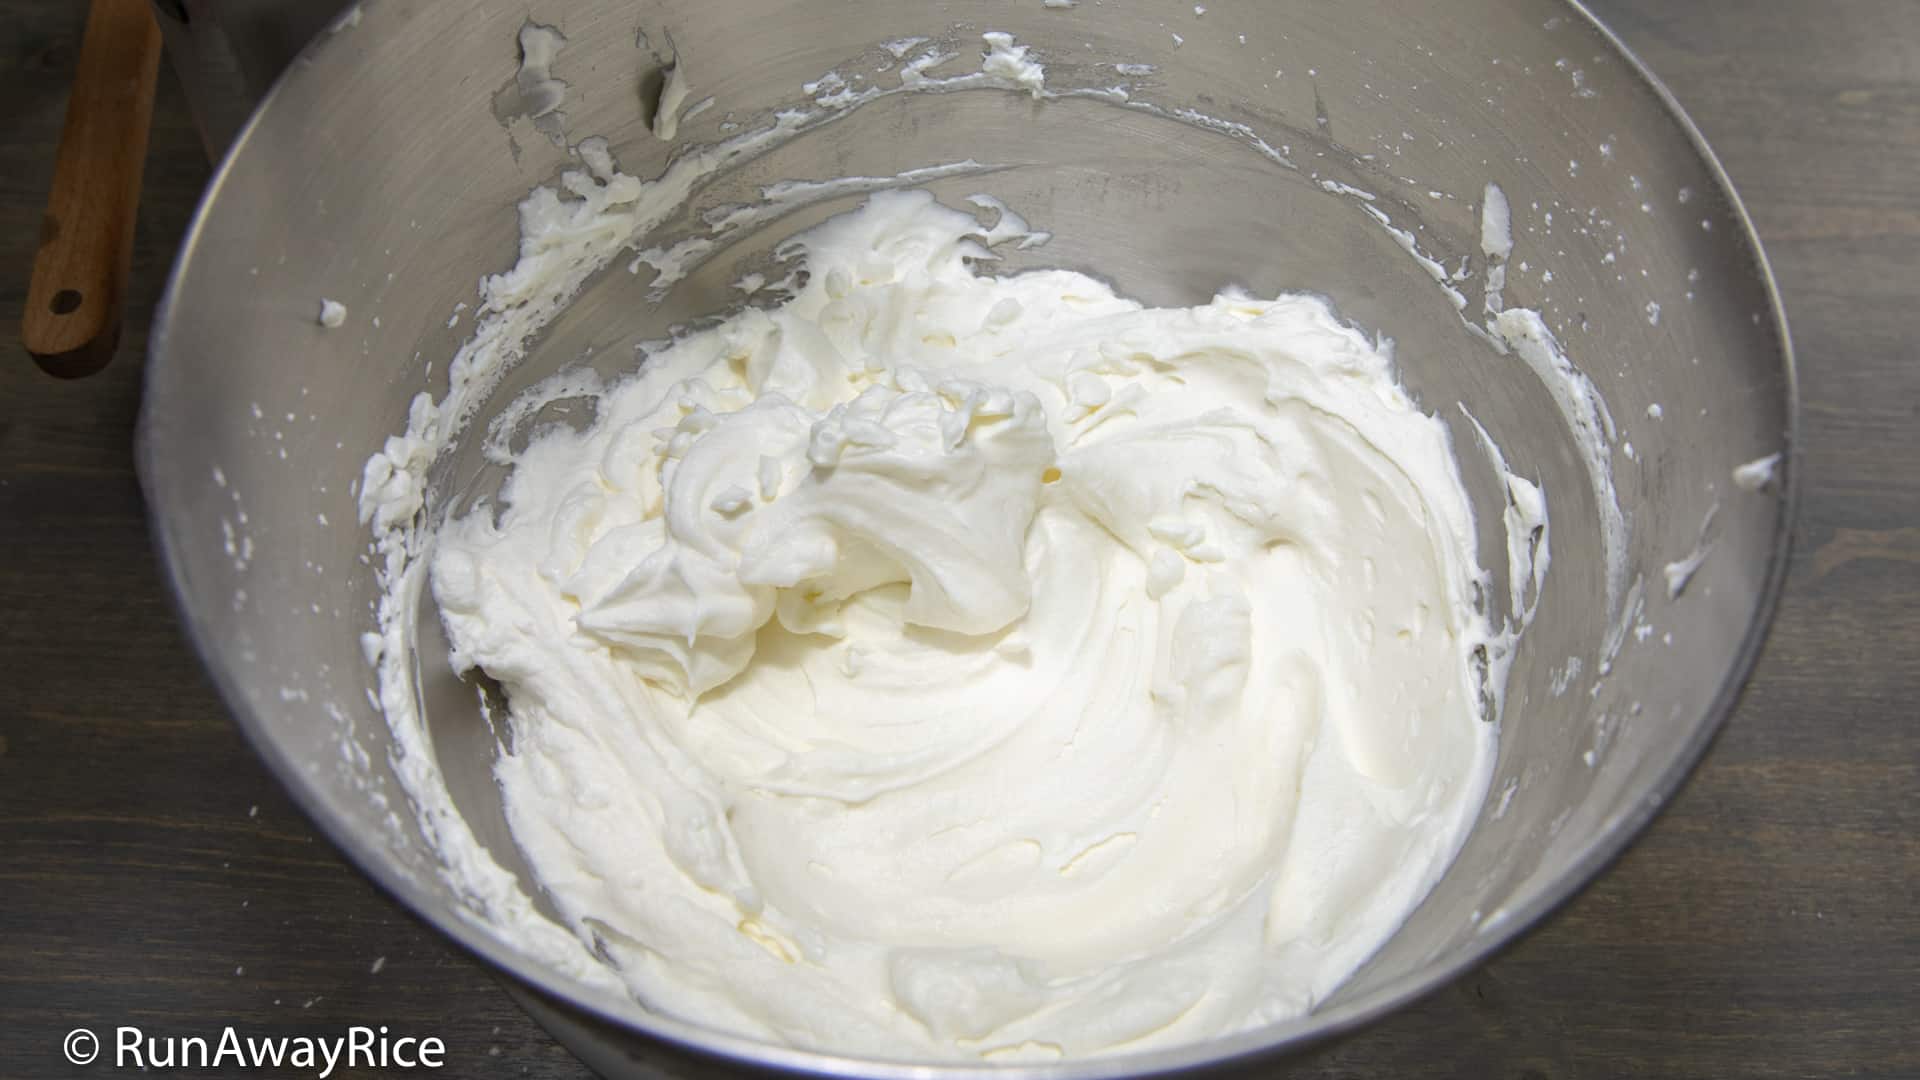
Remove the cold mixing bowl and whisk from the fridge and attach to the stand mixer. Add the cold heavy whipping cream into the bowl. Mix on Medium speed until the cream is thick, approximately 3-4 minutes. Gradually add the powdered sugar and continue mixing. Scrape down bowl.
-
Add the cooled gelatin to the whipped cream. Mix on High speed until the cream is stiff, approximately 1 minute.
Assembling the Cake
-
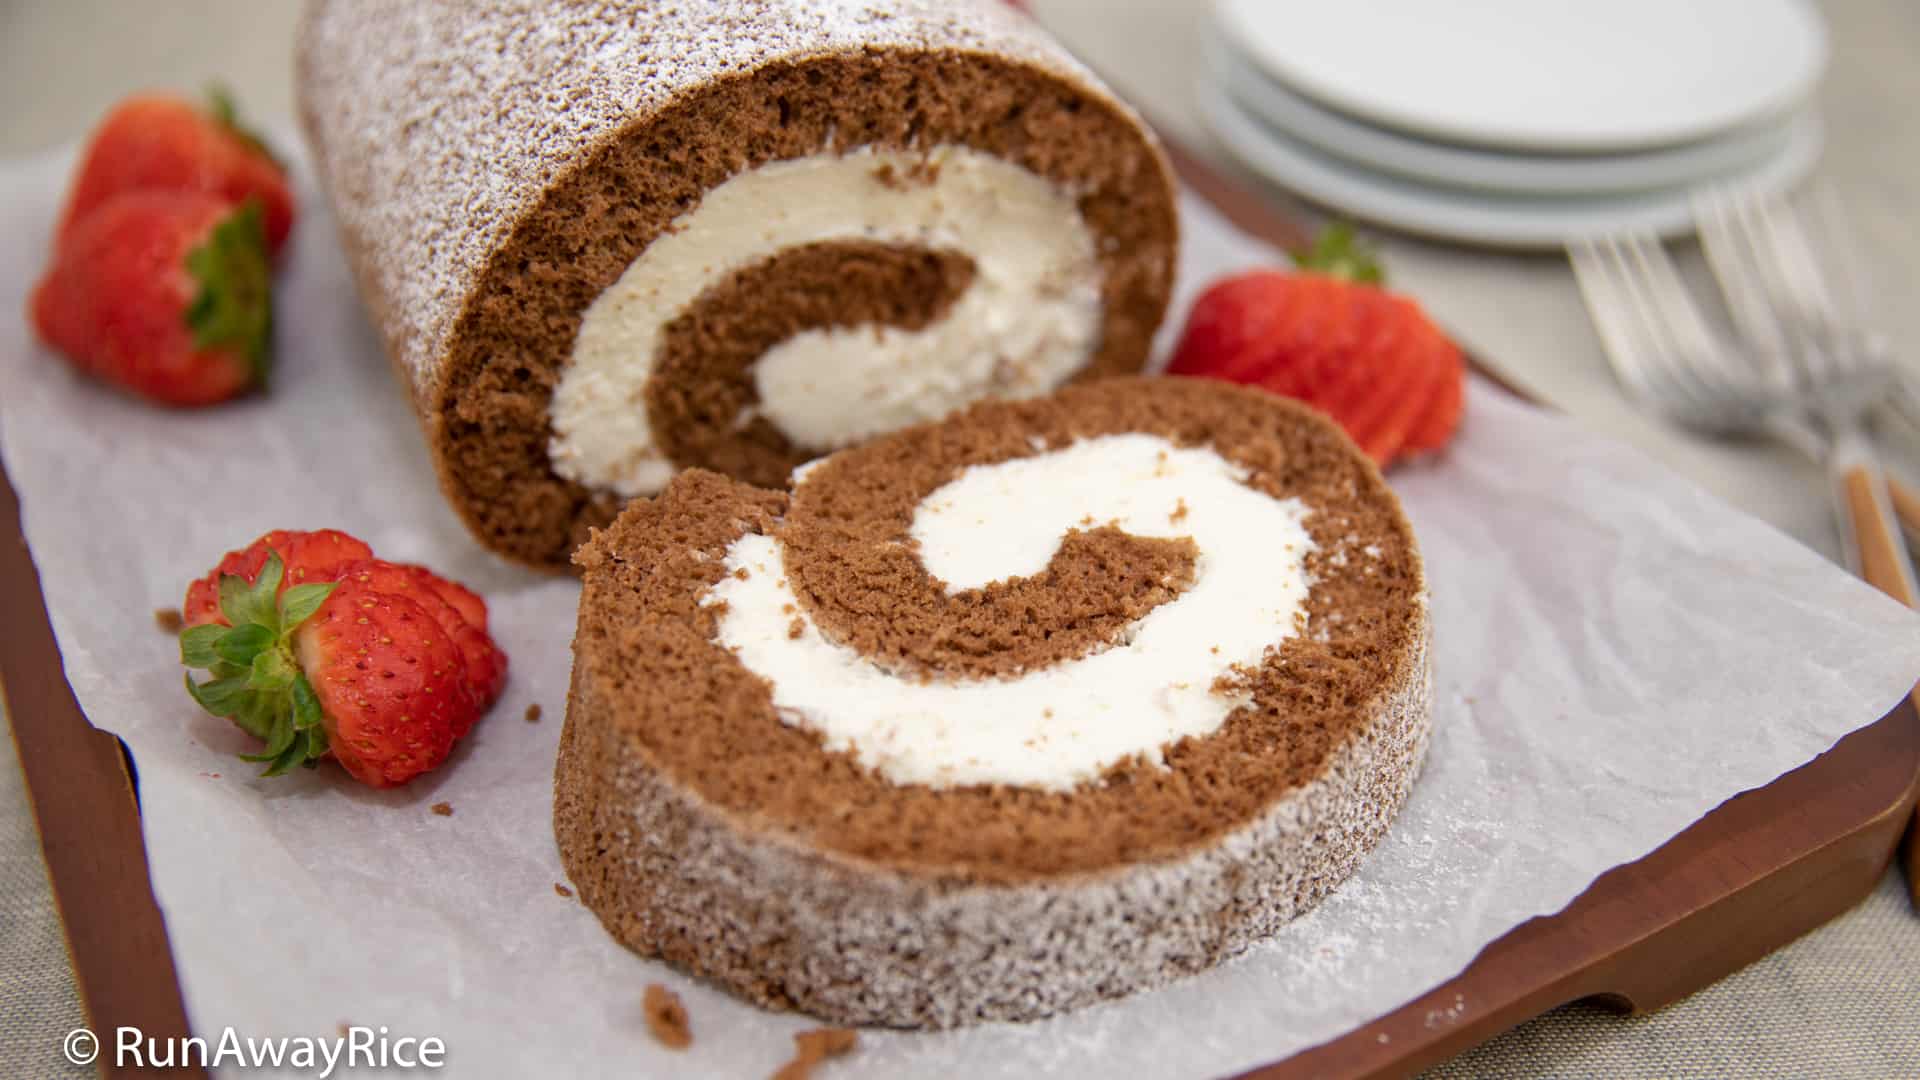
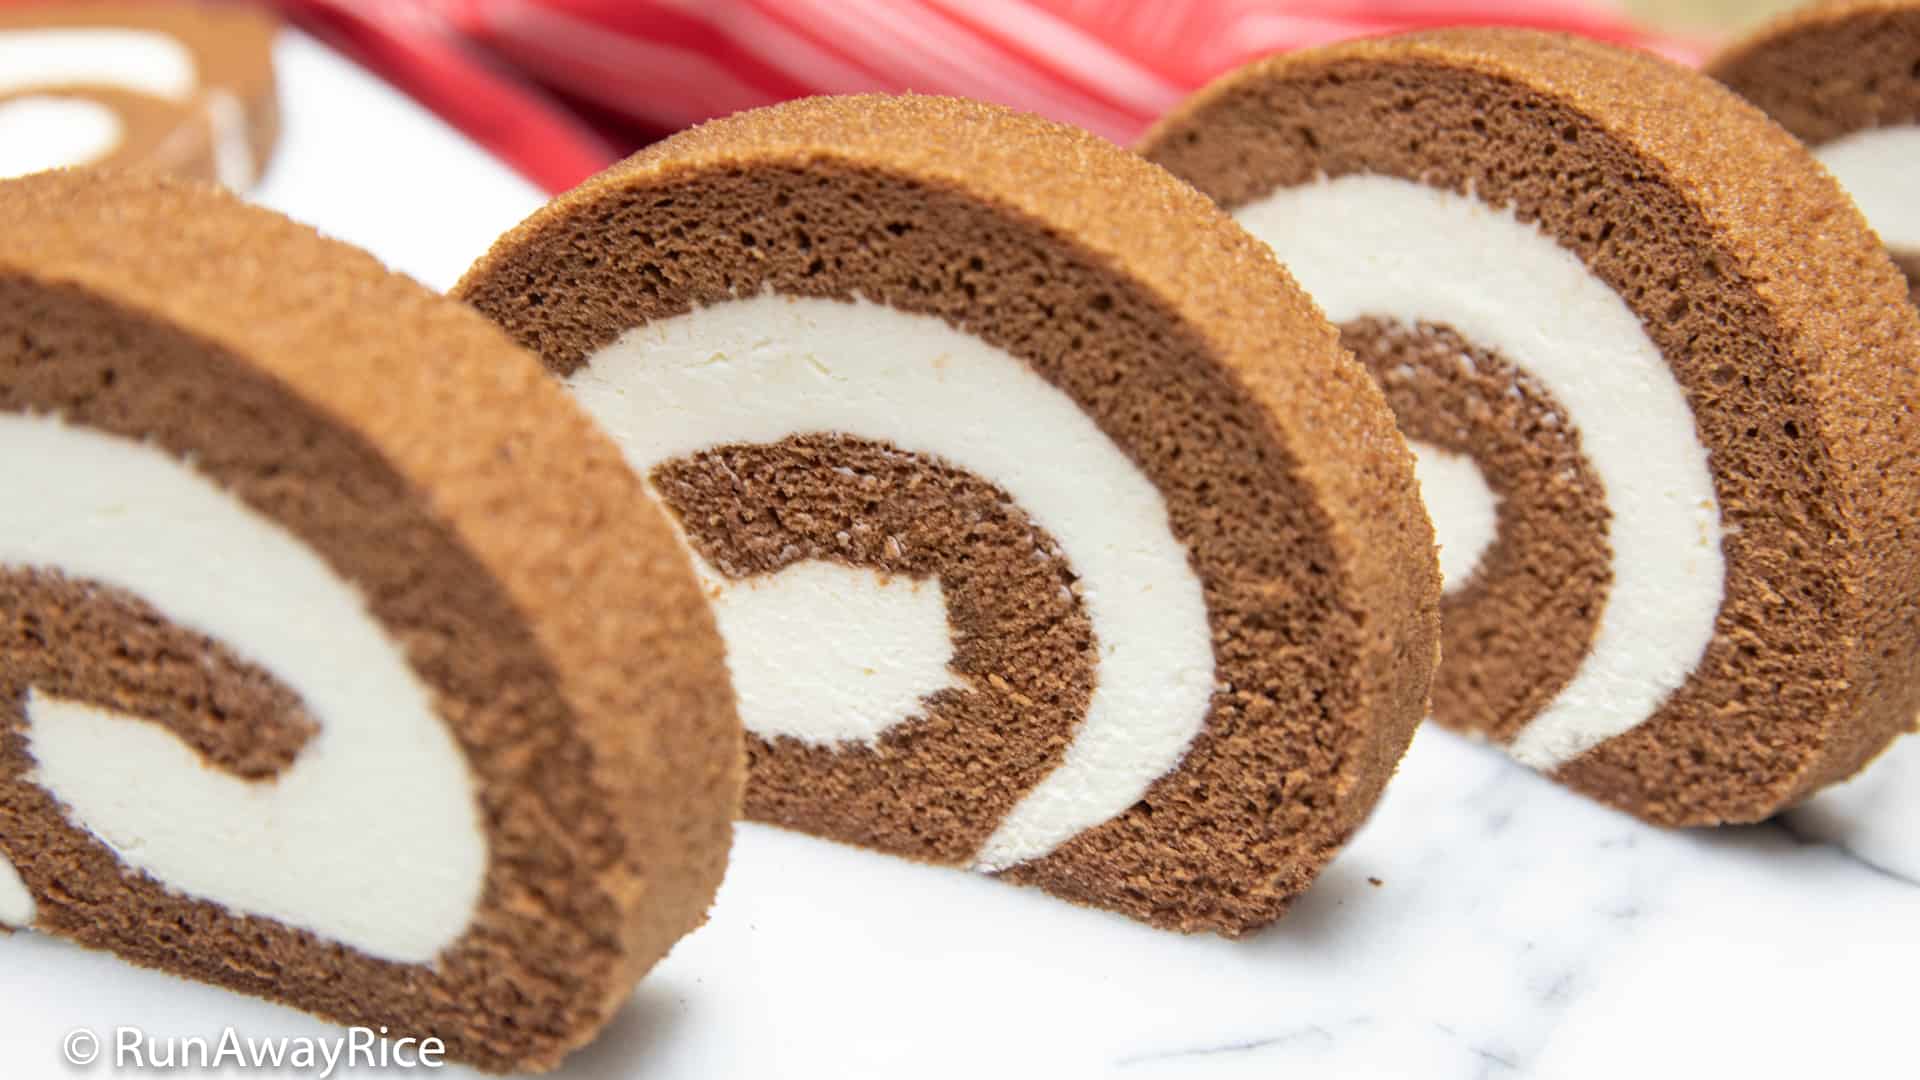
Gently unroll the cooled cake. Spread a thick layer of whipped cream on the cake, coating it evenly.
-
Roll up the cake, ending with seam-side down. Trim off the edges. Chill in the refrigerator until it's time to serve.
Serving the Cake
-
Dust the Chocolate Roll Cake with more powdered sugar or cocoa powder.
-
Cut the cake into thick slices and serve with fresh berries.
-
Refrigerate any remaining cake in an air-tight container. Enjoy within the week. Freeze the cake for up to 2 months.
Recipe Video
Notes, Tips & Tricks
- Crease the parchment paper to help it stay in the sheet pan. In each corner of the parchment paper, make a diagonal cut to help the paper lay in the pan without bunching.
- Separate the eggs while they are cold and then let come to room temperature before using.
- Be sure to spread the batter evenly in the pan including the corners. This helps the cake to be a uniform thickness.
- If your oven heats unevenly, rotate the cake after 7 minutes and bake for the remainder of the time.
- Do not over-bake the cake. This will make it dry and cause it to crack or fall apart when rolled.
- The gelatin helps to stabilize the whipped cream so it doesn't melt so quickly. It should be a liquid, approximately 85 F (29 C), when added to the whipped cream. If the gelatin cools too much and and turns solid, microwave for 5-10 seconds to return to a liquid state. Cool again in cold water if needed. Do not add hot gelatin to the whipped cream as this will melt the cream.
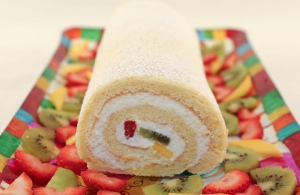
If you enjoy this Chocolate Roll Cake (Banh Cuon Chocolate) recipe, you may also like:


Great recipe and the cake was so fluffy my roll was the size of my leg…lol!!! My mom said i didn’t roll it tight enough…. I have tried this recipe 3 times now and its a breeze each time. Best one on the internet and cake is so soft. Thanks so much!
Love,
Asianmarthastewart
Hi Asianmarthstewart, (love the name by the way!)
I am glad to hear you enjoyed the recipe! Thanks for taking the time to share your results. Happy Baking!
Great fluffy cake, and love the stabilized cream filling! My roll cake was HUGE and delicious!!!!
Thanks for sharing!!!
Yeah! Great job!
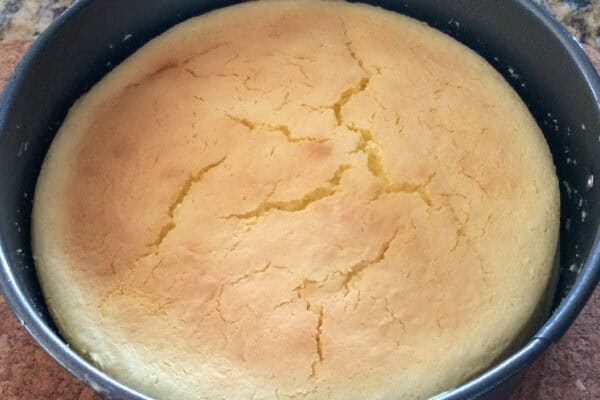
Most epic fail images because the photo doesn’t reflect the reality the 12 inch by 18 inch sheet pan of course is large enough for those ingredients amounts please take a look to the image the cake is thicker and darker also shorter those ingredients are for shorter pan because if you make the roll as author says in 12 inch by 18 inch sheet pan the cake will come out very thin!!! that’s the true.
Hi Trang,
I made Chocolate roll cake this weekend and so proud of myself because I am just a beginner baker. The roll cake turned out so beautiful I didn’t want to eat it…haha…that didn’t last long though. I really like the recipe card. I printed it out and then followed step by step. I’ve never been good with beating egg whites but this time I can say they were perfect. Yay! I am making another one for Christmas and this one I’ll be able to show off!Thanks a million for this awesome recipe!
Hi Melanie,
Great job! I am so happy to hear your Chocolate Roll Cake turned out well. The recipe gets easier with each round and you’ll be able to perfect using your tools and oven. 🙂 I am glad you like the recipe card. I too like to print out recipes and follow along or keep in my recipe book. Have a wonderful Christmas holiday! 🙂