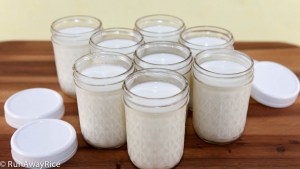
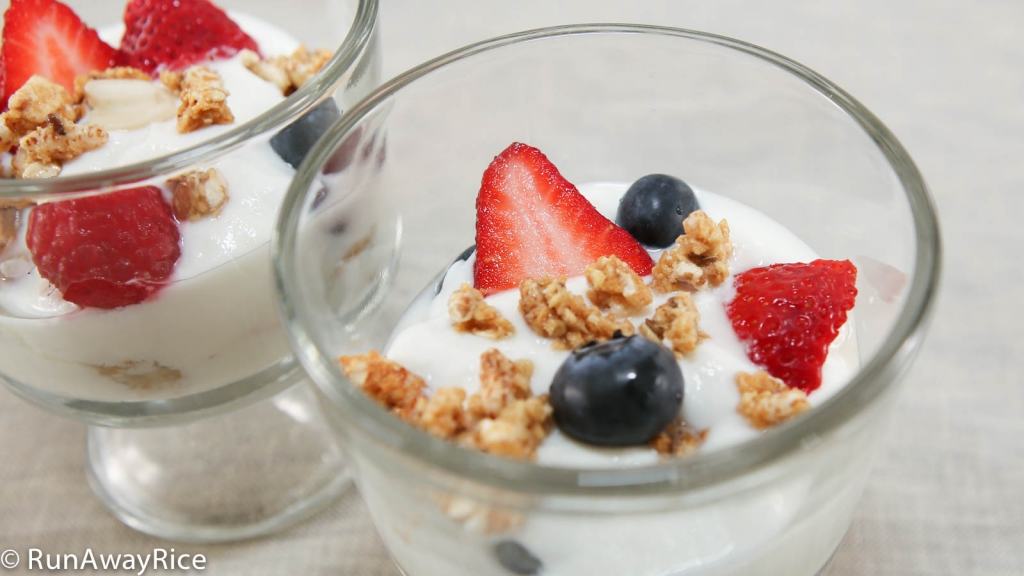
 Yogurt has been around for a long time, but just in recent years, it’s gained popularity as a health food. Today yogurt is touted by nutritionists and health food advocates as a must-have food in our daily diets. Loaded with probiotics, animal protein and essential nutrients, it’s truly a super food and tastes so good! To make yogurt at home (without a yogurt maker) is surprisingly quite simple. The best reasons for making yogurt at home is you can control the sweetness and the percentage of milk fat to suit your preference. Please review the tips and tricks below to achieve the best results. Enjoy!
Notes, tips and tricks
The milk must be heated between 190-200 degrees. Heating the milk enables the yogurt to later thicken. If you don’t heat the milk, the yogurt will not set and be watery.
Use plain/unflavored yogurt. Also, be sure the label shows “live and active cultures” which is needed to make more yogurt.
There is no sugar in the base recipe. You can add the sweetener when you eat it. (This will also allow you to use the existing batch to culture additional yogurt batches.)
A quick way to cool the milk is to set the saucepan in cold water or an ice bath for a few minutes.
Oven settings vary but we are trying to keep the oven around 100-110 degrees F. If you have a Keep Warm function in your oven, this works too.
The fermentation time is approximately 5-12 hours. The longer you let the yogurt rest, the thicker and tarter it becomes. If this is your first time making yogurt, try it after 4 hours and then add 1 hour at a time until you achieve the thickness and tartness level you like.
The yogurt can be stored in the refrigerator for up to 2 weeks.
Watch the video below for instructions.
Simple Base Recipe
6 1/2 cups milk, 2% milk fat
1 1/2 cups plain yogurt
Directions
Heat milk in a large saucepan over Medium High heat. Stir every few minutes so the milk does not burn. Heat the milk until the temperature reaches 190-200 degrees F or until it just starts to boil. Turn off the heat and allow to cool until the temperature is about 110 degrees F.
Preheat the oven using the lowest available temperature but greater than 110 degrees F. When the oven comes to temperature, turn off the oven and then turn on the oven light.
Transfer the plain yogurt into a large cup or bowl. Add 2 cups of the warm milk to the yogurt. Whisk together until the mixture is smooth and free of lumps. Pour the mixture into the remaining milk and whisk to combine. Strain the yogurt.
Place 8 glass jars into a baking dish. Fill the jars with the yogurt. Skim off the bubbles from the top and discard. Pour warm water into the baking dish filling it approximately 1-inch high.
Place the baking dish into the oven. Close the door and keep the light on. Allow to rest for 5 hours.
Remove from the oven. Cover the jars. Place into the fridge and chill for 4-6 hours before serving.
Serve the yogurt with your choice of sweetener, fresh fruit, granola or other toppings.
Yields: 8-1 cup servings
Sweet and Rich Recipe – Vietnamese-Style Yogurt
Ingredients
3 cups whole milk
2/3 cup condensed milk
2/3 cup plain yogurt
Directions
Heat milk in a saucepan over Medium High heat. Stir every minute so the milk does not burn. Heat the milk until the temperature reaches 190-200 degrees F or until it just starts to boil. Turn off the heat. Stir in the condensed milk until evenly combined. Allow to cool until the temperature is about 110 degrees F.
Preheat the oven using the lowest available temperature but greater than 110 degrees F. When the oven comes to temperature, turn off the oven and then turn on the oven light.
Transfer the plain yogurt into a large cup or bowl. Add 1 cup of the warm milk to the yogurt. Whisk together until the mixture is smooth and free of lumps. Pour the mixture into the remaining milk and stir to combine. Stain the yogurt.
Place 8 small bowls into a baking dish. Fill the bowls with the yogurt. Skim off the bubbles from the top and discard. Pour warm water into the baking dish filling it approximately 1/2-inch high.
Place the baking dish into the oven. Close the door and keep the light on. Allow to rest for 5 hours.
Remove from the oven. Cover the bowls and then chill for 4-6 hours before serving.
Serve the yogurt with more condensed milk, fresh fruit, granola or other toppings.
Yields: 8-1/2 cup servings (Note: This yields approximately one half of the above base recipe.)
Yogurt and Fruit Popsicles
 Ingredients
1 1/2 cups yogurt
1/2 cup fresh or frozen fruit, chopped
2 tsp sugar or your choice of sweetener
Directions
Sprinkle sugar over chopped fruit and let rest for 10 minutes. Add yogurt and mix well. Pour into popsicle molds.
Freeze until solid, approximately 4-6 hours.
Yields: 6 servings
Tools I Love and Use in My Kitchen


Hi Co Trang,
For the Vietnamese Style Yogurt recipe. If I transfer the yogurt into small jars. Can I put the yogurt into the freezer to for 24 hours to get yogurt firmed? Because we like to eat this way. Thanks for the yogurt recipes.
Hi Nick,
Yes you can freeze the yogurt. I will try this for the summertime. It’s sounds really refreshing on a hot day. Thank you for sharing this idea! 🙂
Hi Trang,
Thank you very much for yours wonderful recipes and specially for the Vietnamese yogurt. I love your tricks and it came out nice and thick. I like the yogurt to be more sour, what can I do even after 12 hours?
Hi Tien,
You can actually let the milk ferment for longer if you like it really tart. Try doubling to 24 hours and see if you get the tartness you like. Good Luck!
I wanted to ask a question on your WONDERFUL recipe of Coffe and Cream desert,but,there is no place to contact you.MY Question is “CAN I USE GELATINE istead of AGAR AGAR in the recipe “. Also pl. tell me the uses of Gelatine and can I use it ti thicken the cream??,thanks
Mohammad
stoney creek
CANADA
Hi Mohammed,
You can use gelatin in this recipe instead of agar agar. Please see this link where I share a similar recipe using gelatin. http://runawayrice.com/desserts/marbled-coffee-and-cream-gelatin/
Instead of making the marbled dessert you can pour into layers. Hope that helps. Good Luck with the recipe!