
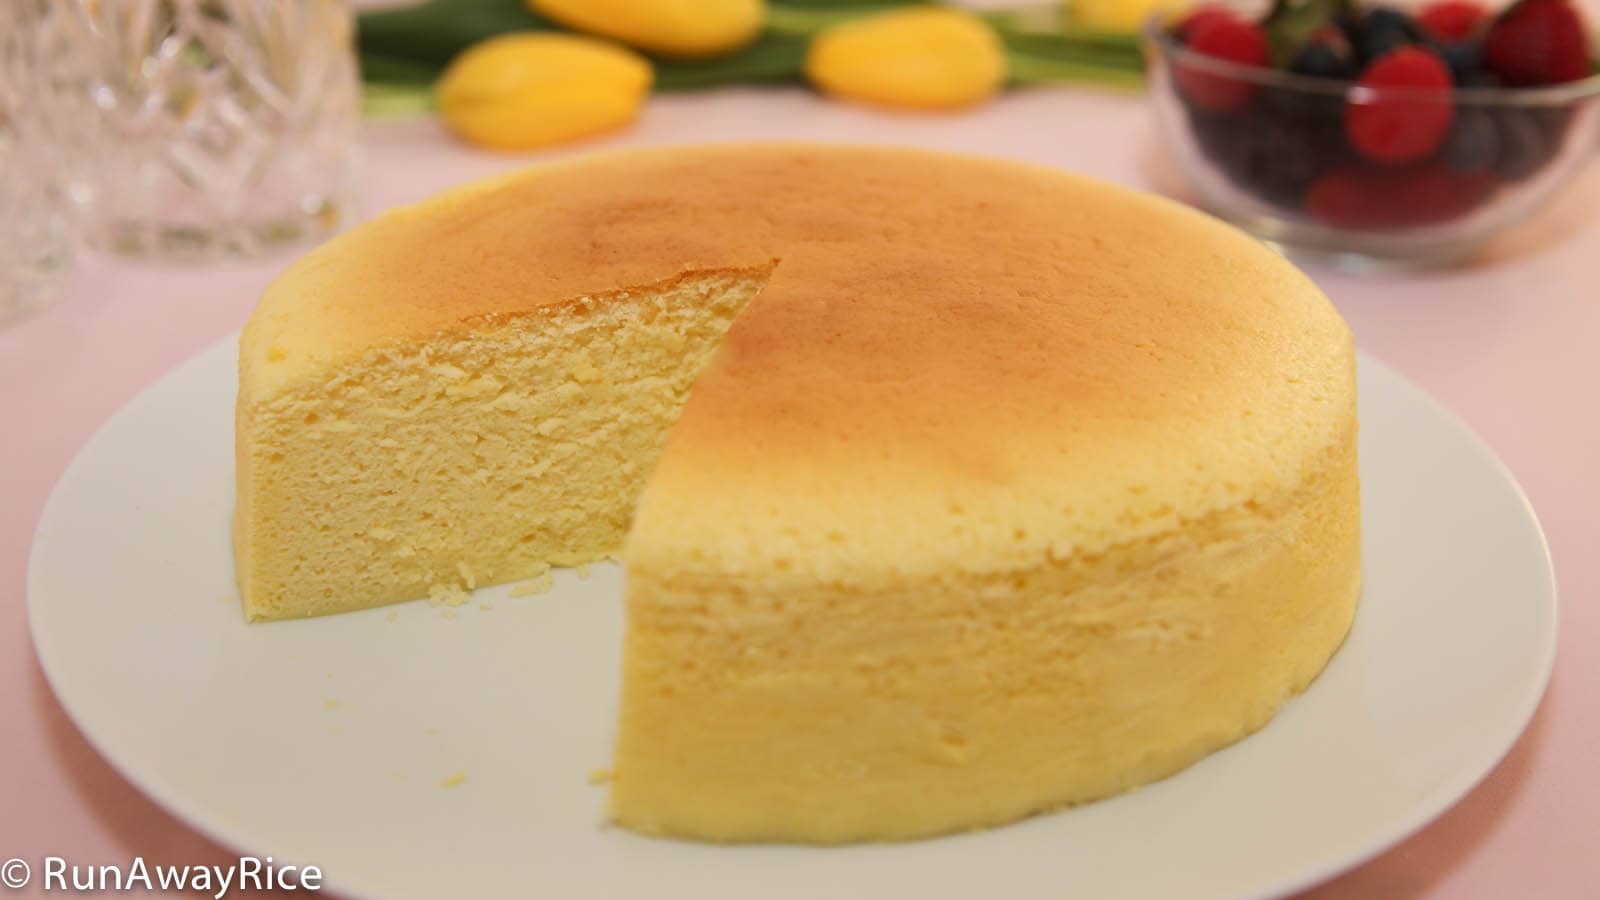
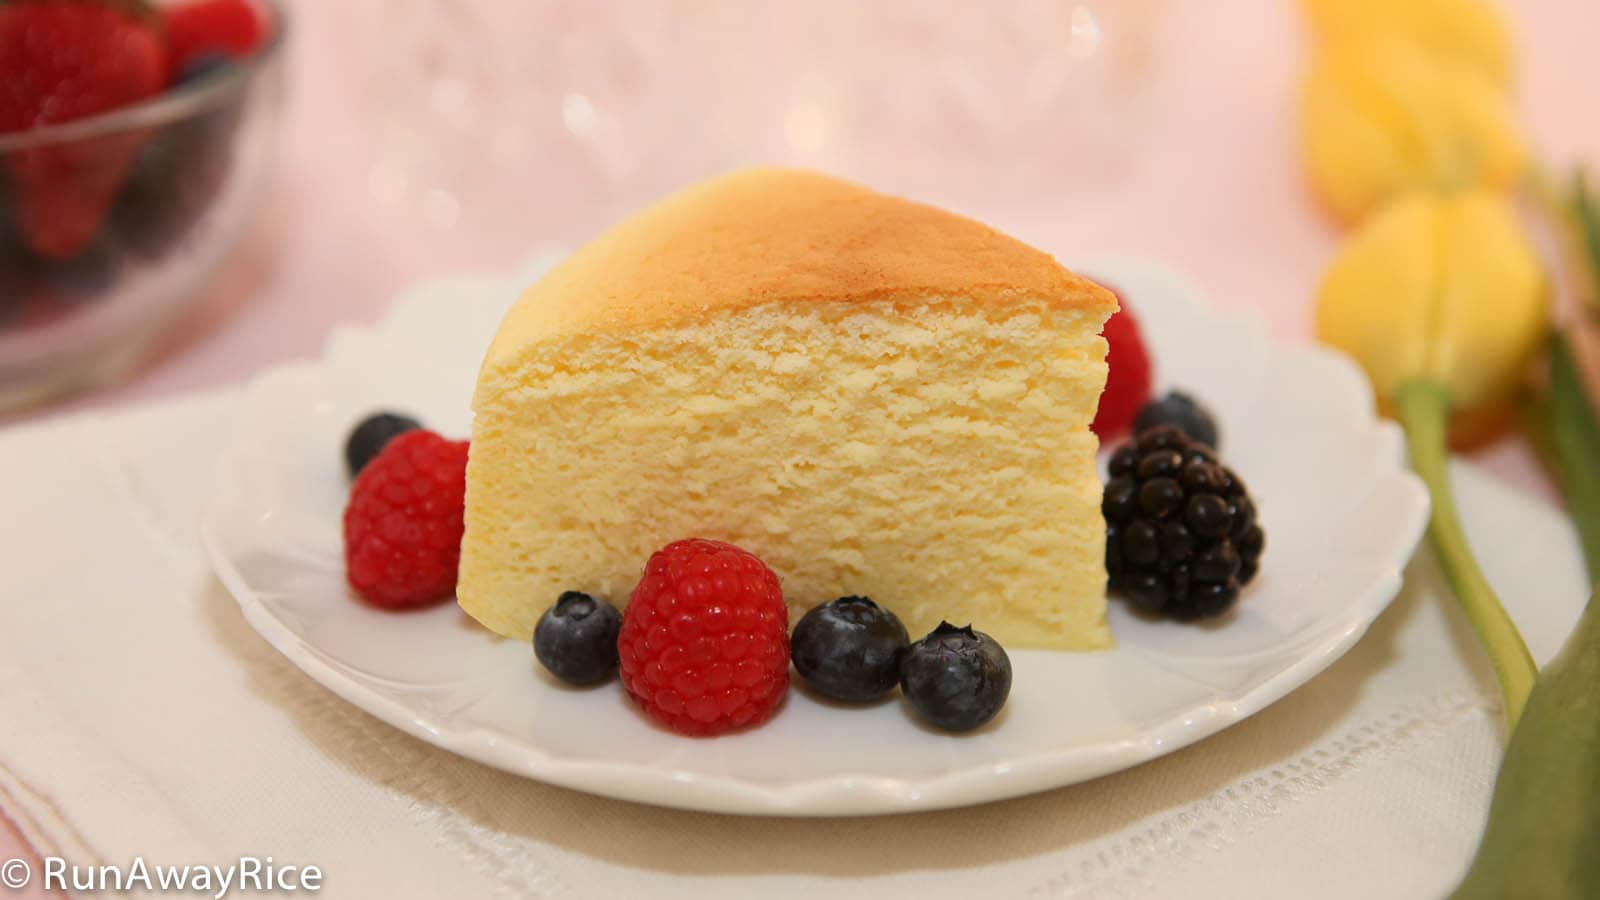
Cotton Cheesecake / Japanese Cheesecake is my new favorite dessert and after you try this recipe, it will become your favorite too! It’s the perfect combination of sponge cake and cheesecake in both taste and texture. What I love about this scrumptious cake is it’s not overly sweet as some cakes can be. The combination of fluffy cake with slightly tart cream cheese is absolutely heavenly. I hope you enjoy this Cotton Cheesecake / Japanese Cheesecake recipe as much as I do. Please note this recipe can be a bit tricky. Watch the video and follow the steps exactly. Happy Baking!
Watch the video for instructions.

Notes on the Cotton Cheesecake Recipe, Tips and Tricks
As the cream cheese, eggs and butter need to be at room temperature, advanced planning is required. About 2 hours before making the cake, remove the cream cheese and butter from the refrigerator. About 1 hour before, take the eggs out of the fridge. The cream cheese and butter should be soft and spreadable for this recipe. If the ingredients are not quite ready, pop them in the microwave on Low power for about 15-20 seconds.
Eggs are easiest to separate when they are cold. Egg whites are best beaten at room temperature to achieve the fluffiest texture. Separate the eggs while they are cold and then let them come to room temperature as you prep the remaining ingredients for the recipe.
Use an 8 inch by 3 inch round springform pan. Line the pan so the parchment paper extends about 2 inches above the pan. The parchment paper wall provides support since the cake rises to about 3 inches tall during baking. Keep the paper to no more than 5 inches tall. Too much paper will prevent the top of the cake from browning nicely.
The water bath is essential for keeping the cake moist. As the cake bakes for longer than the typical cake, the water bath is crucial. Additionally, the water bath insulates the cake and allows it to bake at a consist temperature. These factors are important for achieving the fluffy and moist texture for the cake.
Be sure to fold the egg whites into the batter. Do not beat or mix vigorously as this will deflate the egg whites. (If you’re not familiar with the fold technique, check out how I do it in the video.)
As oven temperatures vary, check to see if the cake is done (by using a toothpick) after 1 hour of baking. Then bake the cake until the top is golden brown. This is one recipe where over-baking the cake is ok. You won’t ruin the cake! Depending on your oven it may take up to 1 1/2 hours. Again, this is just fine.
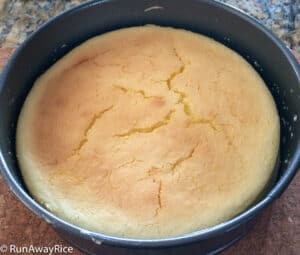
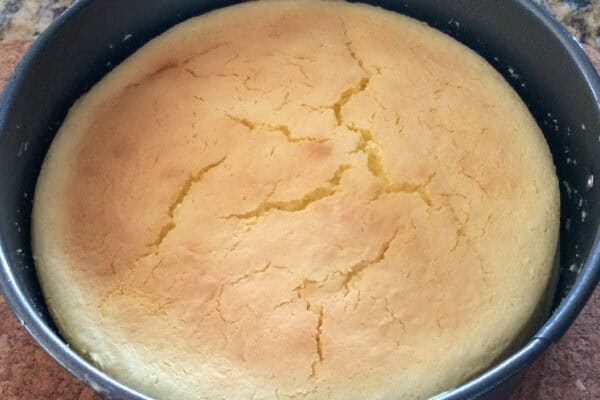
If your cake cracks on top, the heat is too high or the cake is too close to the heating element. Make note of this and adjust these things the next time.
The Cotton Cheesecake will shrink (about 1/2 inch or so) after cooling so please don’t despair. Leaving the cake in the oven after it’s done baking helps to minimize some of the deflating.
Refrigerate the Cotton Cheesecake for at least 4 hours before eating. The cold air sets the cream cheese and greatly improves the flavor and texture.
Store any remaining cake in the refrigerator for up to 1 week. To freeze, wrap the cake securely with plastic wrap and then a layer of foil. Freeze for up to 3 months.
✨✨I just shared a post on the most common challenges with making Cotton Cheesecake / Japanese Cheesecake and I explain all the details with pictures of my past frustrations. If you’re new to making this cheesecake or have made it without much success, check out the post before starting the recipe!
 Cotton Cheesecake Challenges: Deflation, Cracks, and Water Bath Issues
If you enjoy this Cotton Cheesecake / Japanese Cheesecake recipe, you may also like:
Chocolate Cotton Cheesecake / Japanese Cheesecake
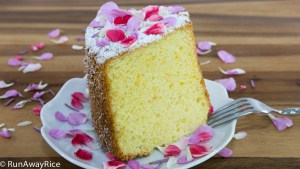
Orange Chiffon Cake with Edible Flowers
Cotton Cheesecake / Japanese Cheesecake
Ingredients
5 large eggs, at room temperature
1/4 tsp cream of tartar
1/2 cup sugar, divided
8 oz cream cheese, at room temperature
1/2 cup low-fat milk
1/4 cup unsalted butter, at room temperature
1 Tbsp lemon juice
1/4 cup all-purpose flour
2 Tbsp corn starch
Directions
Line the bottom and side of the springform pan with parchment paper. Wrap the springform pan with several sheets of foil, sealing it completely.
Fill a large baking pan halfway with water. Place it in the oven on the lowest rack. Preheat the oven to 315 F (157 C).
Separate the eggs and place the egg whites into a mixing bowl and the yolks into a measuring cup.
Beat the egg whites on Low speed for 30 seconds. Increase the speed to Medium Low and beat for another 30 seconds or until foamy. Add the cream of tartar. Increase the speed to Medium High and beat until the egg whites just start to thicken. Add 1/4 cup sugar gradually. Continue beating until the egg whites reach the soft peaks stage (approximately 3 minutes using a stand mixer).
In a separate bowl, add the cream cheese and milk. Mix on Low speed until creamy and smooth (approximately 2-3 minutes). Add the butter, remaining 1/4 cup sugar and lemon juice and beat for 1 minute. Add the flour and corn starch and mix for another minute. Finally add the egg yolks and mix for 1 more minute. Strain the batter using a sieve.
Add 1/3 of the egg whites and gently fold into the batter until mostly incorporated. Add another 1/3 and gently fold. Add the remaining 1/3 and gently fold.
Pour the batter into the lined springform pan. Spread the batter evenly into the pan and smooth out the top using a spatula. Holding the side of the pan, gently lift and drop the pan on the counter about 6 times to remove any big air bubbles.
Place the springform pan into the water bath and bake the cake for 1 hour and 10 minutes. Check the cake for doneness by inserting a toothpick into the center of the cake. (It should come out clean.) Bake the cake for an additional 10-15 minutes to brown the top.
Turn off the oven, open the oven door slightly (about 2-3 inches) and let the Cotton Cheesecake cool in the oven for 1 hour.
Remove the Cotton Cheesecake from the pan. Place on a plate and refrigerate for at least 4 hours.
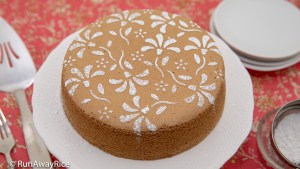
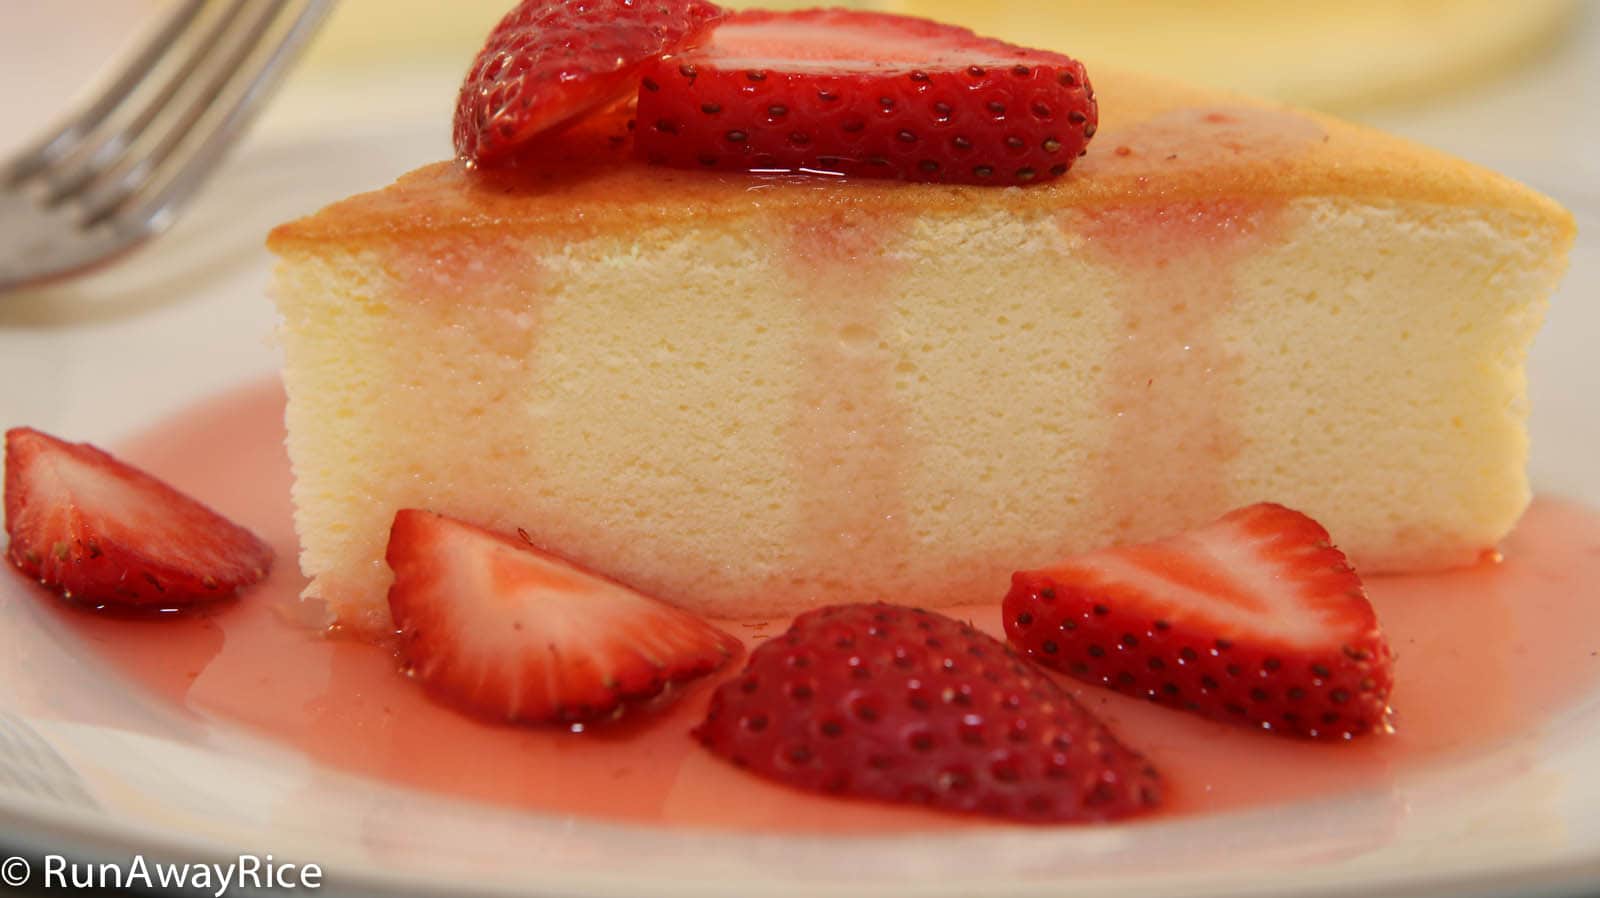
Serve with fresh fruit, fruit puree, chocolate sauce, whipped cream, etc.
Cover and refrigerate any remaining portions. Enjoy the Cotton Cheesecake within the week.
Yields: 8 servings

Cotton Cheesecake / Japanese Cheesecake
Cotton Cheesecake / Japanese Cheesecake is my new favorite dessert and after you try this recipe, it will become your favorite too. It's the perfect combination of sponge cake and cheesecake in both taste and texture. What I love about this scrumptious cake is it's not overly sweet as some cakes can be. The combination of fluffy cake with slightly tart cream cheese is absolutely heavenly. I hope you enjoy the recipe as much as I do. Please note this recipe can be a bit tricky. Watch the video and follow the steps exactly. Happy Baking!
Ingredients
- 5 large eggs , at room temperature
- 1/4 tsp cream of tartar
- 1/2 cup sugar , divided
- 8 oz cream cheese , at room temperature
- 1/2 cup low-fat milk
- 1/4 cup unsalted butter , at room temperature
- 1 Tbsp lemon juice
- 1/4 cup all-purpose flour
- 2 Tbsp corn starch
Bakeware
- 8 inch round springform pan
Instructions
-
Line the bottom and side of the springform pan with parchment paper. Wrap the springform pan with several sheets of foil, sealing it completely.
-
Fill a large baking pan halfway with water. Place it in the oven on the lowest rack. Preheat the oven to 315 F (157 C).
-
Separate the eggs and place the egg whites into a mixing bowl and the yolks into a measuring cup.
-
Beat the egg whites on Low speed for 30 seconds. Increase the speed to Medium Low and beat for another 30 seconds or until foamy. Add the cream of tartar. Increase the speed to Medium High and beat until the egg whites just start to thicken. Add 1/4 cup sugar gradually. Continue beating until the egg whites reach the soft peaks stage (approximately 3 minutes using a stand mixer).
-
In a separate bowl, add the cream cheese and milk. Mix on Low speed until creamy and smooth (approximately 2-3 minutes). Add the butter, remaining 1/4 cup sugar and lemon juice and beat for 1 minute. Add the flour and corn starch and mix for another minute. Finally add the egg yolks and mix for 1 more minute. Strain the batter using a sieve.
-
Add 1/3 of the egg whites and gently fold into the batter until mostly incorporated. Add another 1/3 and gently fold. Add the remaining 1/3 and gently fold.
-
Pour the batter into the lined springform pan. Spread the batter evenly into the pan and smooth out the top using a spatula. Holding the side of the pan, gently lift and drop the pan on the counter about 6 times to remove any big air bubbles.
-
Place the springform pan into the water bath and bake the cake for 1 hour and 10 minutes. Check the cake for doneness by inserting a toothpick into the center of the cake. (It should come out clean.) Bake the cake for an additional 10-15 minutes to brown the top.
-
Turn off the oven and open the oven door slightly (about 2-3 inches) and let the Cotton Cheesecake cool in the oven for 1 hour.
-
Remove the Cotton Cheesecake from the pan. Place on a plate and refrigerate for at least 4 hours.
-
Serve with fresh fruit, fruit puree, chocolate sauce, whipped cream, etc.
-
Cover and refrigerate any remaining portions. Enjoy the Cotton Cheesecake within the week.
Recipe Video
Notes, Tips & Tricks
- As the cream cheese, eggs and butter need to be at room temperature, advanced planning is required. About 2 hours before making the cake, remove the cream cheese and butter from the refrigerator. About 1 hour before take the eggs out of the fridge. The cream cheese and butter should be soft and spreadable for this recipe. If these ingredients are not quite ready, pop them in the microwave on Low power for about 15-20 seconds.
- Eggs are easiest to separate when they are cold. Egg whites are best beaten at room temperature to achieve the fluffiest texture. Separate the eggs while they are cold and then let them come to room temperature as you prep the remaining ingredients for the recipe.
- Use an 8 inch by 3 inch round springform pan. Line the pan so the parchment paper extends about 2 inches above the pan. The parchment paper wall provides support since the cake rises to about 3 inches tall during baking. Keep the paper to no more than 5 inches tall. Too much paper will prevent the top of the cake from browning nicely.
- The water bath is essential for keeping the cake moist. As the cake bakes for longer than the typical cake, the water bath is crucial. Additionally, the water bath insulates the cake and allows it to cook at a consist temperature. These factors are important for achieving the fluffy and moist texture for the cake.
- Be sure to fold the egg whites into the batter. Do not beat or mix vigorously as this will deflate the egg whites. (If you’re not familiar with the fold technique, check out how I do it in the video.)
- As oven temperatures vary, check to see if the cake is done (by using a toothpick) after 1 hour of baking. Then bake the cake until the top is golden brown. This is one recipe where over-baking the cake is ok. You won’t ruin the cake! Depending on your oven it may take up to 1 1/2 hours. Again, this is just fine.
- If your cake cracks on top, the heat is too high or the cake is too close to the heating element. Make note of this and adjust these things the next time.
- This cake will shrink (about 1/2 inch or so) after cooling so please don’t despair. Leaving the cake in the oven after it’s done baking helps to minimize some of the deflating.
- Refrigerate the cake for at least 4 hours before eating. The cold air sets the cream cheese and greatly improves the flavor and texture.
Nutrition FactsCotton Cheesecake / Japanese CheesecakeAmount Per ServingCalories 265 Calories from Fat 162% Daily Value*Fat 18g28%Saturated Fat 10g63%Cholesterol 149mg50%Sodium 138mg6%Potassium 113mg3%Carbohydrates 19g6%Sugar 14g16%Protein 6g12%Vitamin A 720IU14%Vitamin C 0.7mg1%Calcium 63mg6%Iron 0.8mg4%* Percent Daily Values are based on a 2000 calorie diet.
Want to learn more about making Cotton Cheesecake / Japanese Cheesecake and the common challenges? Check out this post where I detail the most common frustrations and how to fix them.
Cotton Cheesecake Challenges: Deflation, Cracks, and Water Bath Issues


Thanks.. First attempt and was successful. Deco with strawberry and blueberry. Simple and nice to present as a birthday cake. My friend love it very much.
Hi Joyce,
That’s awesome. I am glad your friend liked the cake 🙂 Thanks for sharing your results.
hi, i tried this tne and the cake turned out perfect. i let my japanese friend try it and they said it was so good. do you recommend any toppings for this certain type of cake? Thanks
Hi Chastine,
That’s wonderful! I am glad to hear you and your friend enjoyed the recipe. I like to serve this with fruit (strawberries, raspberries and blueberries) and fresh whipped cream. It also tastes great with some chocolate sauce drizzled on top…yum!!
Hi Trang,
I tried this recipe and the cake tasted awesome. However the thin bottom layer is a little bit rubbery with a darker egg color and strong egg taste. Also the top of the cake got wrinkled even before I removed from oven. Any advice?
Regards,
Maryann
Hi Maryann,
It sounds like perhaps the egg whites were not evenly mixed with the batter which would explain the darker color, strong egg taste and rubbery texture. When adding the egg whites, please fold gently but evenly. Always start at the bottom of the bowl and fold up and over like I demonstrated in the video. Regarding the wrinkled skin, this is because the cake swelled quickly and then shrank back causing the wrinkle. You can reduce the temperature by 10 degrees or move the cake farther away from the heating element so it doesn’t rise so quickly. I hope these tips help.
Hi Trang,
I made this cake last weekend, as per your guide, I baked at 150 degree celsius for 1 hr 30 minutes. the toothpick came out clean when I tested the doneness. the cake didn’t rise as much as expected, I was wondering was it I overly mixed the eggs white by folding it too much strokes in the batter.
and it doesn’t look as fluffy as yours… and the cake’s side seems to have 2 tones of colors, with yellowish at the bottom, and whitish on top. the cake’s top didn’t crack, and perfectly golden brown. overall, it tastes good.
I am thinking to make another soon ( not giving up yet ), can I use self raising flour? is it possible if I use more lemon juice instead of just 1 tbsp? like half or the whole of lemon?
Thank you.
Hi Lisa,
Do you think some water seeped into the bottom of your cake causing it to be two-toned? Did the bottom of the cake seem moister than the top? Yes, overbeating the egg whites could cause the cake to rise but then flatten. Did your cake rise at all during baking? Please check the position of your cake in relation to the heating elements. You can see how I have my cake placed in the video. Regarding self rising flour, you can give this a try. Keep in mind that some self-rising flours have salt added so you may want to add more sugar. Based on your results, you are very close, don’t give up 🙂 Let me know if you have any questions.
Hi Trang,
I found this recipe when I was searching for cheesecake recipe… the outcome really look good & delicious, which makes me intended to bake this cake… I am a beginner on baking…
may I ask, when baking the cake in the oven, shall I use only the bottom heating element OR both top and bottom? What about if using fan-forced? and instead of using 5 large eggs, can I use 6 medium eggs? can I omit the lemon juice and put vanilla essence instead?
thank you .
Hi Lisa,
Use both top and bottom heating elements and try to place your cake toward the lower portion of the oven as I showed in the video. This recipe is not for a fan-forced/convection oven so use the conventional oven setting if possible. If not, lower the temperature to 290 degrees Fahrenheit for convection cooking. The baking time is approximately the same but keep your eyes on it after 1 hour and 10 minutes. Yes, you can use 6 medium instead of 5 large eggs and can replace the lemon juice with vanilla essence. Good Luck and let me know how it turns out for you.
I tried a couple of times of this recipe, following the exact steps you described, but the cake never came out as fluffy as in your video, also the bottom and the sides of the cake looked and tasted waxy.
Hi Jyune,
I am sorry to hear the cake didn’t turn out for you. The “waxy” bottom and sides sounds like water is seeping into your cake. If you’d like to give it another try, instead of putting the cake in the water bath, please a tray full of water just under the cake. The steam will help to keep the cake moist without getting the cake wet. One other thing you may want to try with the water bath is to double-wrap the pan with large sheets of aluminum foil. Good Luck!
Can I use cake flour instead all-purpose flour? And if I do use cake flour, do I still need to add cornstarch?
Hi Christyn,
You can certainly use cake flour instead of all-purpose flour and it will just fine. If you don’t have cornstarch you can substitute with more flour.
Hope that helps!
Hi!
I was just wondering if it is okay to use cake flour instead of all purpose flour?
Thanks!
Hi Elizabeth,
Yes, all-purpose flour will work just fine. Good luck!
What is the purpose of the water bath?
Hi Rachel,
The water bath helps to keep the cheesecake moist and prevents cracking which is common when baking for longer periods of time. Also, the bath provides a steady heat which yields an evenly baked cake. For cheesecakes, I highly recommend it. Hope that helps!
OMG it came out perfect 😉 I couldn’t wait to chill this cake ;-). I had to try it after 1 hr in the fridge but it was so good already 😉
After following closely to your instructions, awhile the cake was in the oven, I realized that I didn’t have vanilla added but I think the lime juice is more than suffice.
Thanks Trang!
Hi Trang,
Your comment made me laugh because you’re just like me. I really have to resist eating it right after it’s done baking but the cake tastes even better when it’s chilled.
I am sure your cake is delicious even without the vanilla. Happy Eating!