
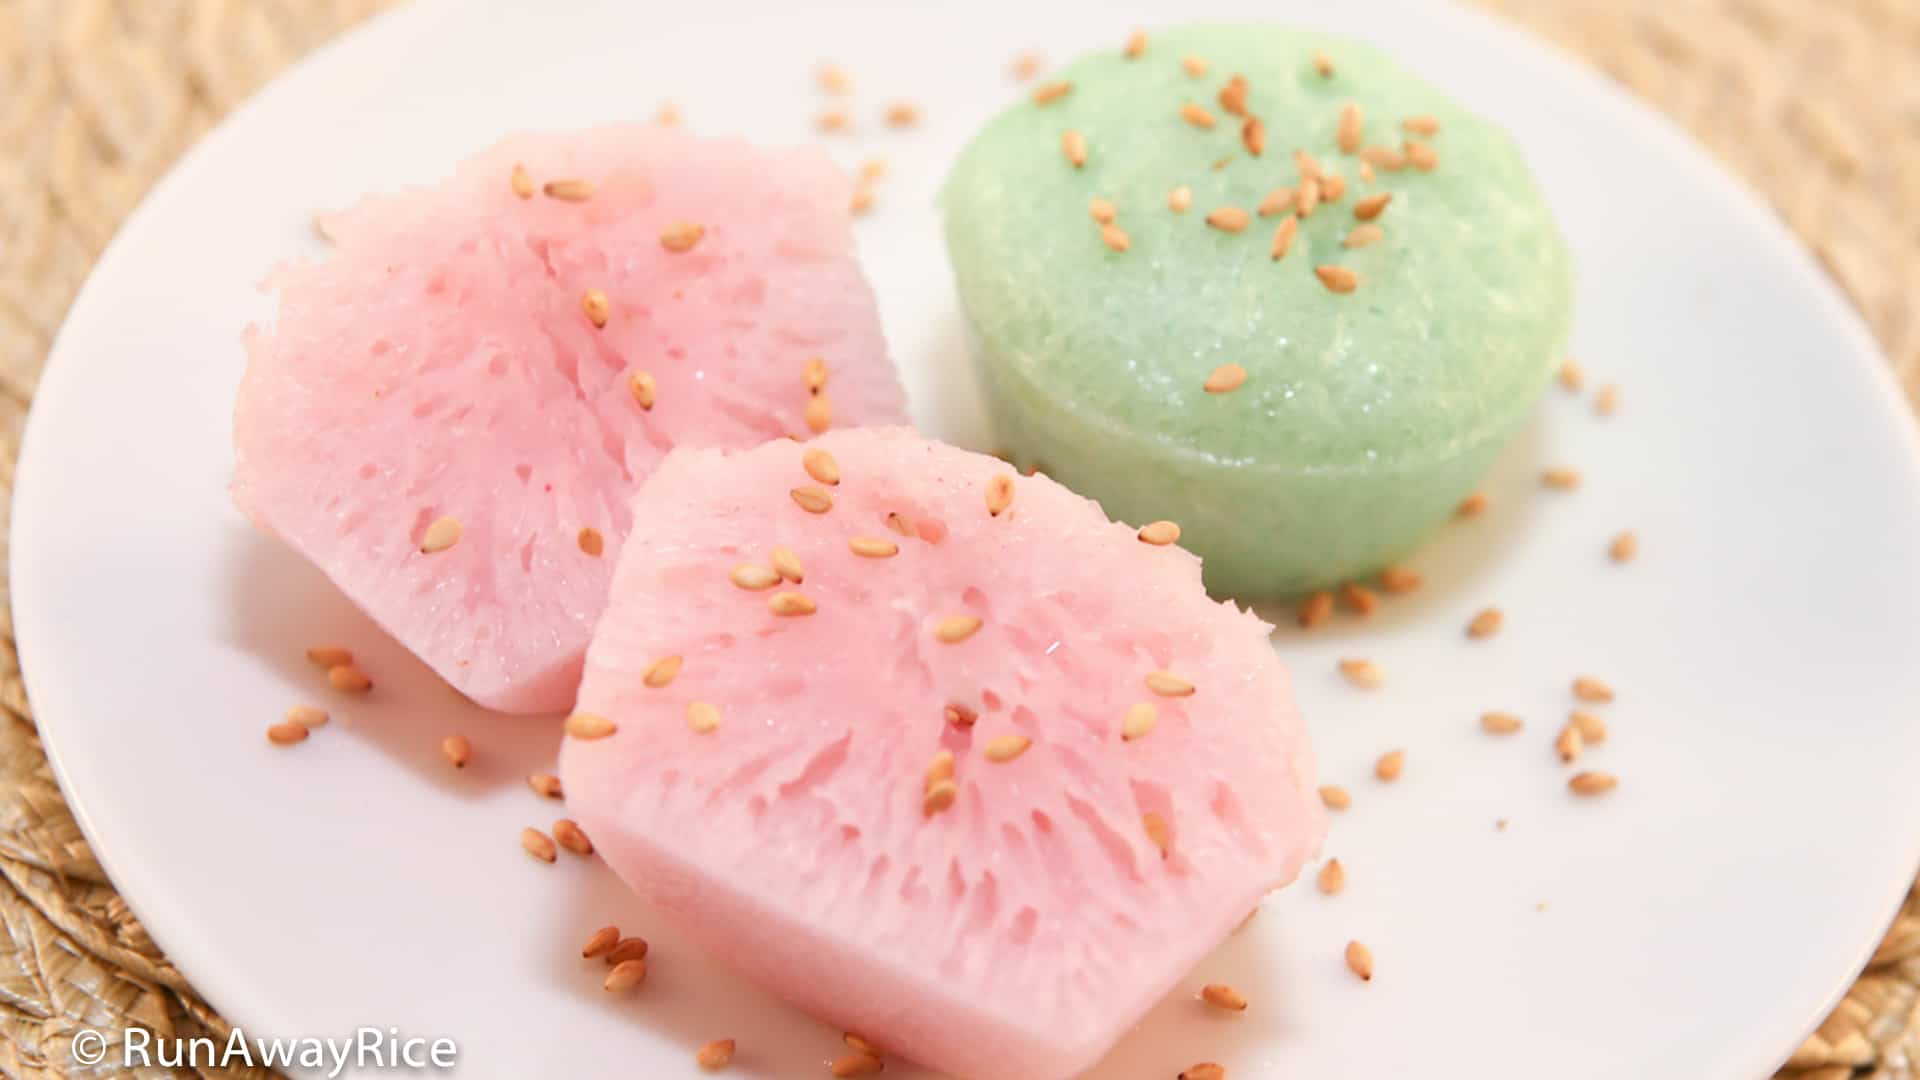
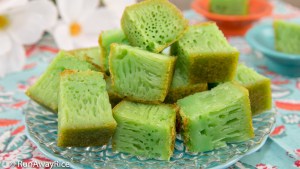
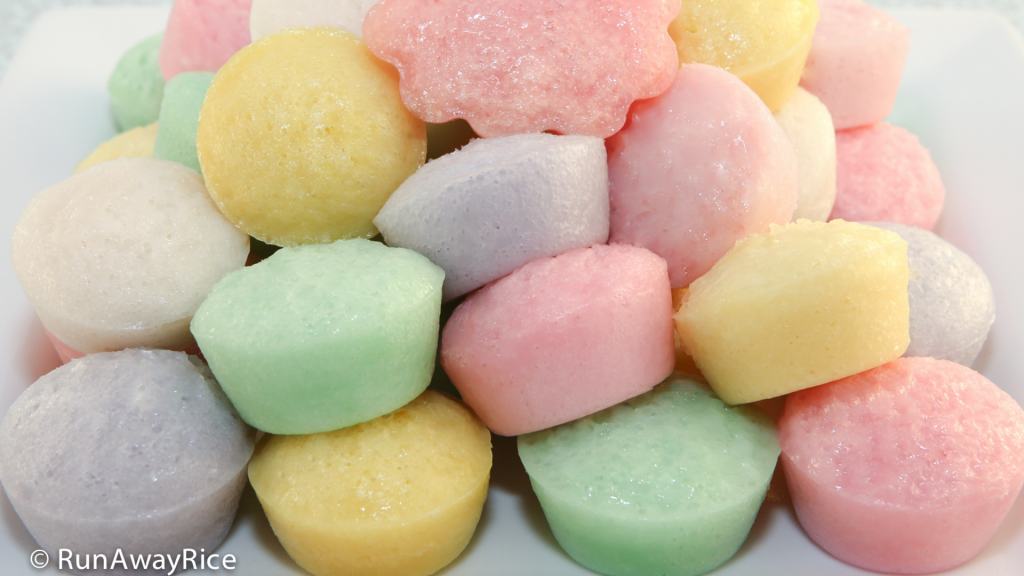
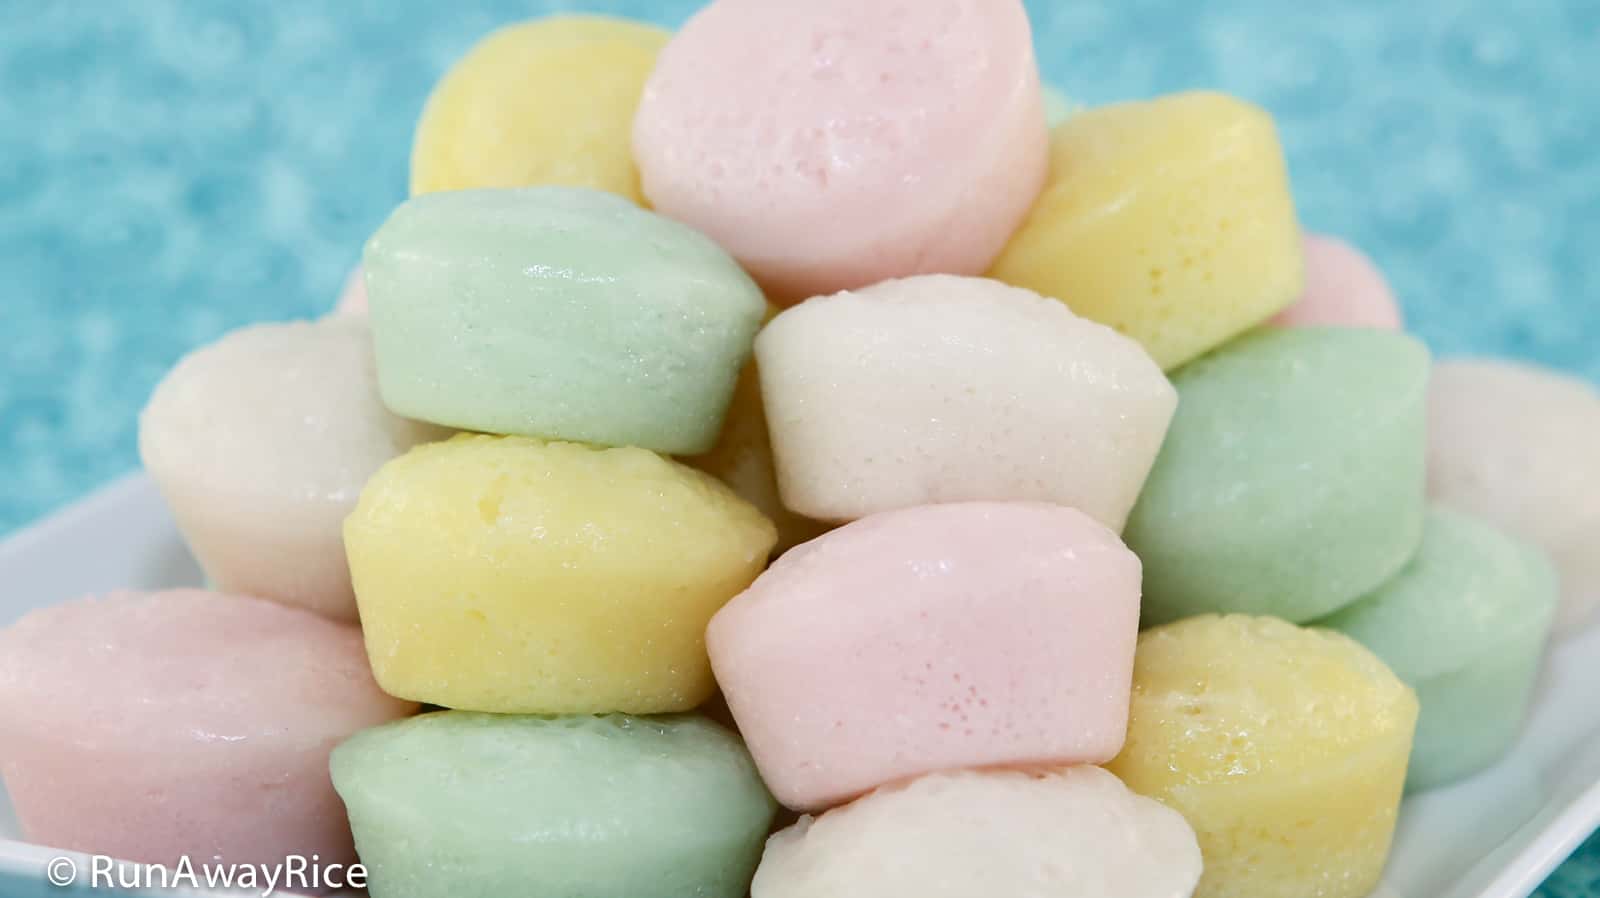
This Steamed Rice Cakes (Banh Bo Hap) recipe is from my childhood and conjures up so many happy memories. Known by a few different names, Cow Cakes or Steamed Honeycomb Cakes, the cakes are sweet, soft and deliciously spongy. As a young child, my sister always called these “Cow Cakes” because “Bánh” in Vietnamese means “Cake” and “Bò” means “Cow”. My Mom would laugh and explain to her that “Bò” also means “to crawl”. That’s what the batter does when it’s steamed–it “crawls” upward rising into a puffy cake. My sister’s nickname for this cake stuck in our house. Moving to southern California, I was pleasantly surprised to also hear others call them “Cow Cakes”. Depending on whom you ask, you will definitely get different explanations on the name. Recently I read on Wikipedia the word “Bò” is intended to mean “Cow” as the cakes resemble a cow’s udder. Well, that I don’t really see. Call them what you will, these cakes are scrumptious and pretty easy to recognize. They are sweet, soft and moist and when cut open have honeycombs throughout which give the cakes their interesting spongy and light texture. The Viet version of these cakes are small and they are usually enhanced with food coloring (green, pink, and yellow) for eye-catching appeal.
Steamed Rice Cake is a wonderful dessert everyone should learn to make and it’s not as difficult as you may think. There are some key techniques to learn but once you get them down, you’ll see it’s easy peasy. Please watch the video, read the recipe along with the tips and tricks and follow the directions closely. Good Luck!
Watch the video for instructions.
Notes on the Steamed Rice Cakes (Banh Bo Hap) Recipe, Tips and Tricks
Use fresh active dry yeast. Activate the yeast using warm water that is approximately 100 degrees. If the yeast isn’t frothy after resting for 10 minutes, the yeast has expired.
During the colder months, the batter may not rise as quickly. To encourage the batter to rise, place the bowl in the oven with the light on and close the door. The light will generate additional heat and further activate the yeast. During the summer months (air temperature in the 70’s), letting the batter rest on the kitchen counter is just fine.
Use liquid or gel food coloring. Gel food coloring requires lots of mixing. Be sure to mix it into the batter evenly so there are no streaks or blotches of color. When adding food coloring, keep in mind the colors brighten when the cakes are steamed so go easy on the food coloring and don’t add too much.
Since the batter is near the warm stove, you may notice bubbles forming on top of the batter. Use a spoon or skimmer to scoop off the bubbles and discard. These bubbles make the tops of the cakes uneven and bumpy.
As flour has a tendency to settle in liquid, be sure to stir the batter several times before pouring into the pan or dishes.
When preparing the steamer, fill the bottom pan with plenty of water, about three-quarters full. The steam needs to be strong and steady when cooking these cakes. The goal is to steam these cakes quickly over High heat.
Having two sets of mini-muffin pans is best. As one batch is cooling you can start steaming another one. You’ll be able to make the cakes quickly. As an alternative to using mini muffin pans, use any small dishes or cups. Try to keep them about the same size so they are done steaming at the same time. To test for doneness, insert a toothpick into a cake and if it comes out clean, it’s done. The mini-muffins steam for 6 minutes. Adjust the steaming time according to the size of your dishes or cups.
Be sure to steam the empty muffin pan or dishes before adding the batter. The hot pan or dishes will help the batter to rise and make the cakes fluffy.
Wrap a large kitchen towel around the steamer lid to absorb the moisture. This saves time as you don’t have to continually wipe the lid as the cakes are steaming. If the moisture from the lid drips down onto the cakes, little blisters may form on the cakes. Also, water drips from the lid could affect the consistency of the cakes, making them wet.
Consider using your wok to make the Steamed Rice Cakes if you don’t have a steamer large enough to hold a mini-muffin pan.
Store any Steamed Rice Cakes not eaten within the day in an airtight container and refrigerate. Warm the cakes in the microwave for 15-30 seconds or steam for 1 minute. Enjoy the Steamed Rice Cakes within the week.
If you enjoy this Steamed Rice Cakes (Banh Bo Hap) recipe, you may also like:
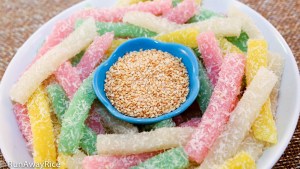
Silkworm Cassava Cake
(Banh Tam Khoai Mi)
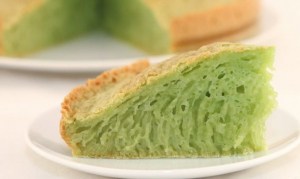
Honeycomb Cake
(Banh Bo Nuong)
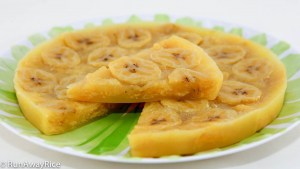
Steamed Banana Cake
(Banh Chuoi Hap)
Steamed Rice Cakes / Cow Cakes / Steamed Honeycomb Cakes / Banh Bo Hap
Ingredients
Yeast
1/2 cup water
2 tsp active dry yeast
1 tsp sugar
Batter
3 3/4 cups (1 lb) rice flour
1/3 cup tapioca starch
3 cups water, divided
1 1/2 cups sugar
.28 oz packet vanilla sugar
14 oz can coconut milk
food coloring: green, pink and yellow
1/4 cup vegetable oil for oiling muffin pans
Directions
Activating the Yeast
Heat 1/2 cup water to approximately 100 F (38 C). Add the active dry yeast and sugar and stir together. Let the mixture rest for 10 minutes or until it becomes frothy.
Making the Batter
In a large bowl, add the rice flour, tapioca starch and 2 cups water. Whisk together until the mixture is smooth and free of lumps. Add the yeast mixture to the flour mixture and combine well. Cover the bowl with plastic wrap and let the batter rest on the counter for 2 hours. (If making this during the winter months, please see the notes above.)
In a large measuring cup or bowl, combine the sugar, vanilla sugar, coconut milk and remaining 1 cup water. Whisk together until the sugar is dissolved. Microwave the liquid on High for 1 minute. Let the coconut milk mixture cool until the temperature is approximately 100 F (38 C).
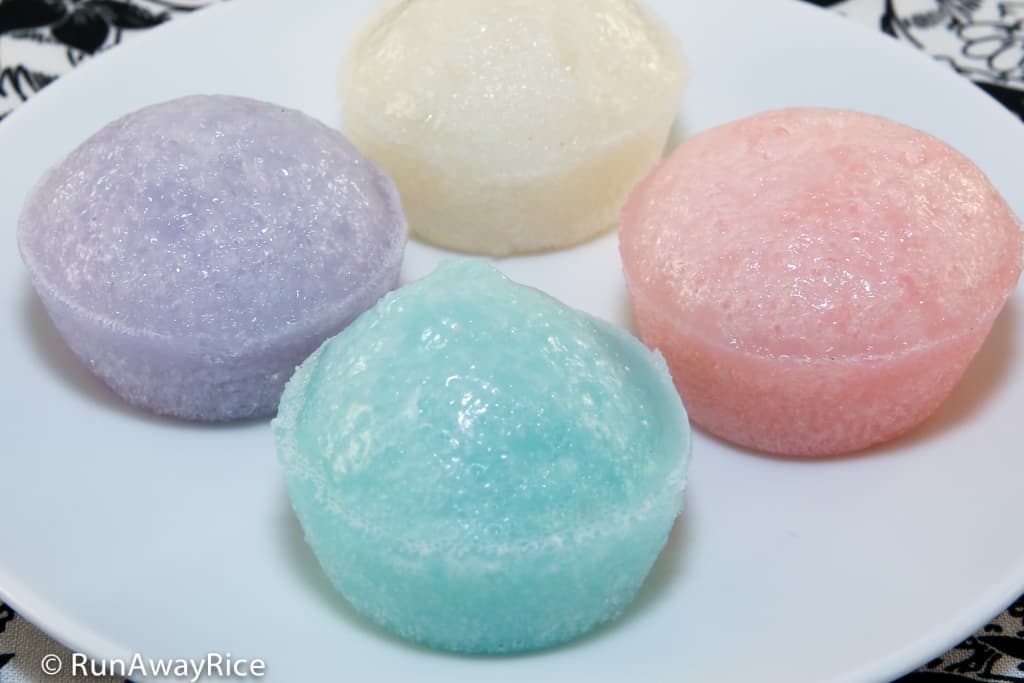
Pour the coconut milk mixture into the batter and whisk together combining well. Strain the batter. Pour the batter into 4 separate cups or bowls, approximately 1 3/4 cups in each. Add your choice of food coloring to each batch. Let the batter rest for 30 minutes.
Steaming the Cakes
Fill a steamer basin three-quarters full with water. Cover and bring to a rapid boil over High heat.
Using a small brush, lightly oil each of the muffin cups with vegetable oil. Place the empty mini-muffin pan into the steamer tray and steam for 1 minute.
Stir the batter a few times and then pour the batter into the muffin cups filling each cup almost to the top. (Leave some room so the cakes can expand and rise.) Cover and steam the cakes for 3 minutes. Remove the steamer lid and wipe off the moisture with a kitchen towel. Replace the lid and steam for another 3 minutes.
Remove the mini-muffin pan from the steamer. Allow the Steamed Rice Cakes to cool for 5 minutes before removing from the pan.
A simply and delicious way to serve these cakes is to drizzle them with creamy coconut sauce and then top with roasted sesame seeds.
Refrigerate any remaining portions for up to 1 week. To reheat, warm in the microwave.
Yields: 5 dozen cakes

Steamed Rice Cakes / Cow Cakes / Steamed Honeycomb Cakes / Banh Bo Hap
This Steamed Rice Cakes (Banh Bo Hap) recipe is from my childhood and conjures up so many happy memories. They are sweet, soft and moist and when cut open have honeycombs throughout which give the cakes their interesting spongy and light texture. The Viet version of these cakes are small and they are usually enhanced with food coloring (green, pink, and yellow) for eye-catching appeal.
Ingredients
Yeast
- 1/2 cup water
- 2 tsp active dry yeast
- 1 tsp sugar
Batter
- 3 3/4 cups rice flour , 1 lb
- 1/3 cup tapioca starch
- 3 cups water , divided
- 1 1/2 cups sugar
- .28 oz packet vanilla sugar
- 14 oz coconut milk
- food coloring: green pink and yellow
Other
- 1/4 cup vegetable oil , for oiling muffin pans
Instructions
Activating the Yeast
-
Heat 1/2 cup water to approximately 100 F (38 C). Add the active dry yeast and sugar and stir together. Let the mixture rest for 10 minutes or until it becomes frothy.
Making the Batter
-
In a large bowl, add the rice flour, tapioca starch and 2 cups water. Whisk together until the mixture is smooth and free of lumps. Add the yeast mixture to the flour mixture and combine well. Cover the bowl with plastic wrap and let the batter rest on the counter for 2 hours. (If making this during the winter months, please see the notes above.)
-
In a large measuring cup or bowl, combine the sugar, vanilla sugar, coconut milk and remaining 1 cup water. Whisk together until the sugar is dissolved. Microwave the liquid on High for 1 minute. Let the coconut milk mixture cool until the temperature is approximately 100 F (38 C).
-
Pour the coconut milk mixture into the batter and whisk together combining well. Strain the batter. Pour the batter into 4 separate cups or bowls, approximately 1 3/4 cups in each. Add your choice of food coloring to each batch. Let the batter rest for 30 minutes.
Steaming the Cakes
-
Fill a steamer basin three-quarters full with water. Cover and bring to a rapid boil over High heat.
-
Using a small brush, lightly oil each of the muffin cups with vegetable oil. Place the empty mini-muffin pan into the steamer tray and steam for 1 minute.
-
Stir the batter a few times and then pour the batter into the muffin cups filling each cup almost to the top. (Leave some room so the cakes can expand and rise.) Cover and steam the cakes for 3 minutes. Remove the steamer lid and wipe off the moisture with a kitchen towel. Replace the lid and steam for another 3 minutes.
-
Remove the mini-muffin pan from the steamer. Allow the Steamed Rice Cakes to cool for 5 minutes before removing from the pan.
-
A simply and delicious way to serve these cakes is to drizzle them with creamy coconut sauce and then top with roasted sesame seeds.
-
Refrigerate any remaining portions for up to 1 week. To reheat, warm in the microwave.
Recipe Video
Notes, Tips & Tricks
- During the colder months, the batter may not rise as quickly. To encourage the batter to rise, place the bowl in the oven with the light on and close the door. The light will generate additional heat and further activate the yeast. During the summer months (air temperature in the 70's), letting the batter rest on the kitchen counter is just fine.
- Use liquid or gel food coloring. Gel food coloring requires lots of mixing. Be sure to mix it into the batter evenly so there are no streaks or blotches of color. When adding food coloring, keep in mind the colors brighten when the cakes are steamed so go easy on the food coloring and don't add too much.
- Having two sets of mini-muffin pans is best. As one batch is cooling you can start steaming another one. You'll be able to make the cakes quickly. As an alternative to using mini muffin pans, use any small dishes or cups. Try to keep them about the same size so they are done steaming at the same time. To test for doneness, insert a toothpick into a cake and if it comes out clean, it's done.
- Wrap a large kitchen towel around the steamer lid to absorb the moisture. This saves time as you don't have to continually wipe the lid as the cakes are steaming.
Nutrition FactsSteamed Rice Cakes / Cow Cakes / Steamed Honeycomb Cakes / Banh Bo HapAmount Per ServingCalories 80 Calories from Fat 18% Daily Value*Fat 2g3%Saturated Fat 2g13%Sodium 1mg0%Potassium 23mg1%Carbohydrates 14g5%Sugar 5g6%Vitamin C 0.1mg0%Calcium 3mg0%Iron 0.3mg2%* Percent Daily Values are based on a 2000 calorie diet.


Hello! I have just tried “another recipe” that in the end turned out, flat without any honeycomb texture and wasn’t sweet at all! I’m so sad. I’m going to try your recipe tomorrow but will be using a 5×3″ loaf pan, half full and steaming for about 10 minutes. Is there any way to make them sweeter (more sugary) tasting? So it’s not so bland? I’m using Fleishmann’s Rapid Rise instant yeast. I hope mine will turn out better this go round.
Hi Mo,
You can add as much sugar as you like! Enjoy!
Hello, is there a troubleshoot for cakes that rise in the pan while steaming then suddenly sink when taken out of the steamer? So sad, this is the 3rd time trying this with no luck. Does coconut milk vs coconut cream make a difference? I can definitely taste the yeast so they are working, it just simply won’t rise for some reason.
Hi Dianne,
Sorry to hear that. When steaming make sure there’s lot of water in the basin and the steam is vigorous. This helps to puff up the cakes. If the cakes are shrinking, they may not be fully cooked. Did you test them with a toothpick to make sure they come out clean? Also, what kind of pan are you using? Either coconut milk or coconut cream should be fine.
Hi! Trang i would like to know where to buy tapioca flour im in Cebu,philippines.i have not tried buying tapioca flour i would like to cook your recipe.thanks.
im linda
Hi Linda,
Sorry, I have not shopped in the Philippines so I asked a friend of mine. She said tapioca starch/flour is very common in the grocery stores. I hope that helps.
Thanks for your recipe! I love how it came out so beautifully and yummy. I was wondering if I bake the batter will it be Banh Bo Nuong Chay? I am looking everywhere for how to make that and it seems all the recipes out there are fake.
Hi Sophia,
Glad to hear you were successful with making these delicious cakes. (They are my favorite!) I have not tried making this recipe as Banh Bo Nuong Chay but it’s worth a try. If you do give it a go, I’d love to hear the results. Thanks for stopping by 🙂
Hi there!
Would love to try this recipe but wnated to know how to modify it if using instant yeast instead?
Thanks 🙂
Crystal
Hi Crystal,
If using instant yeast, skip the first step where you combine the yeast with water and sugar and let rest for 10 minutes. Simply mix everything together and let the batter rest for 2 hours.
Good Luck and please stop back and share your results! 🙂
I made this last night and it turned out beautifully! I used silicone mini cherry flower muffin cups and they so cute! I am thinking about making it for my family reunion at the end of the year!
Hi Ann,
Your cakes sounds beautiful! If you have any pics, I’d love to see it. (You can post to my FB page.) Your family will definitely love these cakes!!
Hi Trang,
When I mixed in the 1lb flour, 2 cups water and 1/3 cups of tapioca flour my batter is thick it’s not like yours. Did I do something wrong? Please help.
Hi Dekdee,
Those are the right proportions. Would you please confirm you are using rice flour? Does your rice flour come in a 1 lb package or do you have to weigh it?
Yes the rice flour come in a 1 Ib package. I’ve been trying to make this recipe again and i still got the same consistency of having a thick batter on that step. please help me
Hi Dekdee,
I am sorry to hear you’re not having much success. May I ask what brand of rice flour you’re using?
I am making this right now and also have a very thick batter instead of the batter in your video. I am using Shah brand rice four. I am going toforge ahead and see how they come out in the end!
I mixed water, tapioca starch and yeast in the same proportions and added slowly until I got a batter that looks about the same consistency as in your video. It took one cup.
Hi Anitra,
So you added an additional 1 cup of water? How did the cakes turn out?
Hi Anitra,
At first the batter looks really thick but if you keep mixing, it will start to loosen up. Keep going with the recipe 🙂
I had doubled the recipe, so 1 cup additional liquid wasn’t as much as it sounds. But I discovered that over time the batter did keep getting thinner, until at the end I had to add more rice flour. Then it was perfect.
It was an interesting evening. 🙂 I learned a lot, including that Indian rice flour has a coarser texture than Japanese rice flour and takes longer to liquify. I would have been fine if I had just given it time and not panicked.
Hi Anitra,
That’s good to know about the texture of the Indian rice flour. I am glad to hear it all turned out well. Thanks for stopping back to share your results 🙂
Hi Trang
What can I used instead of vanilla sugar?
Many thanks
Aimy
Hi Aimy,
You can use 1/2 tsp of clear vanilla extract with 2 tsp sugar. Hope that helps.
Yes, thanks for your help
Thanks for sharing this recipe. I will definitely try to make it soon.
Hi Ann,
Glad to hear you’ll give it a try. Good Luck with the recipe and let me know if you have any questions.
You made it looks so easy. I will definitely try this recipe. My question is, where can I buy the grabber that you used to grab the muffin pan?
Hi Ngoc,
Thank you! This recipe is not difficult. I bought the dish clip at my Asian grocery store but here’s a link to a similar product you can buy from Amazon. Hope that helps! http://www.amazon.com/gp/product/B00EZ51AW8/ref=as_li_tl?ie=UTF8&camp=1789&creative=390957&creativeASIN=B00EZ51AW8&linkCode=as2&tag=runawayrice-20&linkId=BW764ND6CMTI46P3