
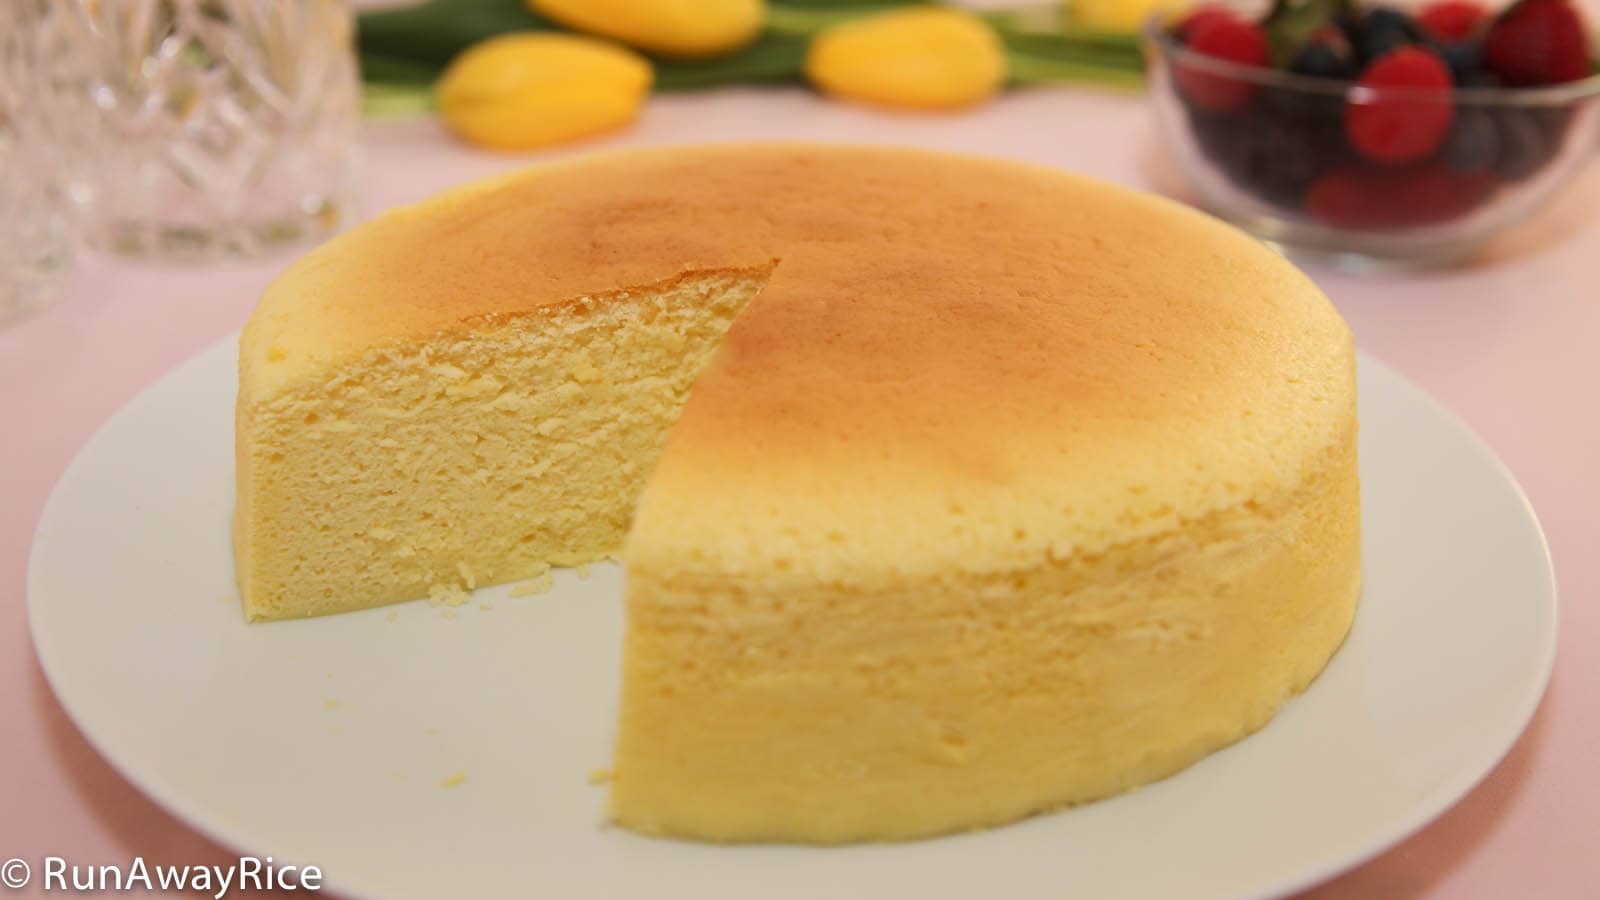
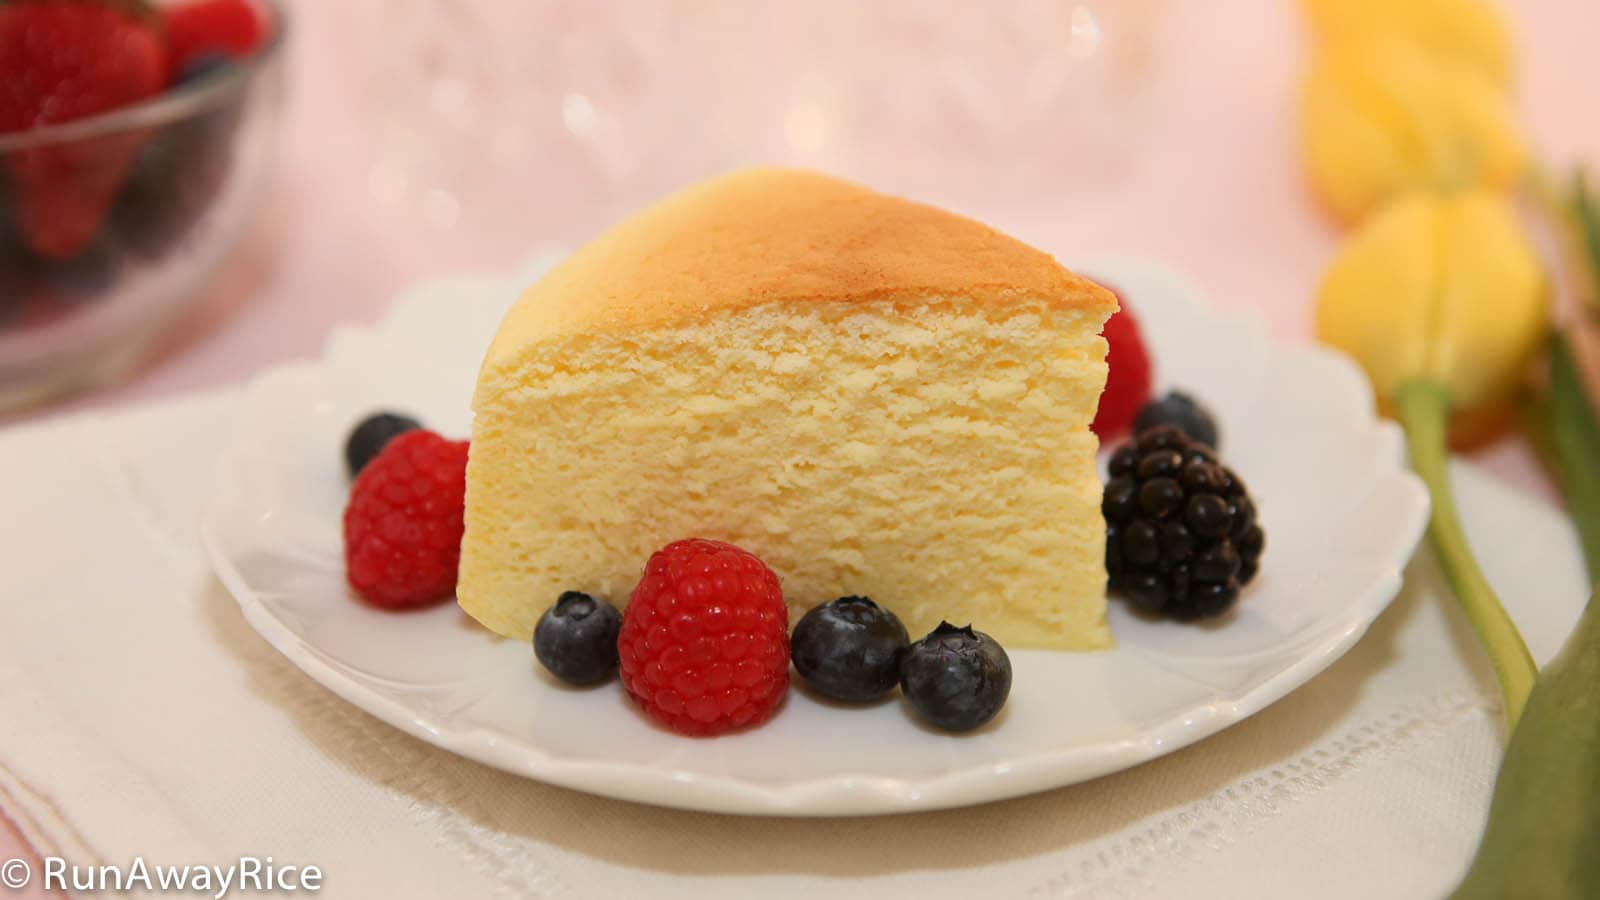
Cotton Cheesecake / Japanese Cheesecake is my new favorite dessert and after you try this recipe, it will become your favorite too! It’s the perfect combination of sponge cake and cheesecake in both taste and texture. What I love about this scrumptious cake is it’s not overly sweet as some cakes can be. The combination of fluffy cake with slightly tart cream cheese is absolutely heavenly. I hope you enjoy this Cotton Cheesecake / Japanese Cheesecake recipe as much as I do. Please note this recipe can be a bit tricky. Watch the video and follow the steps exactly. Happy Baking!
Watch the video for instructions.

Notes on the Cotton Cheesecake Recipe, Tips and Tricks
As the cream cheese, eggs and butter need to be at room temperature, advanced planning is required. About 2 hours before making the cake, remove the cream cheese and butter from the refrigerator. About 1 hour before, take the eggs out of the fridge. The cream cheese and butter should be soft and spreadable for this recipe. If the ingredients are not quite ready, pop them in the microwave on Low power for about 15-20 seconds.
Eggs are easiest to separate when they are cold. Egg whites are best beaten at room temperature to achieve the fluffiest texture. Separate the eggs while they are cold and then let them come to room temperature as you prep the remaining ingredients for the recipe.
Use an 8 inch by 3 inch round springform pan. Line the pan so the parchment paper extends about 2 inches above the pan. The parchment paper wall provides support since the cake rises to about 3 inches tall during baking. Keep the paper to no more than 5 inches tall. Too much paper will prevent the top of the cake from browning nicely.
The water bath is essential for keeping the cake moist. As the cake bakes for longer than the typical cake, the water bath is crucial. Additionally, the water bath insulates the cake and allows it to bake at a consist temperature. These factors are important for achieving the fluffy and moist texture for the cake.
Be sure to fold the egg whites into the batter. Do not beat or mix vigorously as this will deflate the egg whites. (If you’re not familiar with the fold technique, check out how I do it in the video.)
As oven temperatures vary, check to see if the cake is done (by using a toothpick) after 1 hour of baking. Then bake the cake until the top is golden brown. This is one recipe where over-baking the cake is ok. You won’t ruin the cake! Depending on your oven it may take up to 1 1/2 hours. Again, this is just fine.
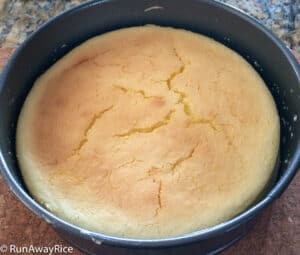
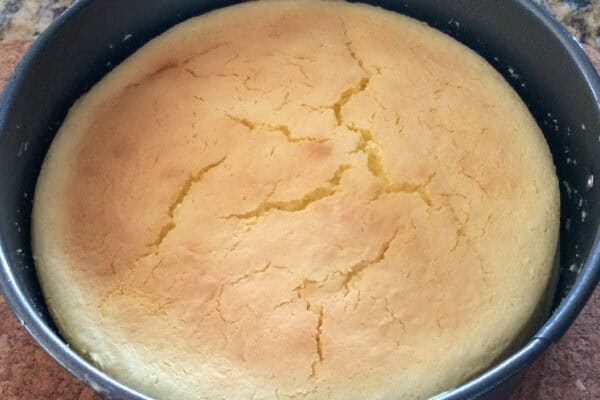
If your cake cracks on top, the heat is too high or the cake is too close to the heating element. Make note of this and adjust these things the next time.
The Cotton Cheesecake will shrink (about 1/2 inch or so) after cooling so please don’t despair. Leaving the cake in the oven after it’s done baking helps to minimize some of the deflating.
Refrigerate the Cotton Cheesecake for at least 4 hours before eating. The cold air sets the cream cheese and greatly improves the flavor and texture.
Store any remaining cake in the refrigerator for up to 1 week. To freeze, wrap the cake securely with plastic wrap and then a layer of foil. Freeze for up to 3 months.
✨✨I just shared a post on the most common challenges with making Cotton Cheesecake / Japanese Cheesecake and I explain all the details with pictures of my past frustrations. If you’re new to making this cheesecake or have made it without much success, check out the post before starting the recipe!
 Cotton Cheesecake Challenges: Deflation, Cracks, and Water Bath Issues
If you enjoy this Cotton Cheesecake / Japanese Cheesecake recipe, you may also like:
Chocolate Cotton Cheesecake / Japanese Cheesecake
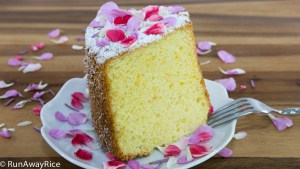
Orange Chiffon Cake with Edible Flowers
Cotton Cheesecake / Japanese Cheesecake
Ingredients
5 large eggs, at room temperature
1/4 tsp cream of tartar
1/2 cup sugar, divided
8 oz cream cheese, at room temperature
1/2 cup low-fat milk
1/4 cup unsalted butter, at room temperature
1 Tbsp lemon juice
1/4 cup all-purpose flour
2 Tbsp corn starch
Directions
Line the bottom and side of the springform pan with parchment paper. Wrap the springform pan with several sheets of foil, sealing it completely.
Fill a large baking pan halfway with water. Place it in the oven on the lowest rack. Preheat the oven to 315 F (157 C).
Separate the eggs and place the egg whites into a mixing bowl and the yolks into a measuring cup.
Beat the egg whites on Low speed for 30 seconds. Increase the speed to Medium Low and beat for another 30 seconds or until foamy. Add the cream of tartar. Increase the speed to Medium High and beat until the egg whites just start to thicken. Add 1/4 cup sugar gradually. Continue beating until the egg whites reach the soft peaks stage (approximately 3 minutes using a stand mixer).
In a separate bowl, add the cream cheese and milk. Mix on Low speed until creamy and smooth (approximately 2-3 minutes). Add the butter, remaining 1/4 cup sugar and lemon juice and beat for 1 minute. Add the flour and corn starch and mix for another minute. Finally add the egg yolks and mix for 1 more minute. Strain the batter using a sieve.
Add 1/3 of the egg whites and gently fold into the batter until mostly incorporated. Add another 1/3 and gently fold. Add the remaining 1/3 and gently fold.
Pour the batter into the lined springform pan. Spread the batter evenly into the pan and smooth out the top using a spatula. Holding the side of the pan, gently lift and drop the pan on the counter about 6 times to remove any big air bubbles.
Place the springform pan into the water bath and bake the cake for 1 hour and 10 minutes. Check the cake for doneness by inserting a toothpick into the center of the cake. (It should come out clean.) Bake the cake for an additional 10-15 minutes to brown the top.
Turn off the oven, open the oven door slightly (about 2-3 inches) and let the Cotton Cheesecake cool in the oven for 1 hour.
Remove the Cotton Cheesecake from the pan. Place on a plate and refrigerate for at least 4 hours.
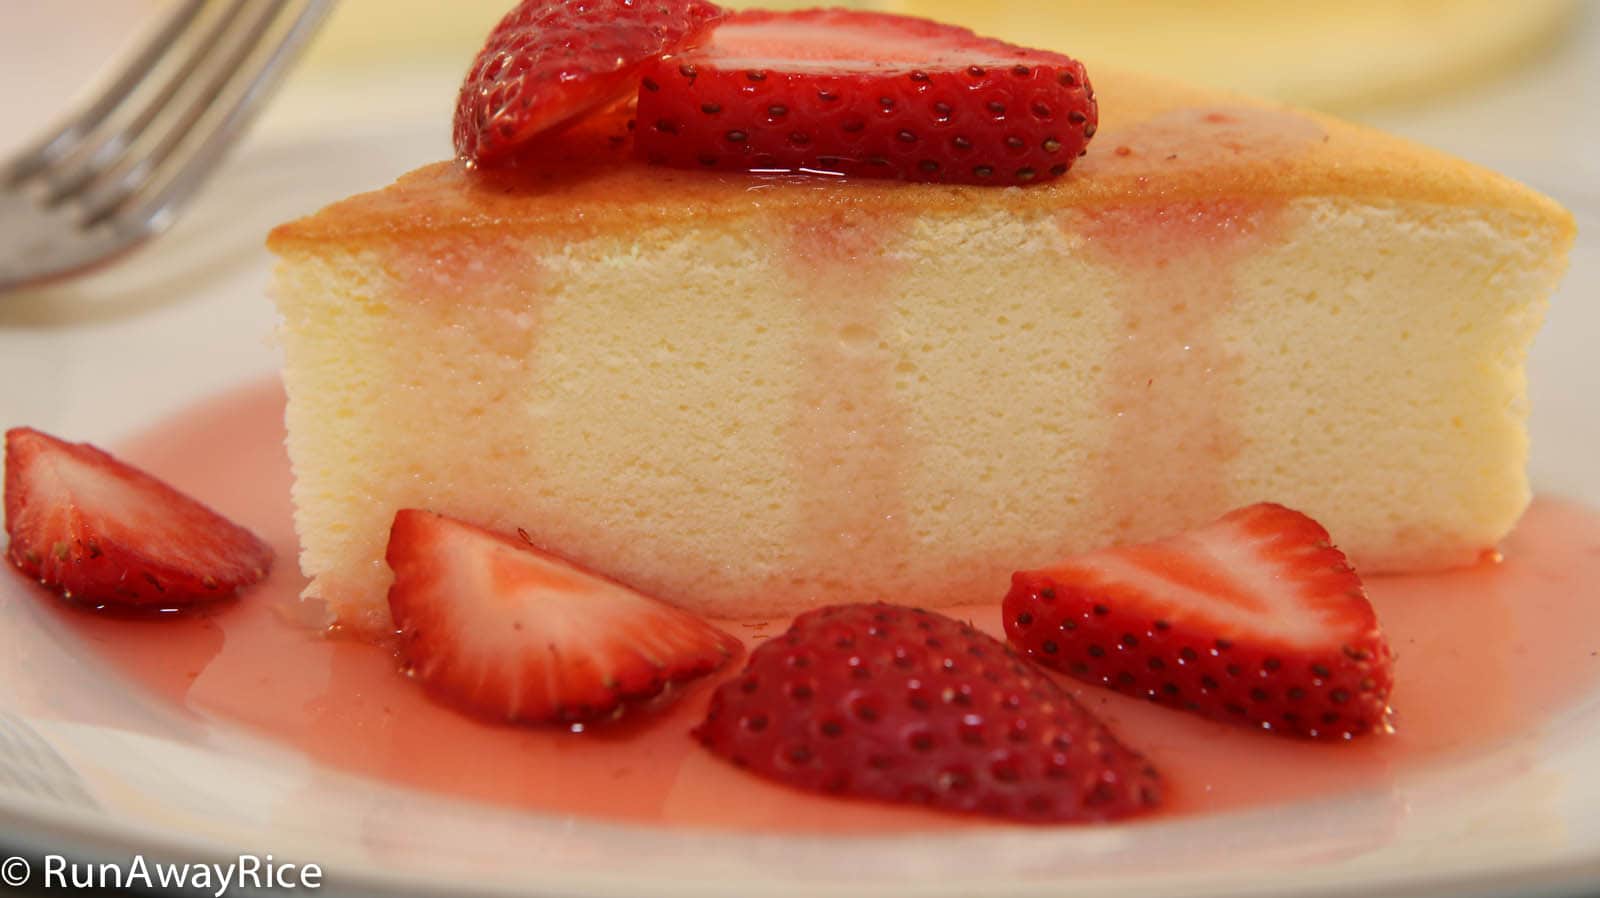
Serve with fresh fruit, fruit puree, chocolate sauce, whipped cream, etc.
Cover and refrigerate any remaining portions. Enjoy the Cotton Cheesecake within the week.
Yields: 8 servings

Cotton Cheesecake / Japanese Cheesecake
Cotton Cheesecake / Japanese Cheesecake is my new favorite dessert and after you try this recipe, it will become your favorite too. It's the perfect combination of sponge cake and cheesecake in both taste and texture. What I love about this scrumptious cake is it's not overly sweet as some cakes can be. The combination of fluffy cake with slightly tart cream cheese is absolutely heavenly. I hope you enjoy the recipe as much as I do. Please note this recipe can be a bit tricky. Watch the video and follow the steps exactly. Happy Baking!
Ingredients
- 5 large eggs , at room temperature
- 1/4 tsp cream of tartar
- 1/2 cup sugar , divided
- 8 oz cream cheese , at room temperature
- 1/2 cup low-fat milk
- 1/4 cup unsalted butter , at room temperature
- 1 Tbsp lemon juice
- 1/4 cup all-purpose flour
- 2 Tbsp corn starch
Bakeware
- 8 inch round springform pan
Instructions
-
Line the bottom and side of the springform pan with parchment paper. Wrap the springform pan with several sheets of foil, sealing it completely.
-
Fill a large baking pan halfway with water. Place it in the oven on the lowest rack. Preheat the oven to 315 F (157 C).
-
Separate the eggs and place the egg whites into a mixing bowl and the yolks into a measuring cup.
-
Beat the egg whites on Low speed for 30 seconds. Increase the speed to Medium Low and beat for another 30 seconds or until foamy. Add the cream of tartar. Increase the speed to Medium High and beat until the egg whites just start to thicken. Add 1/4 cup sugar gradually. Continue beating until the egg whites reach the soft peaks stage (approximately 3 minutes using a stand mixer).
-
In a separate bowl, add the cream cheese and milk. Mix on Low speed until creamy and smooth (approximately 2-3 minutes). Add the butter, remaining 1/4 cup sugar and lemon juice and beat for 1 minute. Add the flour and corn starch and mix for another minute. Finally add the egg yolks and mix for 1 more minute. Strain the batter using a sieve.
-
Add 1/3 of the egg whites and gently fold into the batter until mostly incorporated. Add another 1/3 and gently fold. Add the remaining 1/3 and gently fold.
-
Pour the batter into the lined springform pan. Spread the batter evenly into the pan and smooth out the top using a spatula. Holding the side of the pan, gently lift and drop the pan on the counter about 6 times to remove any big air bubbles.
-
Place the springform pan into the water bath and bake the cake for 1 hour and 10 minutes. Check the cake for doneness by inserting a toothpick into the center of the cake. (It should come out clean.) Bake the cake for an additional 10-15 minutes to brown the top.
-
Turn off the oven and open the oven door slightly (about 2-3 inches) and let the Cotton Cheesecake cool in the oven for 1 hour.
-
Remove the Cotton Cheesecake from the pan. Place on a plate and refrigerate for at least 4 hours.
-
Serve with fresh fruit, fruit puree, chocolate sauce, whipped cream, etc.
-
Cover and refrigerate any remaining portions. Enjoy the Cotton Cheesecake within the week.
Recipe Video
Notes, Tips & Tricks
- As the cream cheese, eggs and butter need to be at room temperature, advanced planning is required. About 2 hours before making the cake, remove the cream cheese and butter from the refrigerator. About 1 hour before take the eggs out of the fridge. The cream cheese and butter should be soft and spreadable for this recipe. If these ingredients are not quite ready, pop them in the microwave on Low power for about 15-20 seconds.
- Eggs are easiest to separate when they are cold. Egg whites are best beaten at room temperature to achieve the fluffiest texture. Separate the eggs while they are cold and then let them come to room temperature as you prep the remaining ingredients for the recipe.
- Use an 8 inch by 3 inch round springform pan. Line the pan so the parchment paper extends about 2 inches above the pan. The parchment paper wall provides support since the cake rises to about 3 inches tall during baking. Keep the paper to no more than 5 inches tall. Too much paper will prevent the top of the cake from browning nicely.
- The water bath is essential for keeping the cake moist. As the cake bakes for longer than the typical cake, the water bath is crucial. Additionally, the water bath insulates the cake and allows it to cook at a consist temperature. These factors are important for achieving the fluffy and moist texture for the cake.
- Be sure to fold the egg whites into the batter. Do not beat or mix vigorously as this will deflate the egg whites. (If you’re not familiar with the fold technique, check out how I do it in the video.)
- As oven temperatures vary, check to see if the cake is done (by using a toothpick) after 1 hour of baking. Then bake the cake until the top is golden brown. This is one recipe where over-baking the cake is ok. You won’t ruin the cake! Depending on your oven it may take up to 1 1/2 hours. Again, this is just fine.
- If your cake cracks on top, the heat is too high or the cake is too close to the heating element. Make note of this and adjust these things the next time.
- This cake will shrink (about 1/2 inch or so) after cooling so please don’t despair. Leaving the cake in the oven after it’s done baking helps to minimize some of the deflating.
- Refrigerate the cake for at least 4 hours before eating. The cold air sets the cream cheese and greatly improves the flavor and texture.
Nutrition FactsCotton Cheesecake / Japanese CheesecakeAmount Per ServingCalories 265 Calories from Fat 162% Daily Value*Fat 18g28%Saturated Fat 10g63%Cholesterol 149mg50%Sodium 138mg6%Potassium 113mg3%Carbohydrates 19g6%Sugar 14g16%Protein 6g12%Vitamin A 720IU14%Vitamin C 0.7mg1%Calcium 63mg6%Iron 0.8mg4%* Percent Daily Values are based on a 2000 calorie diet.
Want to learn more about making Cotton Cheesecake / Japanese Cheesecake and the common challenges? Check out this post where I detail the most common frustrations and how to fix them.
Cotton Cheesecake Challenges: Deflation, Cracks, and Water Bath Issues


Hello,
If i want to make your recipe in a 5″ X 3″ Pan. shall i use 3/4 of the ingredients ?
Thank you very much for your time and your amazing recipes.
Best Regards,
Yes Sam, reducing the recipe would work. Good Luck!
It’s so awesome that you respond to all the questions! I was windering what your opinion is on using sugar replacements like stevia or monk fruit? Are those good alternatives or would they disturb the integrity of how the cheese cake comes out? I’m hoping to make a Keto version of this cake omitting both the flour and sugar and replacing with almond flour and either stevia or monk fruit as the sweetener.
Hi Gayle,
Using a sugar replacement is fine but use one that’s made for baking. In the past I’ve used Splenda Sugar Baking Blend but have not tried this recipe with stevia or monk fruit. Give your substitutions a try and please share your results. Good Luck!
Hi – I made the cake and it tastes great, but the cake was dense instead of ‘cake-like’. It was not on the bottom rack and the water bath was high. I also may have mixed the egg whites into the batter too vigorously.
Could any of these have caused the problem.
Thanks.
Actually – after reading other comments, I believe it was the water bath and possibly the egg whites. I am going to change the water bath to be beneath – but does that mean I put it below on a separate rack. Just want to confirm.
Thanks.
Hi Paul,
Yes put the water bath on a separate rack below the cake. Good Luck!
Hi Paul,
Over mixing the batter may deflate the fluffy egg whites causing the cake to be dense. Fold the egg whites gently into the batter. Give it another go. Good Luck! 🙂
Is there a substitute for the lemon juice? I have a citrus allergy but really want to try this!
You can skip it altogether. The lemon juice adds just a hint of tartness but is not a crucial ingredient.
Hello
I’m a home baker not a professional or anything and I don’t have anything fancy in my kitchen. I do hope you would help me coz I would love to get this right!
Ok I made these Japanese cheesecake three times. Two times it was disaster but third time it was decent. However my cheesecake SINKS! 🙁 It does not sink like a well but sinks like becomes flat and is only slightly elevated from original batter. It tastes smooth and creamy, not at all custardy. But it’s like a well made chiffon cake and not like cotton soft. So I’ll tell you what I’m doing. I’m using kraft Philadelphia cheese, properly measuring everything you mentioned. There are two differences, I’m using simple cake pan and baking in a standard convection oven. Although the cake tastes amazing but I would love that cotton soft texture and that dome shaped top.
Hi Ansh,
If your cake is sinking, it could be you’re over-whipping the egg whites or over-mixing the batter which could cause the cake to deflate. Also under-baking the cake could cause the cake to deflate as the walls cannot support the height of the cake. The recipe can be a bit tricky. Good Luck on the next round! 🙂
Hi, could I please ask two questions. if I use a fan force oven should I reduce your temp by 20c to 140c. Also if I cook this in a 10” pan should I use 1 and a half of your recipe.
Thanks
Linda
Hi Linda,
The conversion from convention oven to convection is 25 degrees F or 3.88 C so I would recommend reducing the oven temperature about 5 C. If you would like a taller cake, I do recommend making 1 1/2 the recipe. Good luck and Enjoy!
hi, can i use cake flour instead of apf?
Yes, cake flour is just fine.
I followed this recipe to the letter and the cake came out perfectly! I used a regular round 8 inch pan and lined it with parchment paper.
Hi Eileen,
Wonderful! I am so glad to hear you Cotton Cheesecake came out perfectly. Great to job to you!
hi trang,
thanks for the great recipe and i cant wait to try baking it! i was just wondering, why do you whisk the egg whites to soft peaks instead of hard peaks? because normally souffle recipes call for hard peaks. is there a particular reason to this and would it make the cake rise better if i had hard peaks?
thanks !
Hi Angie,
This is more of a cake recipe rather than a souffle recipe with the ingredients used. Soft peaks allows more margin for error. You can over-whip soft peaks and it’ll still be okay. Over-whip stiff peaks and you have a grainy mess and have to start over. If you’re a pro at whipping egg whites to the different stages, give the stiff peaks a try and let me know how it turns out. Good Luck!
Hi, i would like to know if i can use a regular round pan and just add the paper?
Hi Kathy,
I don’t think a regular cake pan with paper would provide enough structure for the weight of the batter.
You may be able to take heavy aluminum foil and make High sides. Tie a wire around outside of the pan. (To hold in place.bI used a bunch of bread tie wire one time) Then line with the paper.. can take off after baking. But may have trouble getting out of the pan..
Hi Trang,
i don’t know how many times I’ve tried baking this cheesecake. I’ve been having cracked surface for the last two tries i did. I’ve been using almost the same recipe but the instruction was bake in preheated 200deg for 18mins then lower to 140deg for 30mins. And then turn off the oven and leave the cake inside for another 30min with the over door close. And then remove from water bath and leave in the oven with door slightly open for another 30mins..i figured my oven was too hot so I baked my cake in160degrees and then lowered to 100. my cake was beautifully rising for the first 18mins and even after lowering the temperature, it’s gradually rising still looking pretty… but when i turn the oven off after about 50minutes of baking, when i had a glimpse, it started to crack… by the way i’ve been using cold water for waterbath since and everything looked perfect the last time only after turning the oven off,, my cake cracked again. What seems to be the problem? I really want to have a perfect beautiful top surface for this cake. It is still fluffly and and shrank just fine after baking but only the surface was cracked.
Hi Kristine,
You’ve identified the major culprit making the cake crack and that’s too much heat in the oven or positioning your cake too close to the top heating element. Another contributing factor is over-mixing the ingredients which may produce cake-cracking glutens or introduce too much air. It sounds like you have the temperature in control. Give your batter making process a quick review. Good Luck!
Thank you for responding! I’ve always put my cake at the bottom rack of the oven.. i would try again and hope it will turn out fine…. by the way, what will happen to the cake if the egg whites aren’t beaten to soft peaks? I mean a little less than soft peaks? Thanks again!
Hi Kristine,
A little less than soft peaks is just fine as long as the egg whites have some volume. Good Luck and I look forward to hearing about the results of your next round! 🙂