
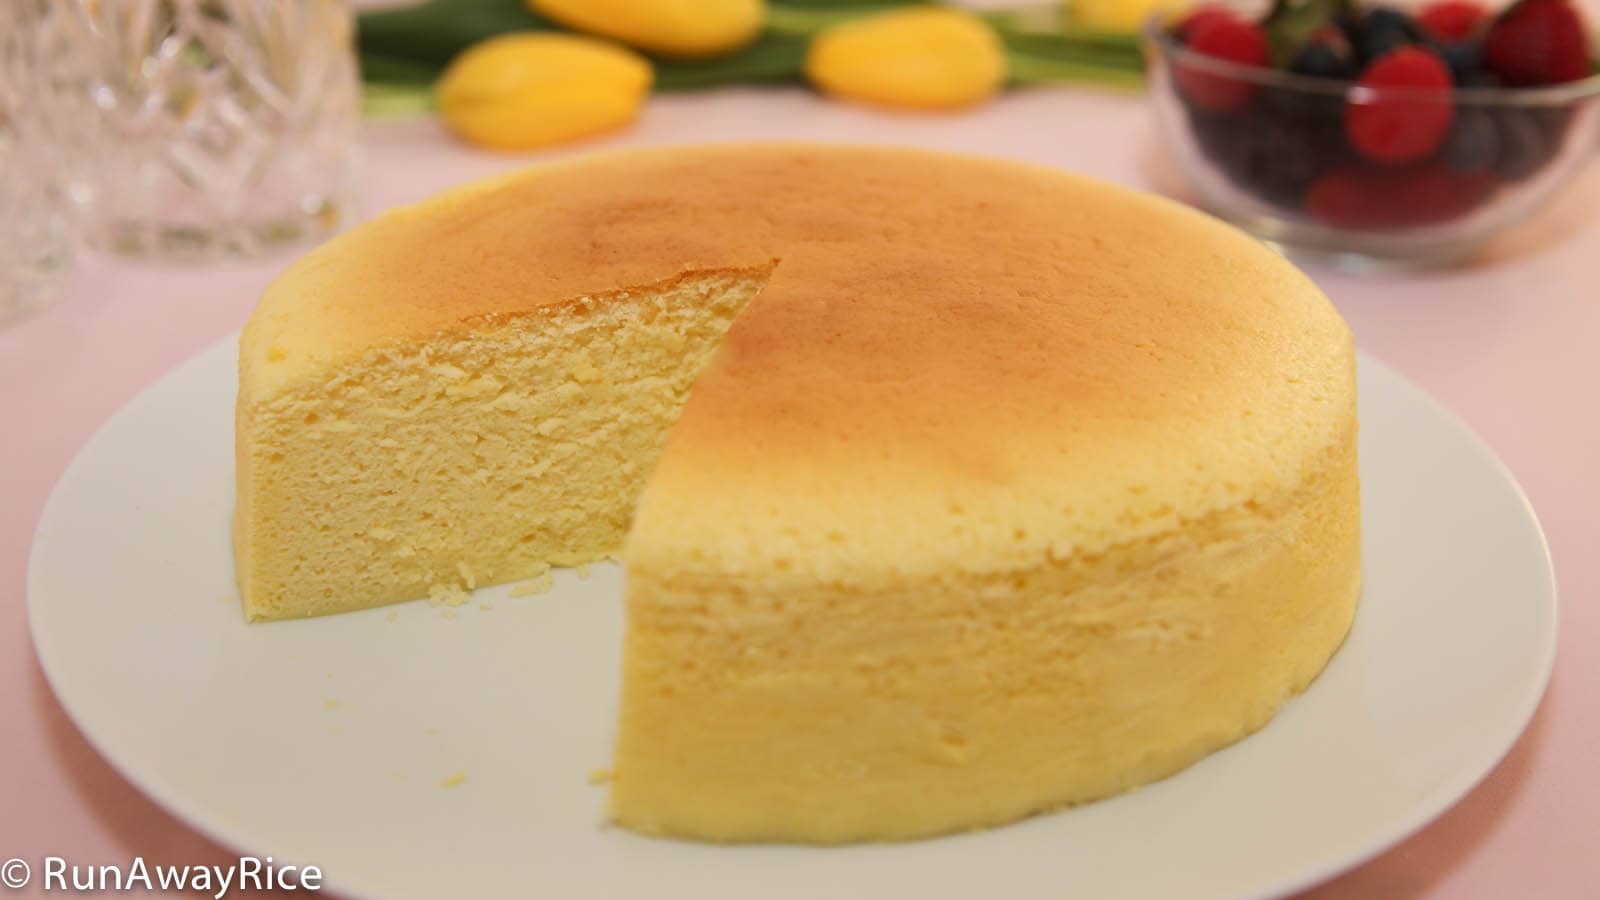
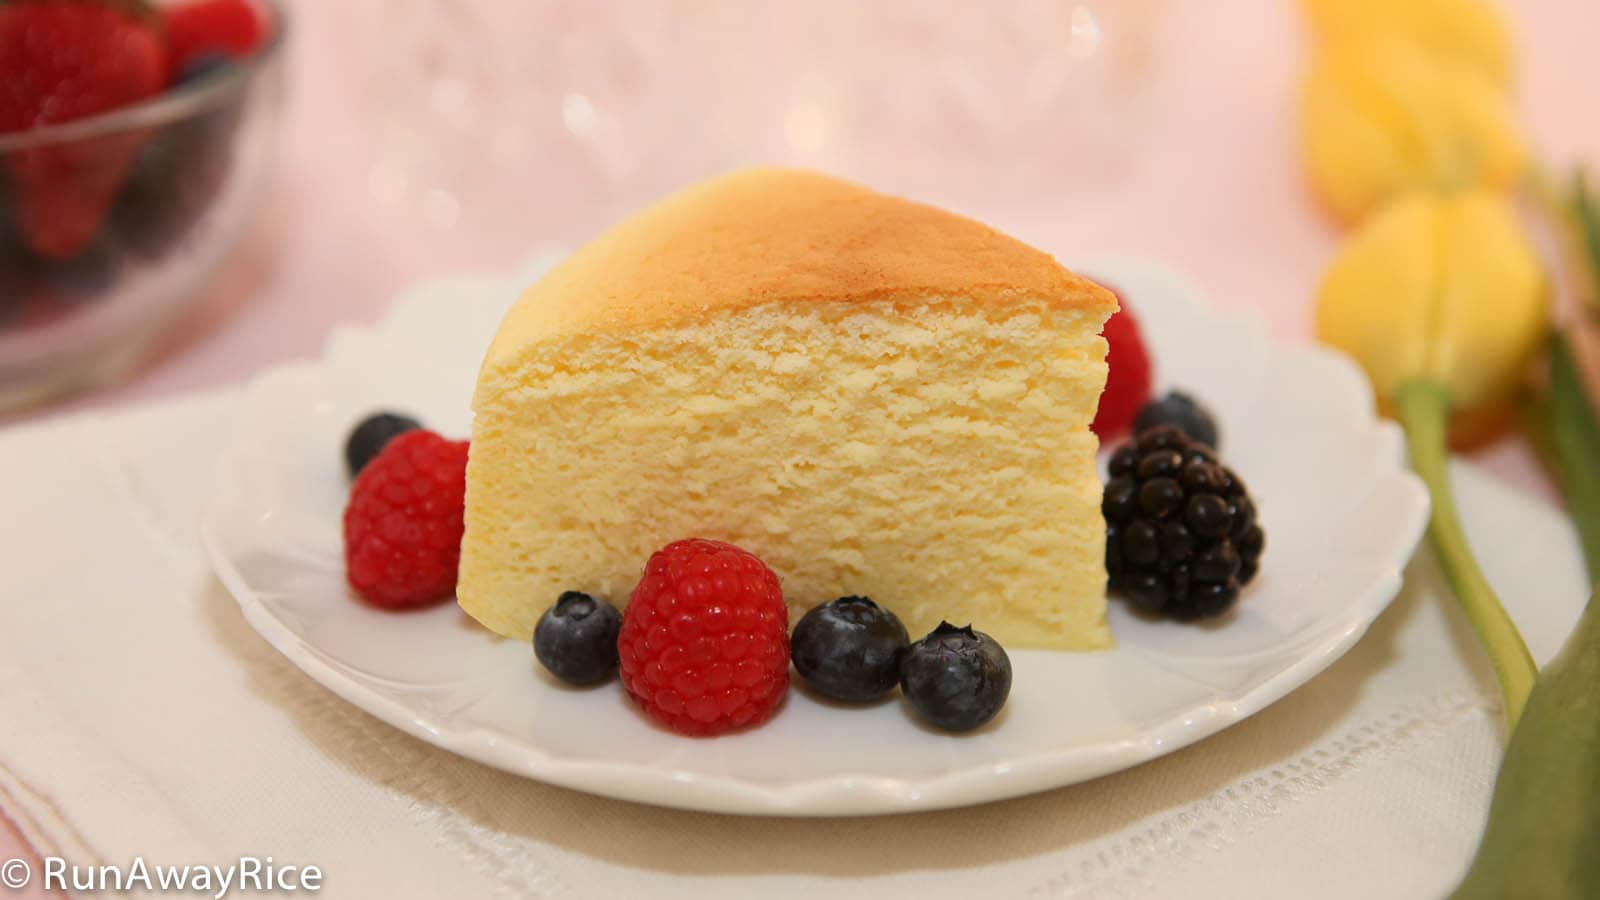
Cotton Cheesecake / Japanese Cheesecake is my new favorite dessert and after you try this recipe, it will become your favorite too! It’s the perfect combination of sponge cake and cheesecake in both taste and texture. What I love about this scrumptious cake is it’s not overly sweet as some cakes can be. The combination of fluffy cake with slightly tart cream cheese is absolutely heavenly. I hope you enjoy this Cotton Cheesecake / Japanese Cheesecake recipe as much as I do. Please note this recipe can be a bit tricky. Watch the video and follow the steps exactly. Happy Baking!
Watch the video for instructions.

Notes on the Cotton Cheesecake Recipe, Tips and Tricks
As the cream cheese, eggs and butter need to be at room temperature, advanced planning is required. About 2 hours before making the cake, remove the cream cheese and butter from the refrigerator. About 1 hour before, take the eggs out of the fridge. The cream cheese and butter should be soft and spreadable for this recipe. If the ingredients are not quite ready, pop them in the microwave on Low power for about 15-20 seconds.
Eggs are easiest to separate when they are cold. Egg whites are best beaten at room temperature to achieve the fluffiest texture. Separate the eggs while they are cold and then let them come to room temperature as you prep the remaining ingredients for the recipe.
Use an 8 inch by 3 inch round springform pan. Line the pan so the parchment paper extends about 2 inches above the pan. The parchment paper wall provides support since the cake rises to about 3 inches tall during baking. Keep the paper to no more than 5 inches tall. Too much paper will prevent the top of the cake from browning nicely.
The water bath is essential for keeping the cake moist. As the cake bakes for longer than the typical cake, the water bath is crucial. Additionally, the water bath insulates the cake and allows it to bake at a consist temperature. These factors are important for achieving the fluffy and moist texture for the cake.
Be sure to fold the egg whites into the batter. Do not beat or mix vigorously as this will deflate the egg whites. (If you’re not familiar with the fold technique, check out how I do it in the video.)
As oven temperatures vary, check to see if the cake is done (by using a toothpick) after 1 hour of baking. Then bake the cake until the top is golden brown. This is one recipe where over-baking the cake is ok. You won’t ruin the cake! Depending on your oven it may take up to 1 1/2 hours. Again, this is just fine.
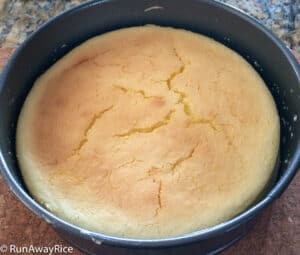
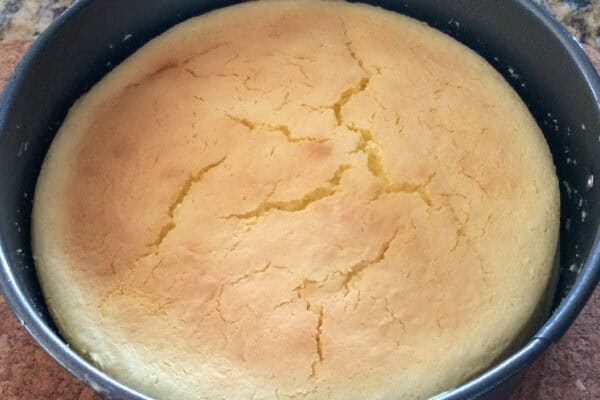
If your cake cracks on top, the heat is too high or the cake is too close to the heating element. Make note of this and adjust these things the next time.
The Cotton Cheesecake will shrink (about 1/2 inch or so) after cooling so please don’t despair. Leaving the cake in the oven after it’s done baking helps to minimize some of the deflating.
Refrigerate the Cotton Cheesecake for at least 4 hours before eating. The cold air sets the cream cheese and greatly improves the flavor and texture.
Store any remaining cake in the refrigerator for up to 1 week. To freeze, wrap the cake securely with plastic wrap and then a layer of foil. Freeze for up to 3 months.
✨✨I just shared a post on the most common challenges with making Cotton Cheesecake / Japanese Cheesecake and I explain all the details with pictures of my past frustrations. If you’re new to making this cheesecake or have made it without much success, check out the post before starting the recipe!
 Cotton Cheesecake Challenges: Deflation, Cracks, and Water Bath Issues
If you enjoy this Cotton Cheesecake / Japanese Cheesecake recipe, you may also like:
Chocolate Cotton Cheesecake / Japanese Cheesecake
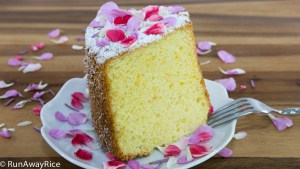
Orange Chiffon Cake with Edible Flowers
Cotton Cheesecake / Japanese Cheesecake
Ingredients
5 large eggs, at room temperature
1/4 tsp cream of tartar
1/2 cup sugar, divided
8 oz cream cheese, at room temperature
1/2 cup low-fat milk
1/4 cup unsalted butter, at room temperature
1 Tbsp lemon juice
1/4 cup all-purpose flour
2 Tbsp corn starch
Directions
Line the bottom and side of the springform pan with parchment paper. Wrap the springform pan with several sheets of foil, sealing it completely.
Fill a large baking pan halfway with water. Place it in the oven on the lowest rack. Preheat the oven to 315 F (157 C).
Separate the eggs and place the egg whites into a mixing bowl and the yolks into a measuring cup.
Beat the egg whites on Low speed for 30 seconds. Increase the speed to Medium Low and beat for another 30 seconds or until foamy. Add the cream of tartar. Increase the speed to Medium High and beat until the egg whites just start to thicken. Add 1/4 cup sugar gradually. Continue beating until the egg whites reach the soft peaks stage (approximately 3 minutes using a stand mixer).
In a separate bowl, add the cream cheese and milk. Mix on Low speed until creamy and smooth (approximately 2-3 minutes). Add the butter, remaining 1/4 cup sugar and lemon juice and beat for 1 minute. Add the flour and corn starch and mix for another minute. Finally add the egg yolks and mix for 1 more minute. Strain the batter using a sieve.
Add 1/3 of the egg whites and gently fold into the batter until mostly incorporated. Add another 1/3 and gently fold. Add the remaining 1/3 and gently fold.
Pour the batter into the lined springform pan. Spread the batter evenly into the pan and smooth out the top using a spatula. Holding the side of the pan, gently lift and drop the pan on the counter about 6 times to remove any big air bubbles.
Place the springform pan into the water bath and bake the cake for 1 hour and 10 minutes. Check the cake for doneness by inserting a toothpick into the center of the cake. (It should come out clean.) Bake the cake for an additional 10-15 minutes to brown the top.
Turn off the oven, open the oven door slightly (about 2-3 inches) and let the Cotton Cheesecake cool in the oven for 1 hour.
Remove the Cotton Cheesecake from the pan. Place on a plate and refrigerate for at least 4 hours.
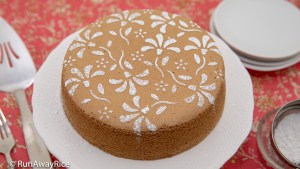
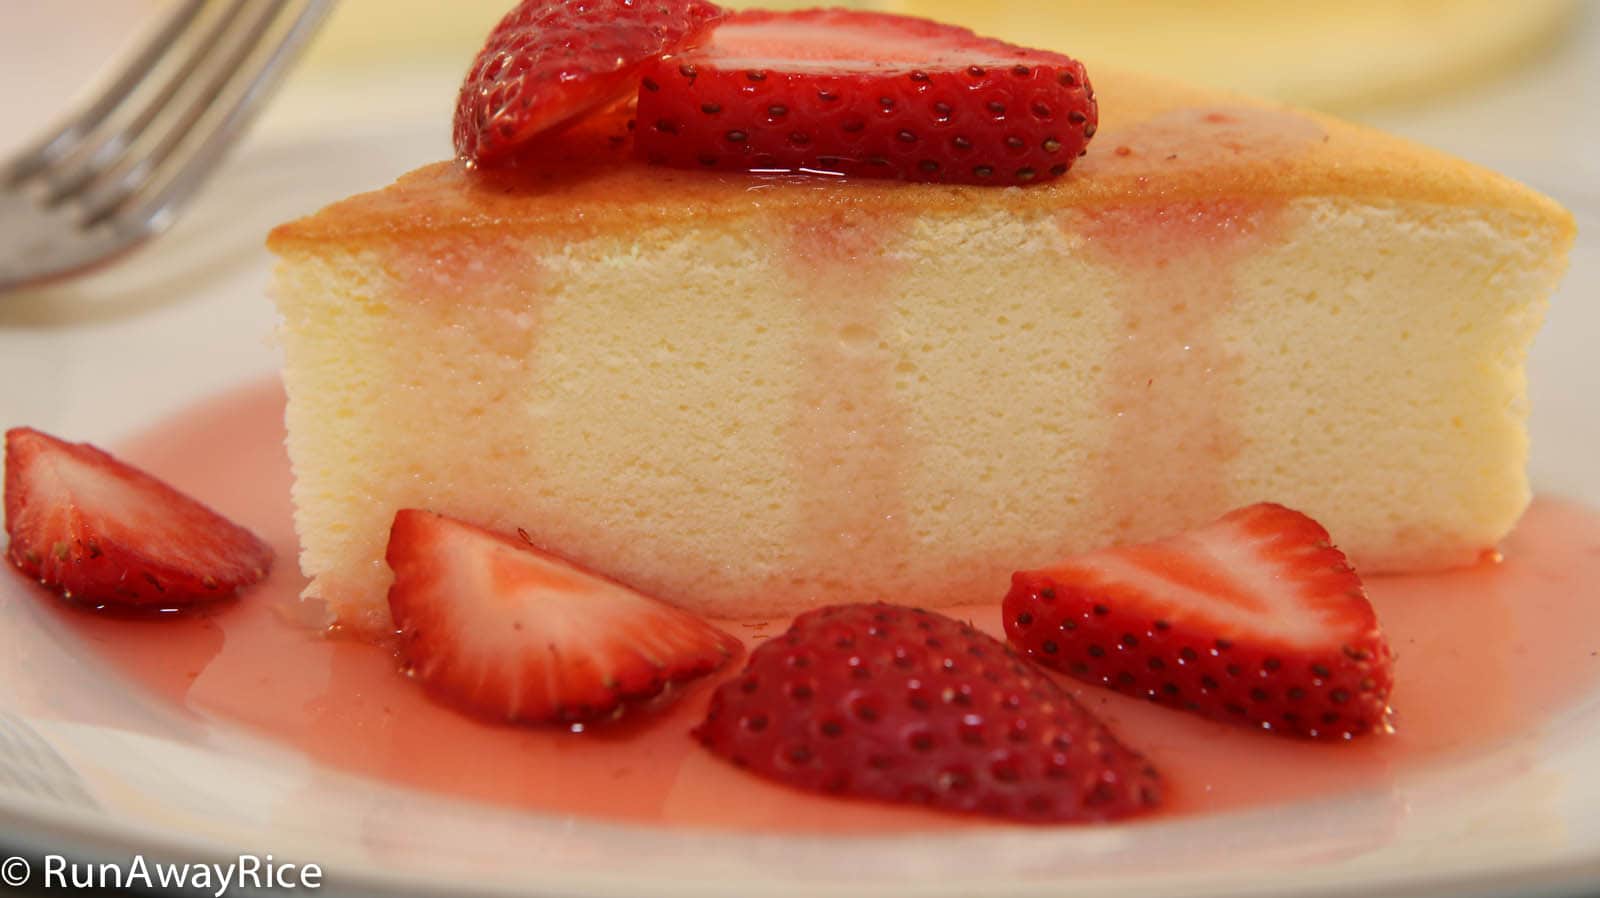
Serve with fresh fruit, fruit puree, chocolate sauce, whipped cream, etc.
Cover and refrigerate any remaining portions. Enjoy the Cotton Cheesecake within the week.
Yields: 8 servings

Cotton Cheesecake / Japanese Cheesecake
Cotton Cheesecake / Japanese Cheesecake is my new favorite dessert and after you try this recipe, it will become your favorite too. It's the perfect combination of sponge cake and cheesecake in both taste and texture. What I love about this scrumptious cake is it's not overly sweet as some cakes can be. The combination of fluffy cake with slightly tart cream cheese is absolutely heavenly. I hope you enjoy the recipe as much as I do. Please note this recipe can be a bit tricky. Watch the video and follow the steps exactly. Happy Baking!
Ingredients
- 5 large eggs , at room temperature
- 1/4 tsp cream of tartar
- 1/2 cup sugar , divided
- 8 oz cream cheese , at room temperature
- 1/2 cup low-fat milk
- 1/4 cup unsalted butter , at room temperature
- 1 Tbsp lemon juice
- 1/4 cup all-purpose flour
- 2 Tbsp corn starch
Bakeware
- 8 inch round springform pan
Instructions
-
Line the bottom and side of the springform pan with parchment paper. Wrap the springform pan with several sheets of foil, sealing it completely.
-
Fill a large baking pan halfway with water. Place it in the oven on the lowest rack. Preheat the oven to 315 F (157 C).
-
Separate the eggs and place the egg whites into a mixing bowl and the yolks into a measuring cup.
-
Beat the egg whites on Low speed for 30 seconds. Increase the speed to Medium Low and beat for another 30 seconds or until foamy. Add the cream of tartar. Increase the speed to Medium High and beat until the egg whites just start to thicken. Add 1/4 cup sugar gradually. Continue beating until the egg whites reach the soft peaks stage (approximately 3 minutes using a stand mixer).
-
In a separate bowl, add the cream cheese and milk. Mix on Low speed until creamy and smooth (approximately 2-3 minutes). Add the butter, remaining 1/4 cup sugar and lemon juice and beat for 1 minute. Add the flour and corn starch and mix for another minute. Finally add the egg yolks and mix for 1 more minute. Strain the batter using a sieve.
-
Add 1/3 of the egg whites and gently fold into the batter until mostly incorporated. Add another 1/3 and gently fold. Add the remaining 1/3 and gently fold.
-
Pour the batter into the lined springform pan. Spread the batter evenly into the pan and smooth out the top using a spatula. Holding the side of the pan, gently lift and drop the pan on the counter about 6 times to remove any big air bubbles.
-
Place the springform pan into the water bath and bake the cake for 1 hour and 10 minutes. Check the cake for doneness by inserting a toothpick into the center of the cake. (It should come out clean.) Bake the cake for an additional 10-15 minutes to brown the top.
-
Turn off the oven and open the oven door slightly (about 2-3 inches) and let the Cotton Cheesecake cool in the oven for 1 hour.
-
Remove the Cotton Cheesecake from the pan. Place on a plate and refrigerate for at least 4 hours.
-
Serve with fresh fruit, fruit puree, chocolate sauce, whipped cream, etc.
-
Cover and refrigerate any remaining portions. Enjoy the Cotton Cheesecake within the week.
Recipe Video
Notes, Tips & Tricks
- As the cream cheese, eggs and butter need to be at room temperature, advanced planning is required. About 2 hours before making the cake, remove the cream cheese and butter from the refrigerator. About 1 hour before take the eggs out of the fridge. The cream cheese and butter should be soft and spreadable for this recipe. If these ingredients are not quite ready, pop them in the microwave on Low power for about 15-20 seconds.
- Eggs are easiest to separate when they are cold. Egg whites are best beaten at room temperature to achieve the fluffiest texture. Separate the eggs while they are cold and then let them come to room temperature as you prep the remaining ingredients for the recipe.
- Use an 8 inch by 3 inch round springform pan. Line the pan so the parchment paper extends about 2 inches above the pan. The parchment paper wall provides support since the cake rises to about 3 inches tall during baking. Keep the paper to no more than 5 inches tall. Too much paper will prevent the top of the cake from browning nicely.
- The water bath is essential for keeping the cake moist. As the cake bakes for longer than the typical cake, the water bath is crucial. Additionally, the water bath insulates the cake and allows it to cook at a consist temperature. These factors are important for achieving the fluffy and moist texture for the cake.
- Be sure to fold the egg whites into the batter. Do not beat or mix vigorously as this will deflate the egg whites. (If you’re not familiar with the fold technique, check out how I do it in the video.)
- As oven temperatures vary, check to see if the cake is done (by using a toothpick) after 1 hour of baking. Then bake the cake until the top is golden brown. This is one recipe where over-baking the cake is ok. You won’t ruin the cake! Depending on your oven it may take up to 1 1/2 hours. Again, this is just fine.
- If your cake cracks on top, the heat is too high or the cake is too close to the heating element. Make note of this and adjust these things the next time.
- This cake will shrink (about 1/2 inch or so) after cooling so please don’t despair. Leaving the cake in the oven after it’s done baking helps to minimize some of the deflating.
- Refrigerate the cake for at least 4 hours before eating. The cold air sets the cream cheese and greatly improves the flavor and texture.
Nutrition FactsCotton Cheesecake / Japanese CheesecakeAmount Per ServingCalories 265 Calories from Fat 162% Daily Value*Fat 18g28%Saturated Fat 10g63%Cholesterol 149mg50%Sodium 138mg6%Potassium 113mg3%Carbohydrates 19g6%Sugar 14g16%Protein 6g12%Vitamin A 720IU14%Vitamin C 0.7mg1%Calcium 63mg6%Iron 0.8mg4%* Percent Daily Values are based on a 2000 calorie diet.
Want to learn more about making Cotton Cheesecake / Japanese Cheesecake and the common challenges? Check out this post where I detail the most common frustrations and how to fix them.
Cotton Cheesecake Challenges: Deflation, Cracks, and Water Bath Issues


Hello! I made this ale today the other day and it’s it was FANTASTIC! However, I do the extra hour in the oven but it’s turned out fine (only shrank a little). Nor did we put it in the fridge for four hours (I’m afraid im a bit impatient). Are these steps necessary? If so, why?
Hi Alyssa,
Cooling in the fridge sets the cake further so it achieves the creamy cheesecake texture. But if you can’t wait, go for it! It’s wonderful just out of the oven too. Enjoy!
Can I use a glass bottom spring form pan and eliminate the parchment paper at the bottom?
Hi Dee, a glass bottom springform pan without the parchment is just fine if you don’t have any problems with it sticking. Let me know how it turns out for you!
Hi! My cake didn’t end up rising… do you have any idea why?
Hi Jana,
The top reason for the cake not rising is the preparation of the egg whites–either over-beating or under-beating the whites. The air in the egg whites along with the heat is what causes the cake to rise during baking. Also don’t over stir the batter, this could also cause the egg whites to flatten and the cake to not rise as well. Give it another try. Good Luck!
My cake is also not rise
Question
After making this recipe how long would you say this would last? My friend wants to make this for her wedding cake. How long can you leave it in the fridge, and how long will it last?
Also…
I made this recipe and it turned out pretty good. I had to try twice as my oven is small and the cake was too close to the top and bottom. After the temp change it was perfection. Thank you so much for this recipe.
Hi Fenay,
I am so glad to hear that with a few oven adjustments you were successful. Great job! Regarding your questions, you can make the Cotton Cheesecake up to 3 days ahead and store in the refrigerator. Be sure to seal it well so the cake doesn’t dry out. In the fridge, the cake is good for up to 5 days. Best wishes to you and your friend with her wedding! 🙂
Hello!
I just tried to make this, and it was a decent first attempt but I’m trying to figure out how to fix xome issues…
*the top half of the cake was nice and fluffy, but the bottom was very very dense (I didn’t use a pan with a removable base so I know it wasn’t water leakage)
*I used a glass pie pan for the water bath but I think I filled it too high because the water boiled and splattered out of the dish
*overall the cake didn’t shrink too much, but it didn’t really rise significantly in the first place…I lined an 8″x2″ pan with paper and it didn’t really extend past the lip of the pan…
Definitely going to try again–woukd love some advice!
Thanks
Hi Allie,
Overall, I think you were successful on your first attempt. The dense bottom sounds like the cake was steamed rather than baked. It seems the water in the bath got really hot. Is it possible you have a bottom heating element in the oven that is too close to the bottom of the pan? If your oven permits, try to center it between the top and bottom heating elements. The cake not rising properly could be a number of things. Beating the egg whites properly and then folding gently into the batter as to not deflate the whites are the keys to getting the cake to rise and be fluffy. The cake should definitely rise above batter line. Let me know how you do on the next try. Good Luck!
Hi! Thanks for this recipe, Im making this right now, ive noticed the top has browned at 30minutes into the oven, its in the lowest rack already. What adjustments can I make for next time? At 1hr10 mins, its so dark brown and cracked on the side…. i have yet to taste it, hopefully it’ll taste fine and not too dry…
Hi Melfread,
It sounds like your oven may run a bit hotter. On the next try, reduce the heat by 20-25 degrees and bake the cake at a lower temperature. Optionally, cover the top with foil and bake. Remove the foil 15-20 minutes before the end of the baking time and allow the top to brown. Good Luck!
I loved your recipe! I have to confess, I did not Strain the batter using a sieve. I don’t have that.
My cake turned out pretty good. The only think I didn’t like was that the sides weren’t smooth cause I had problems with the liners staying put. AND, the top of my cake was very pale compared to yours. Any suggestions?
Hi Janice,
Skipping the straining is not a problem as long as everything is mixed evenly. I am glad to hear your cake turned out well. I use a little butter to stick the parchment paper to the side of the pan. If your pan is high enough, you can try omitting the liner next time for a smoother cake. Regarding the top being pale, you can brown the top more by increasing the heat to 375 F for the last 10-15 minutes. Watch over it, as the top of the cake can brown very quickly and burn. However, a paler cake is perfectly acceptable! 🙂
Hi Trang,
If u could kindly let me know how long I need to pre heat the oven?
Hi Selina,
It really depends on the size of your oven and the power. Generally, for a full-size oven, it takes about 15 to 20 minutes. Good Luck with the recipe!
Is cream of tar tar essential?
It helps to stabilize the egg whites and so I recommend it. Good Luck with the recipe!
It would be much easier if you gave all ingredients in grams.. Cup measurements are far from universal and not as accurate.
Hi Scott,
Appreciate the feedback. I hope to get a recipe plug-in which will provide the ability to select a metric option. For now, please use the Kitchen Calculator on the right side bar. Thanks for stopping by. 🙂