
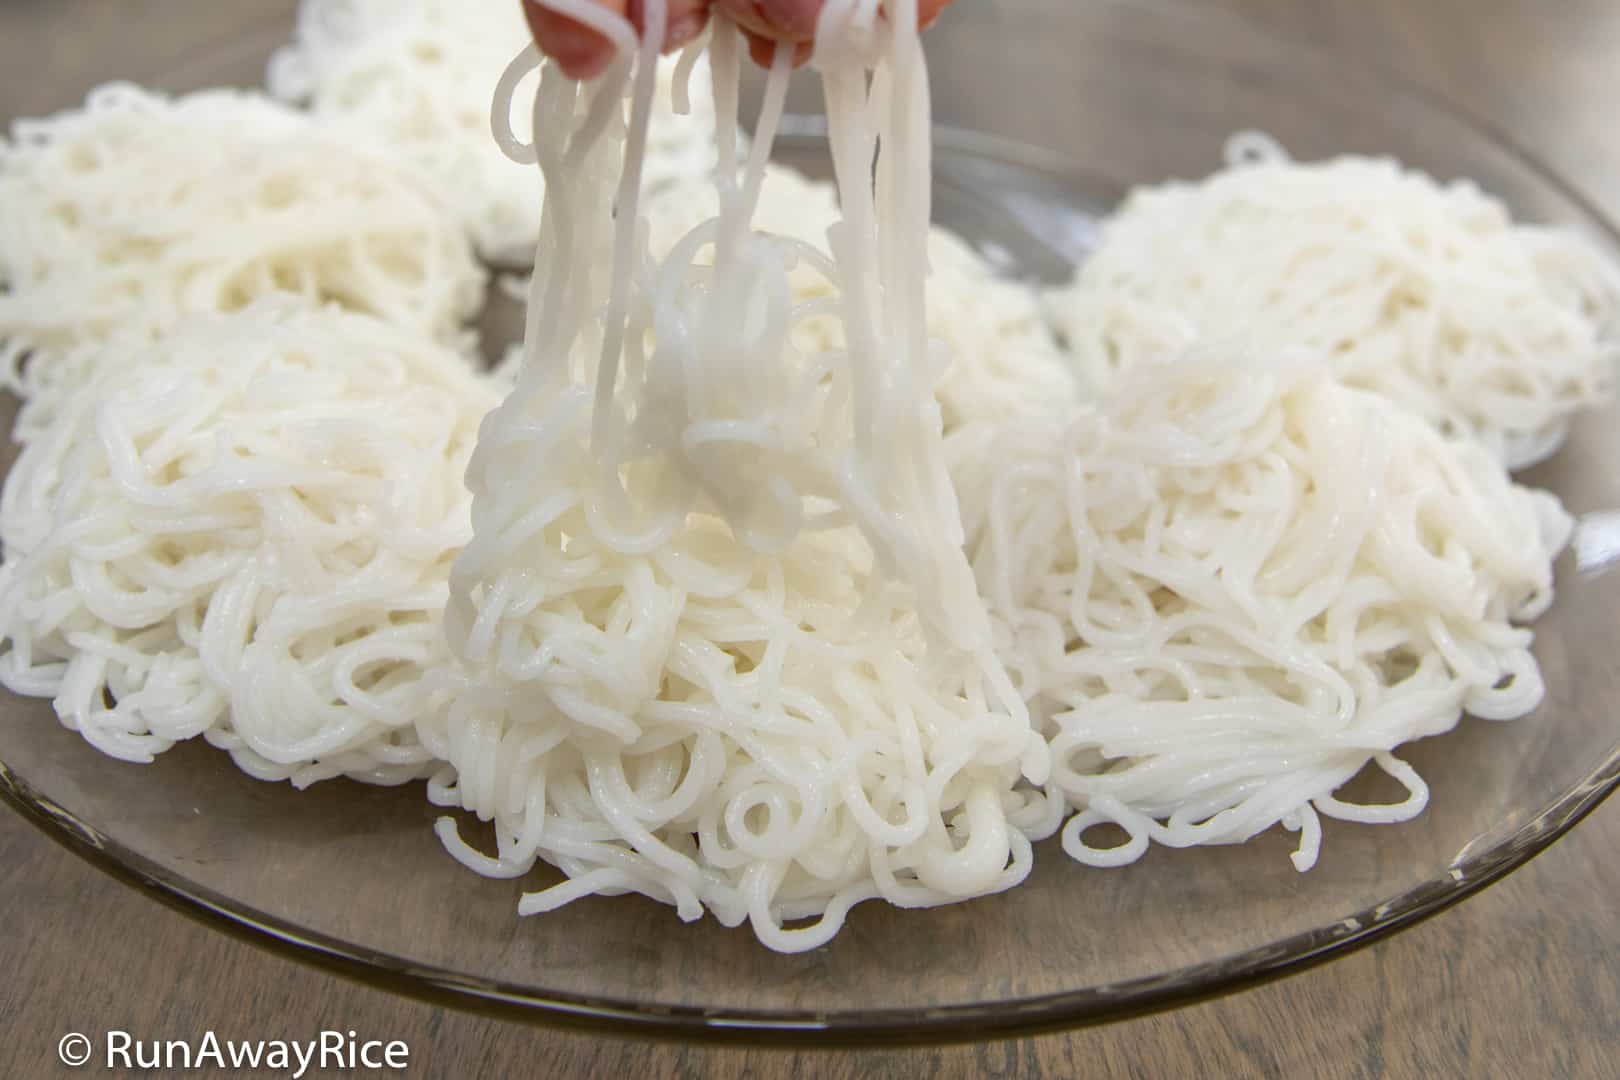
I received lots of requests for instructions on how to make the vermicelli / thin noodle disk used in the Rice Noodle / Rice Vermicelli (Bun Tuoi) recipe I shared. I love that you enjoy DIY projects and I am happy to share the step-by-step process in this post. Making a vermicelli disk for a potato ricer is fairly easy and requires a few tools I think most of us have at home. This little project takes about 1 hour. Let’s get started!
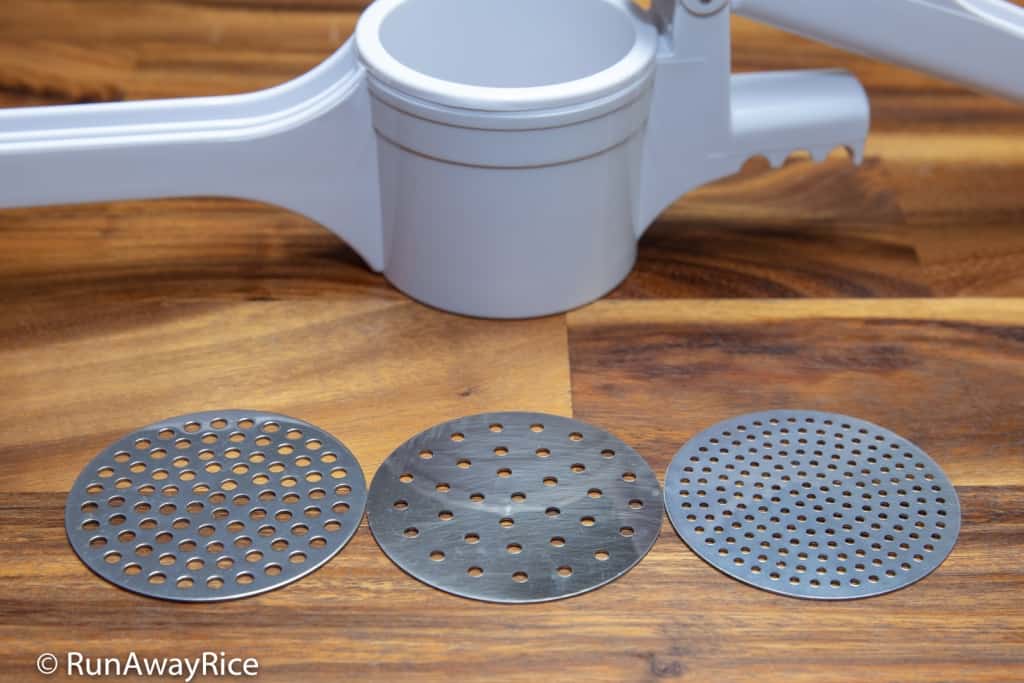
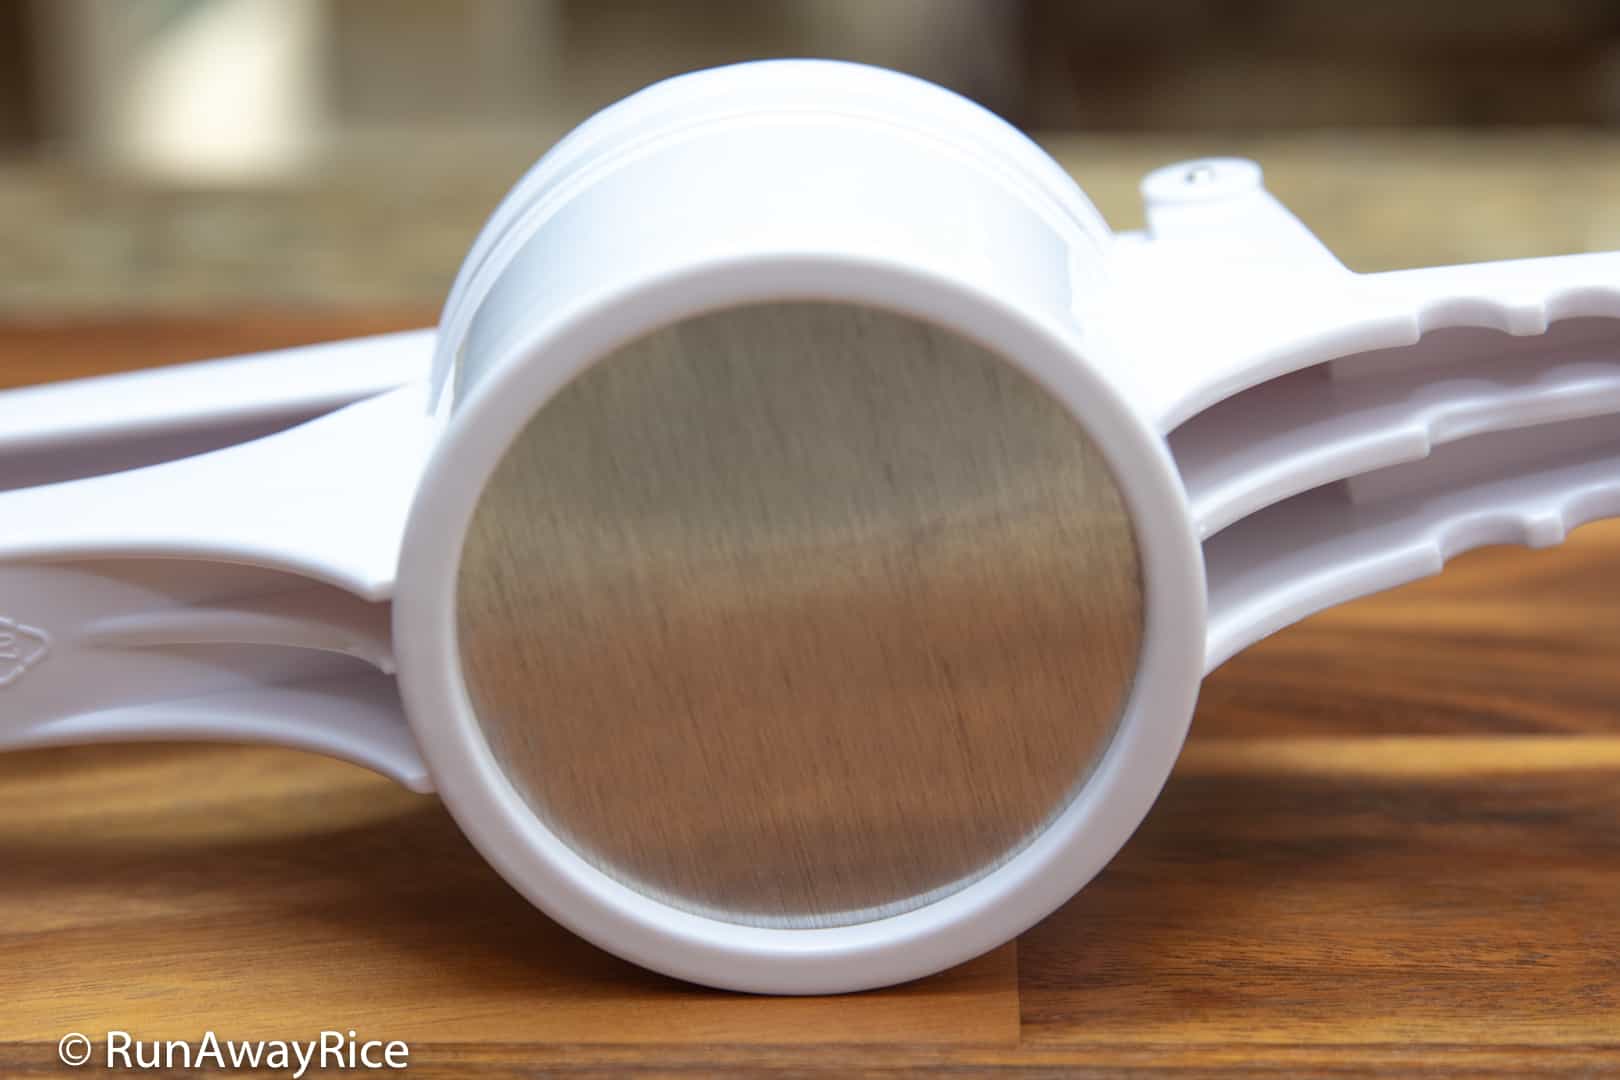
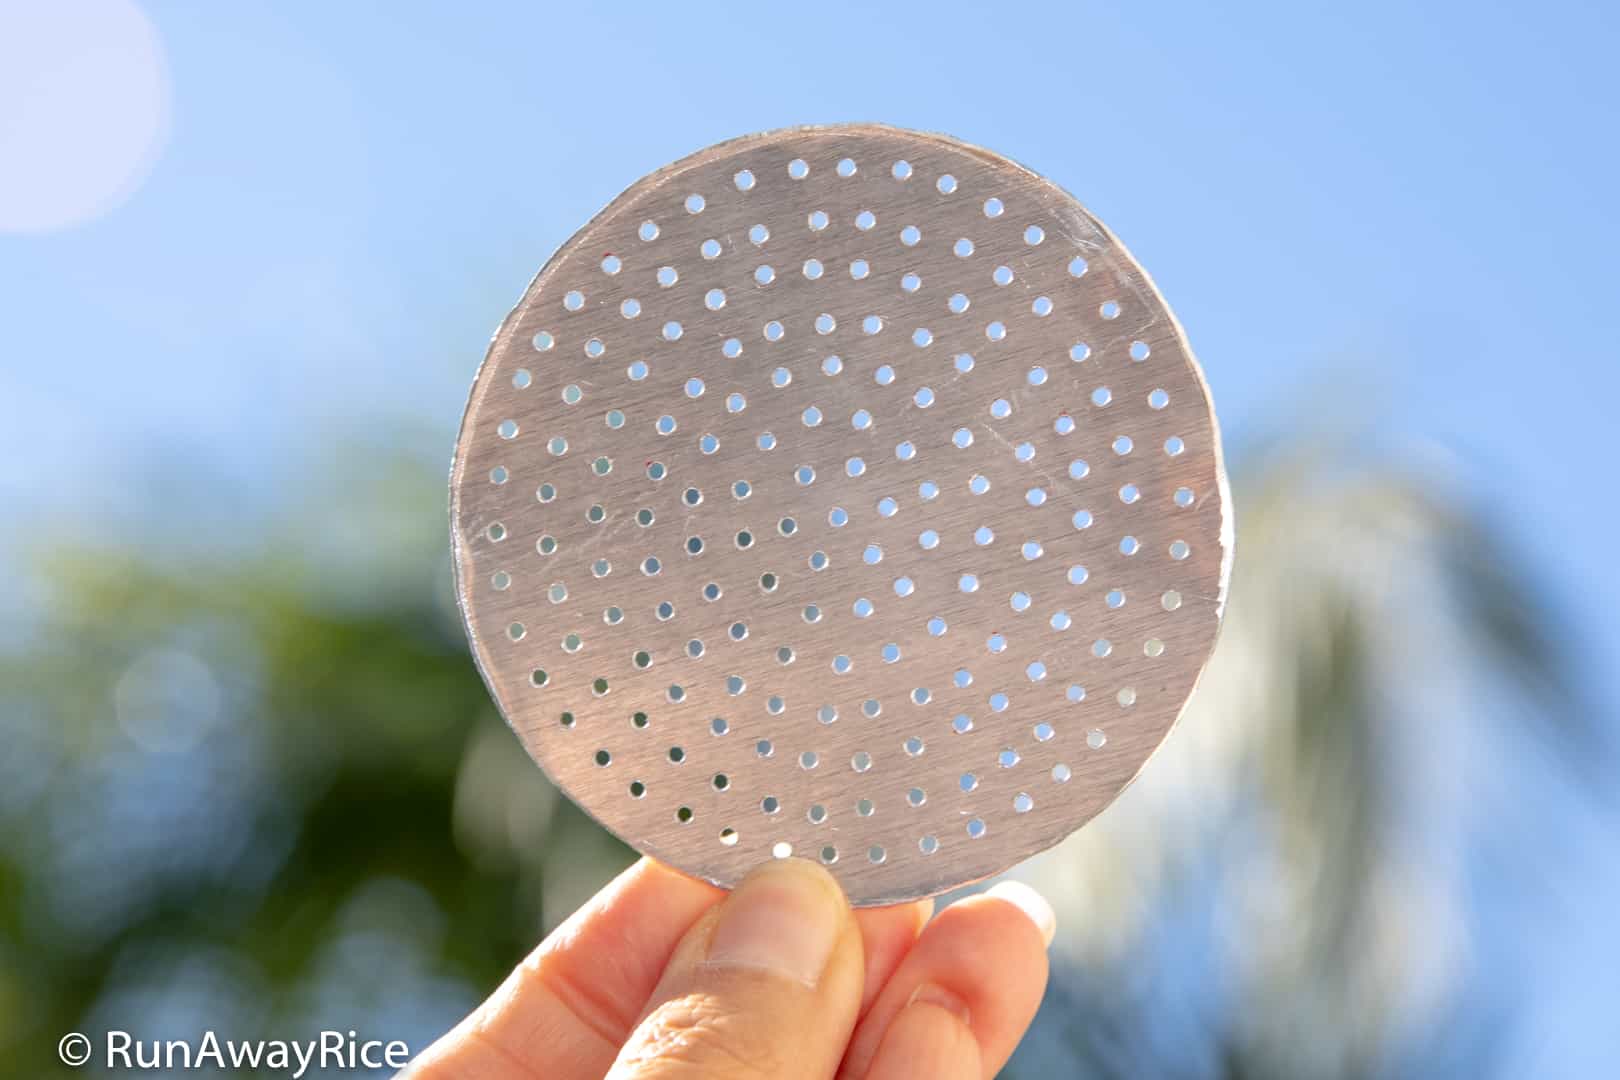
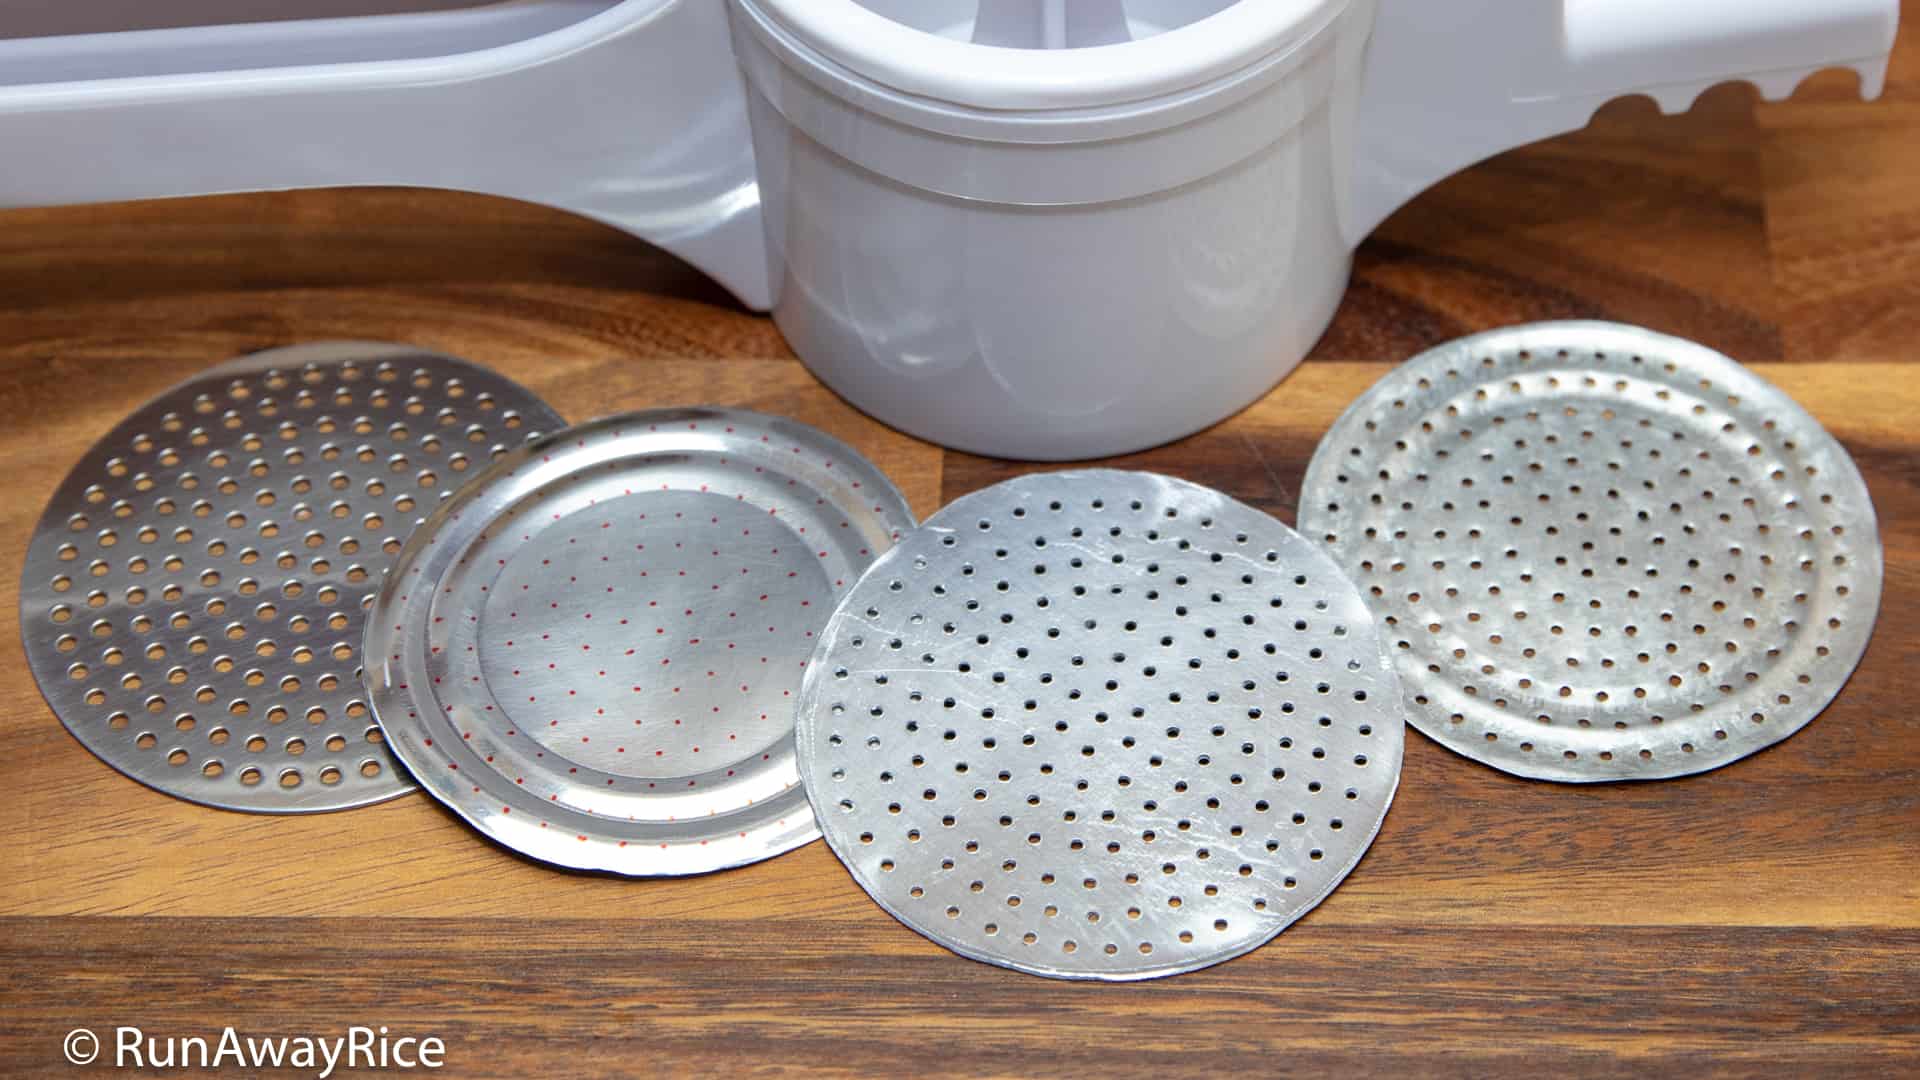
I use the Metaltex Potato Ricer for making Rice Noodle / Rice Vermicelli (Bun Tuoi). It comes with three interchangeable stainless steel disks with holes sized as Coarse, Medium and Fine. The large holes (Coarse) are .20 inches (5 mm). The medium holes (Medium) are .16 inches (4 mm). The small holes (Fine) are .08 inches (2 mm), about the thickness of spaghetti. Each disk is 3 3/16 inches in diameter.
Making the Vermicelli Disk: Materials
Stainless steel, like the disks included with the potato ricer, is the ideal material to use. It’s rust-free and strong. If you can find the same type of steel, that’s the way to go. However, the thicker steel would require heavy-duty tools: steel cutters, a heavy-duty drill and cobalt or titanium drill bits. I am guessing most of us don’t have these tools in our garage.
Keeping the materials easy to find and inexpensive, my first choice is to use the tin from an 8 ounce can of Dole pineapple chunks. When sizing a can, make sure an original disk fits entirely inside the can bottom.

Aluminum is another good choice. It’s light-weight yet strong, rust-free and easy to find. I purchased a 6 by 18 inch (.025 inch thickness) piece of aluminum from Lowe’s for $10.
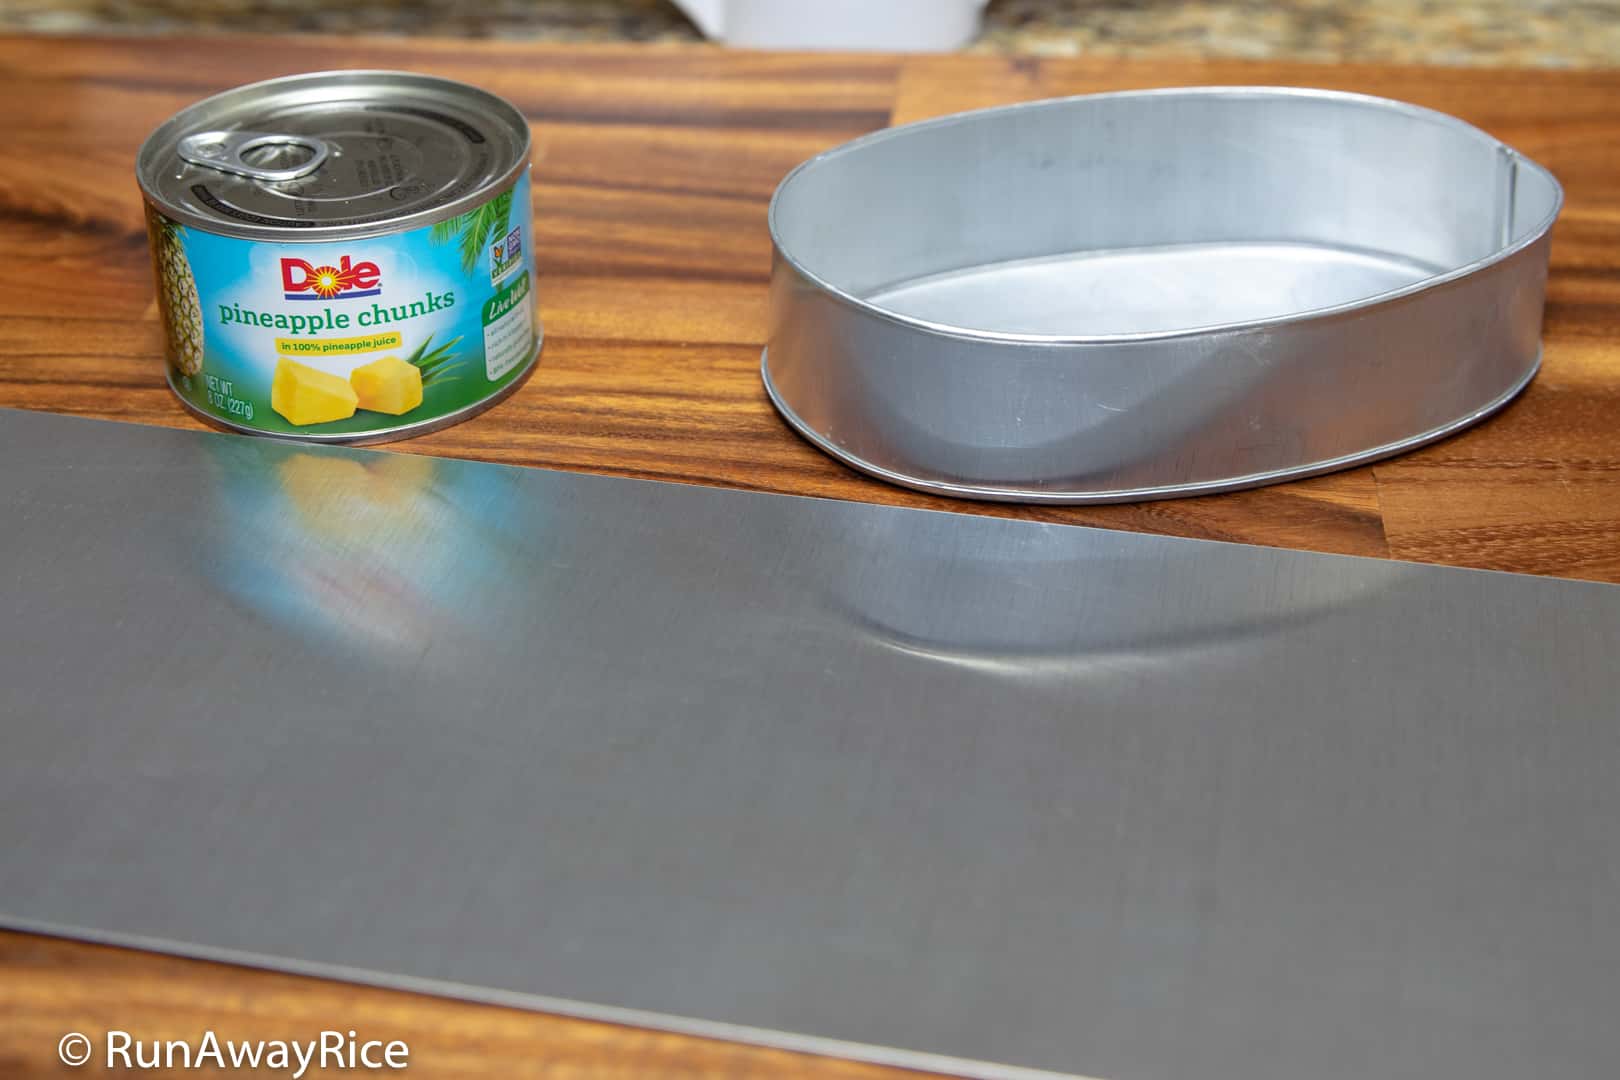
Shop around at your local stores for similar materials. I found a small aluminum pan for $1.59 at a nearby Filipino grocer. The aluminum is thin enough to be cut with heavy-duty scissors or tin snips.
Making the Vermicelli Disk: The Steps
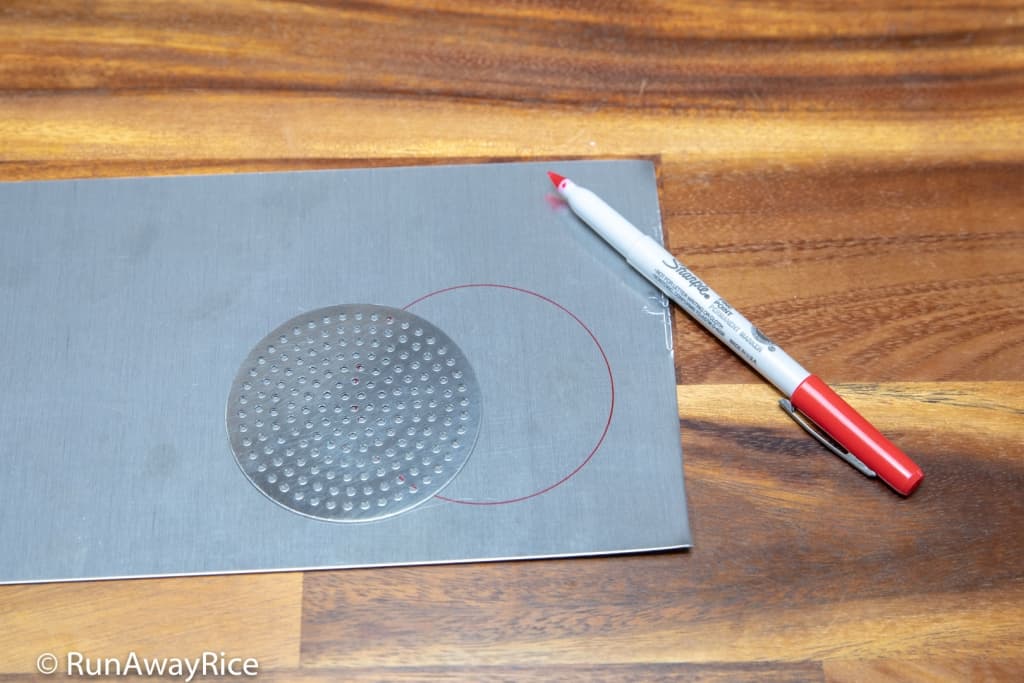
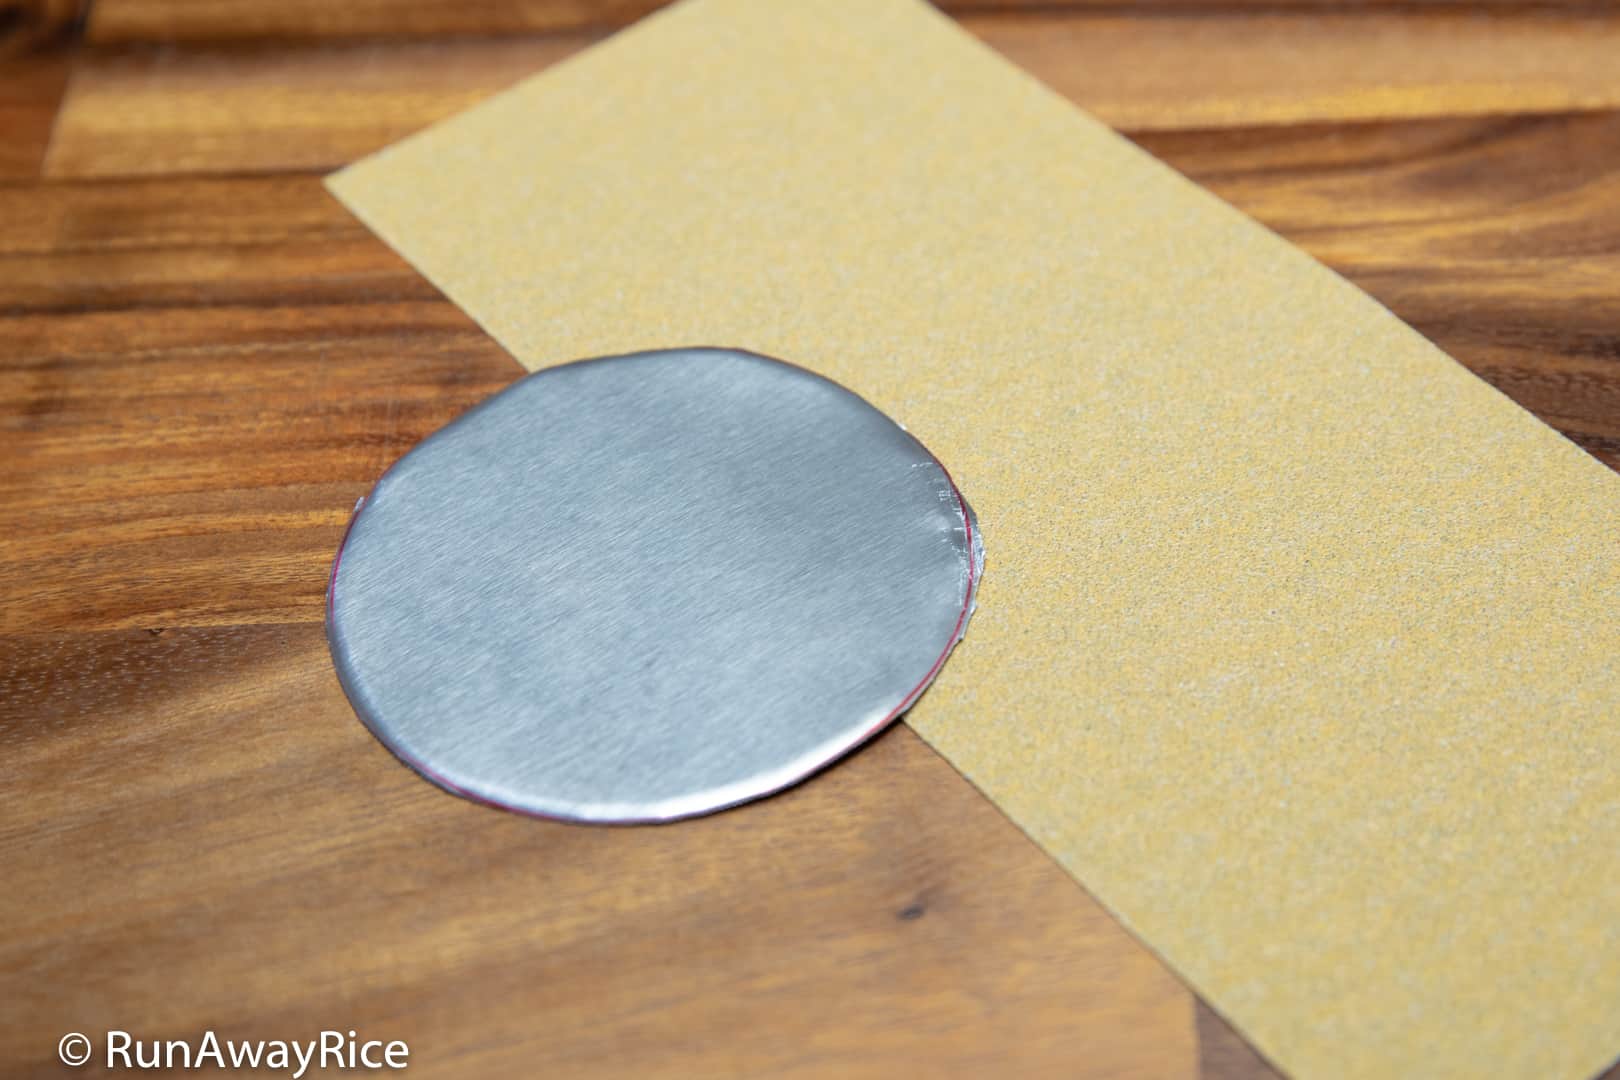
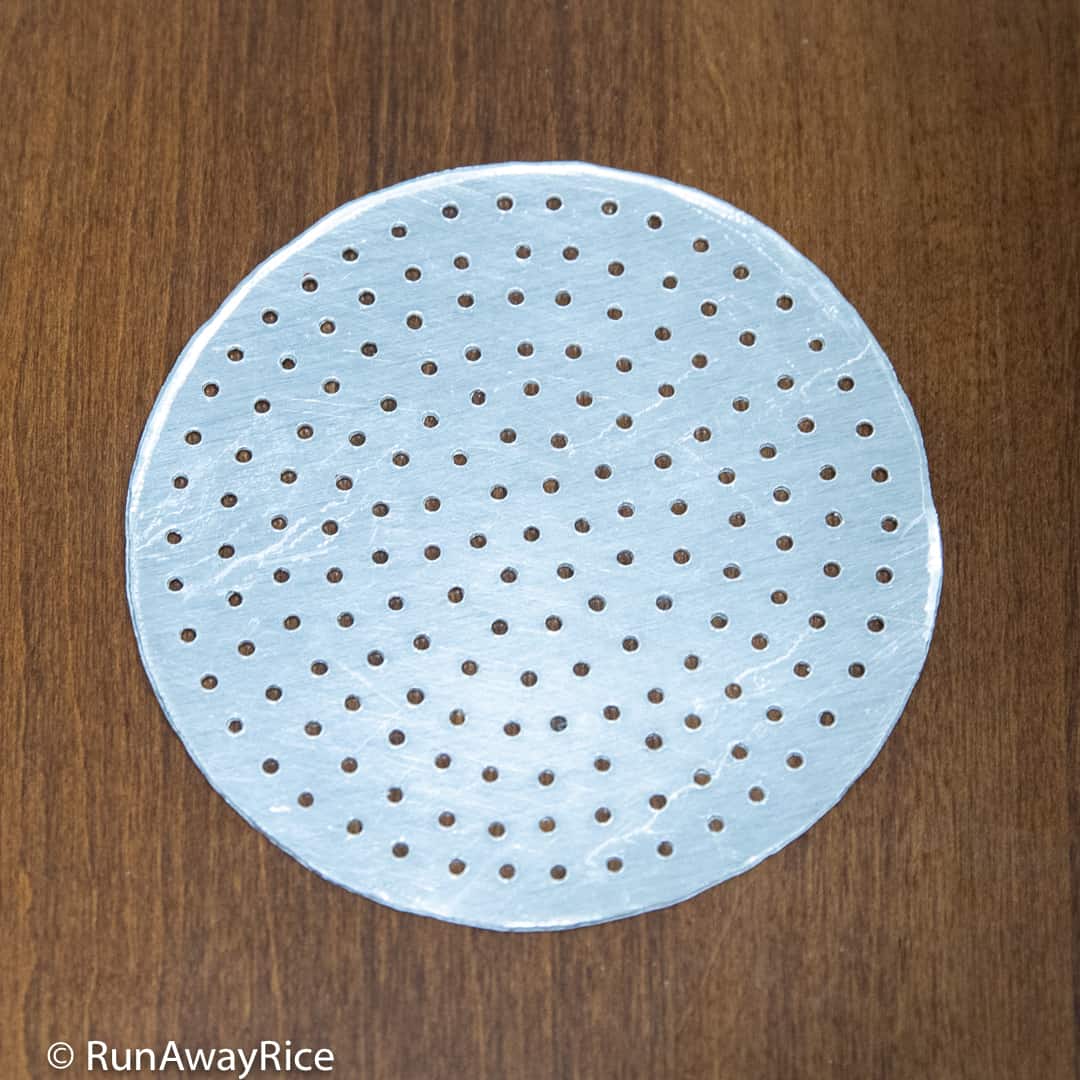
- Using one of the original potato ricer disks as a template, trace around the disk making a circle on the metal.
- Cut out the circle for the new disk using heavy-duty shears. Cut along the inside of the drawn line, otherwise your disk may be too big to fit into the potato ricer. If using tin from a can, simply use a can opener to remove the bottom.
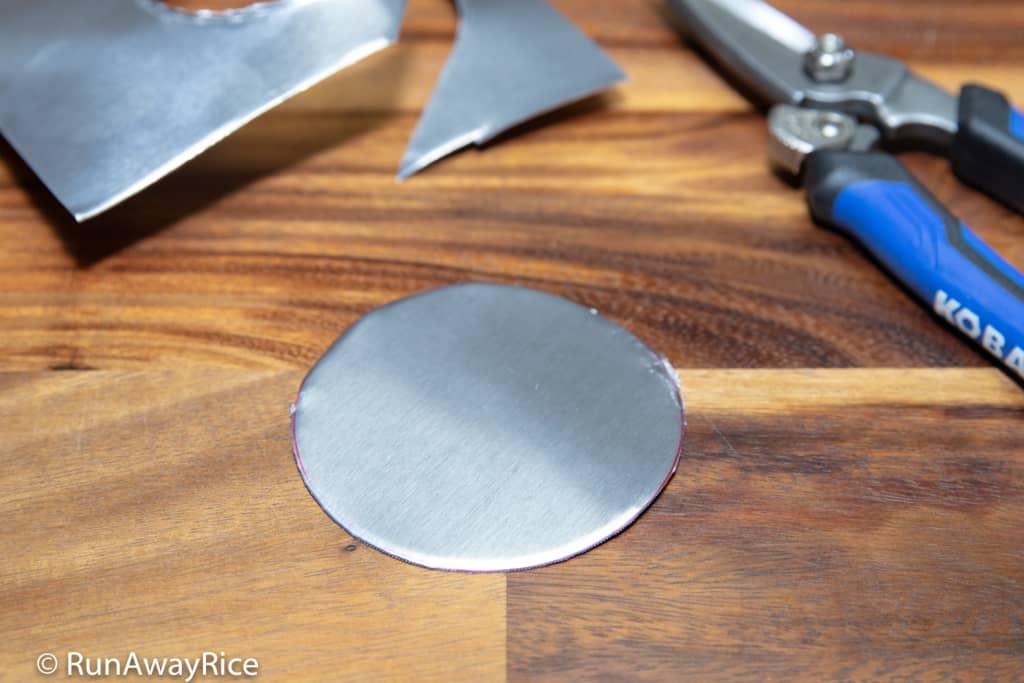
- Sand down any burrs or sharp edges on the new disk.

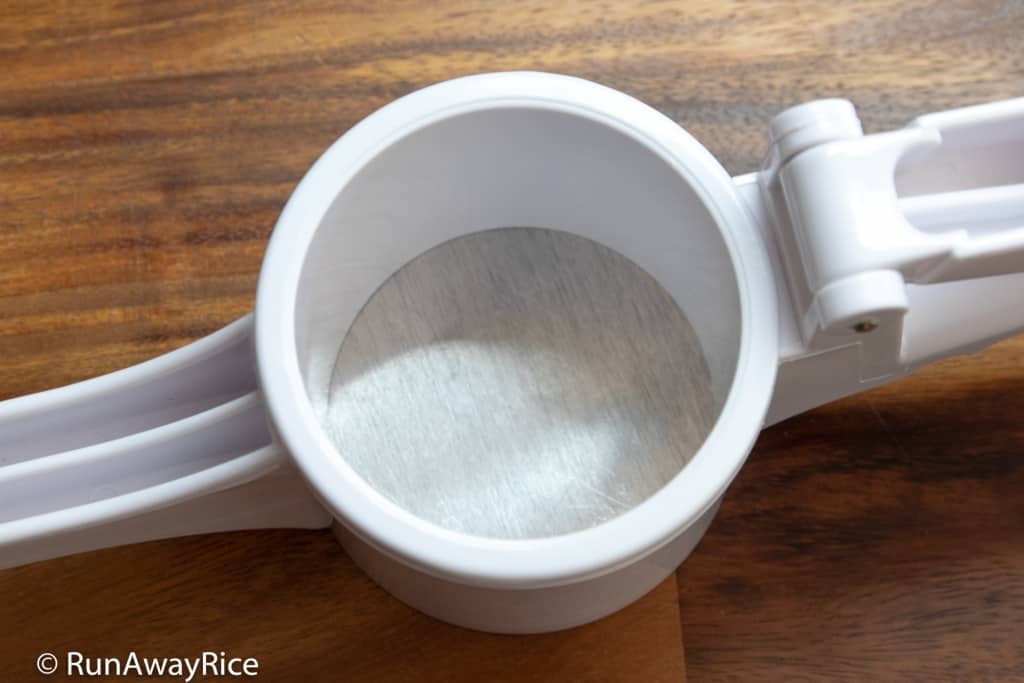
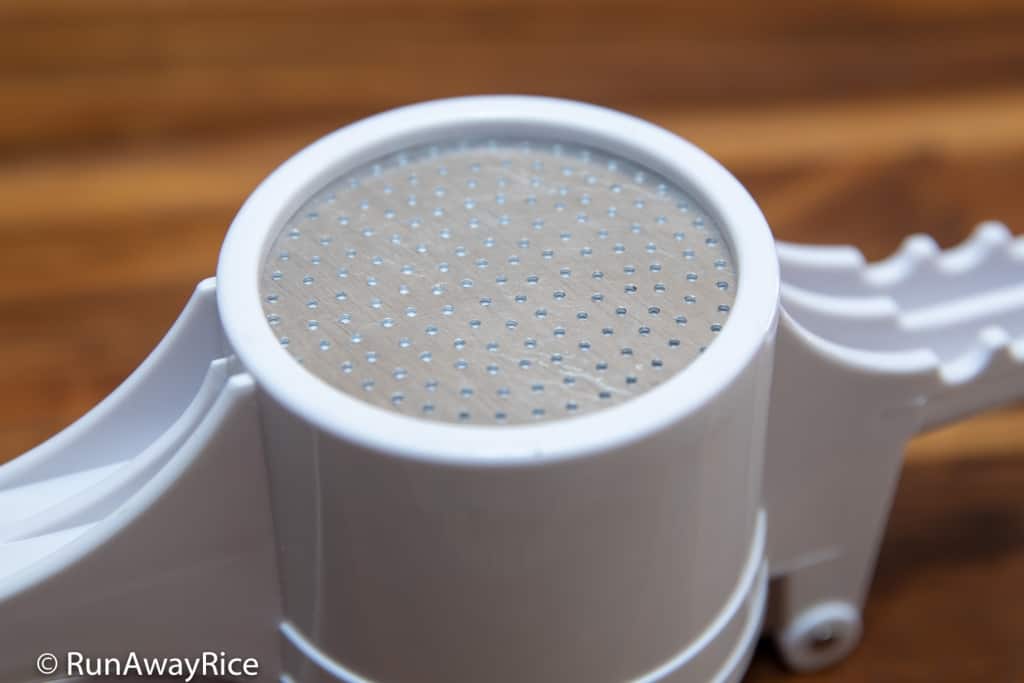
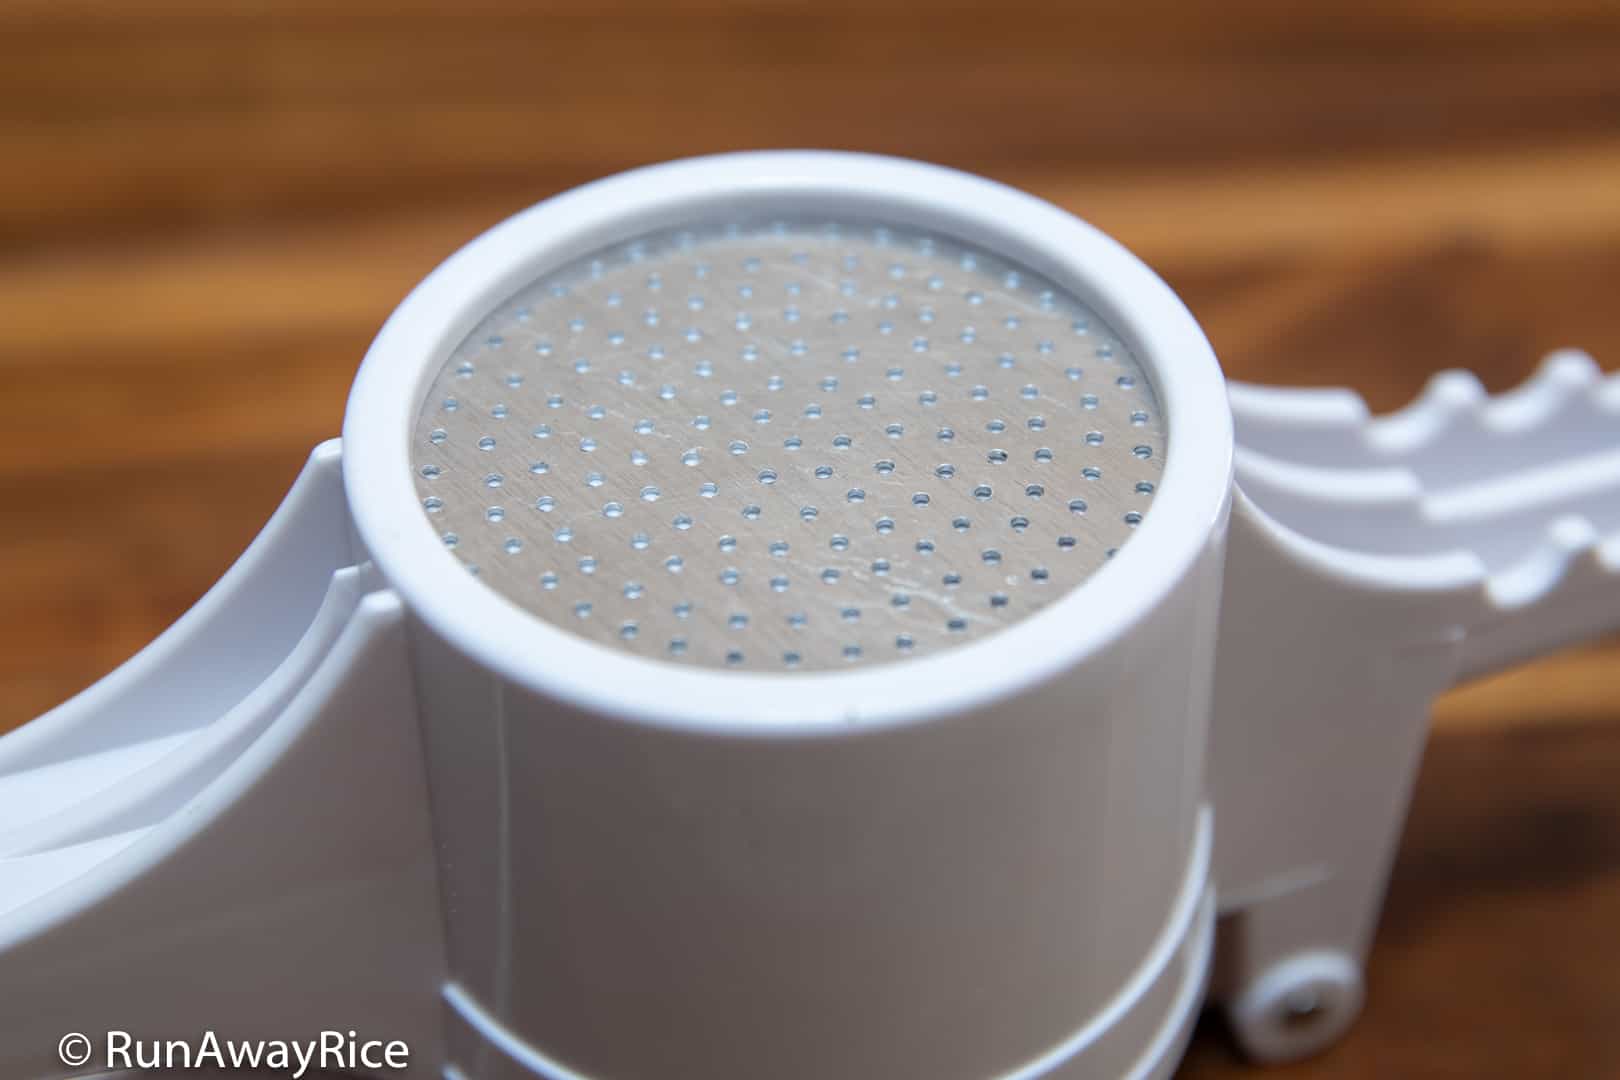
- Place the new disk into the potato ricer and check for fit. Make sure the new disk lays flat with the hopper locked in place.

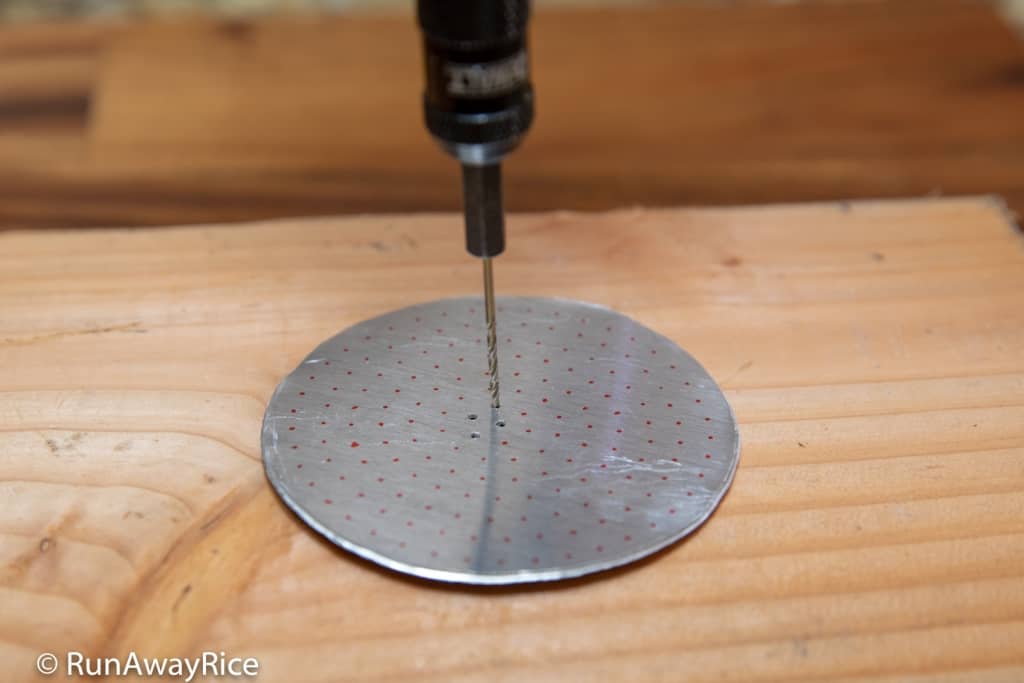
- Place the the smallest hole (Fine) disk on top of the new disk and clamp together using two small binder clips.
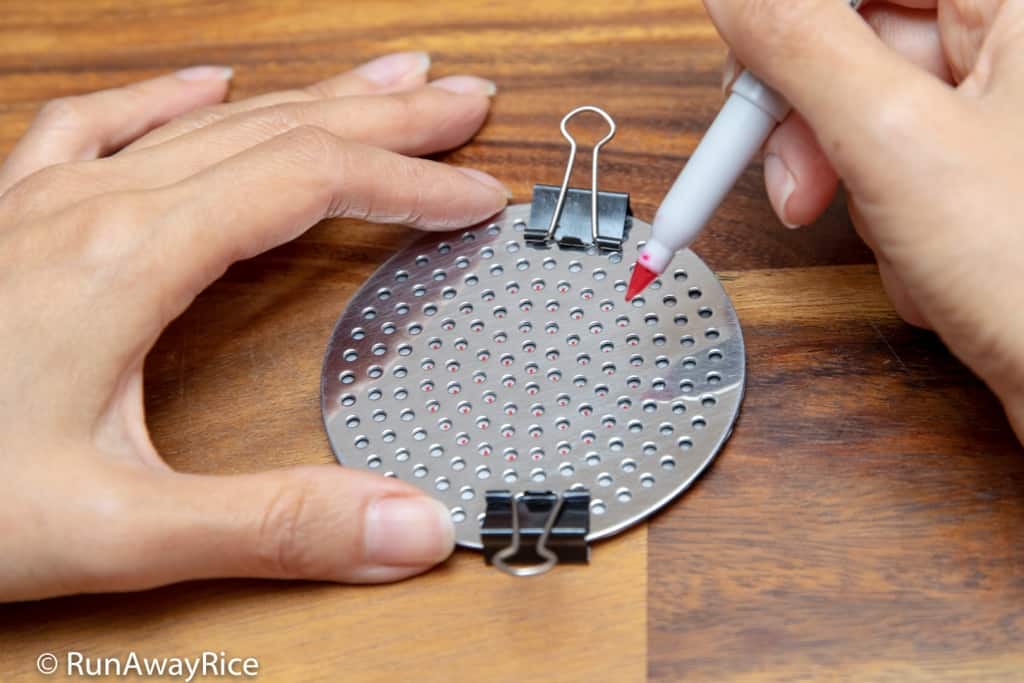
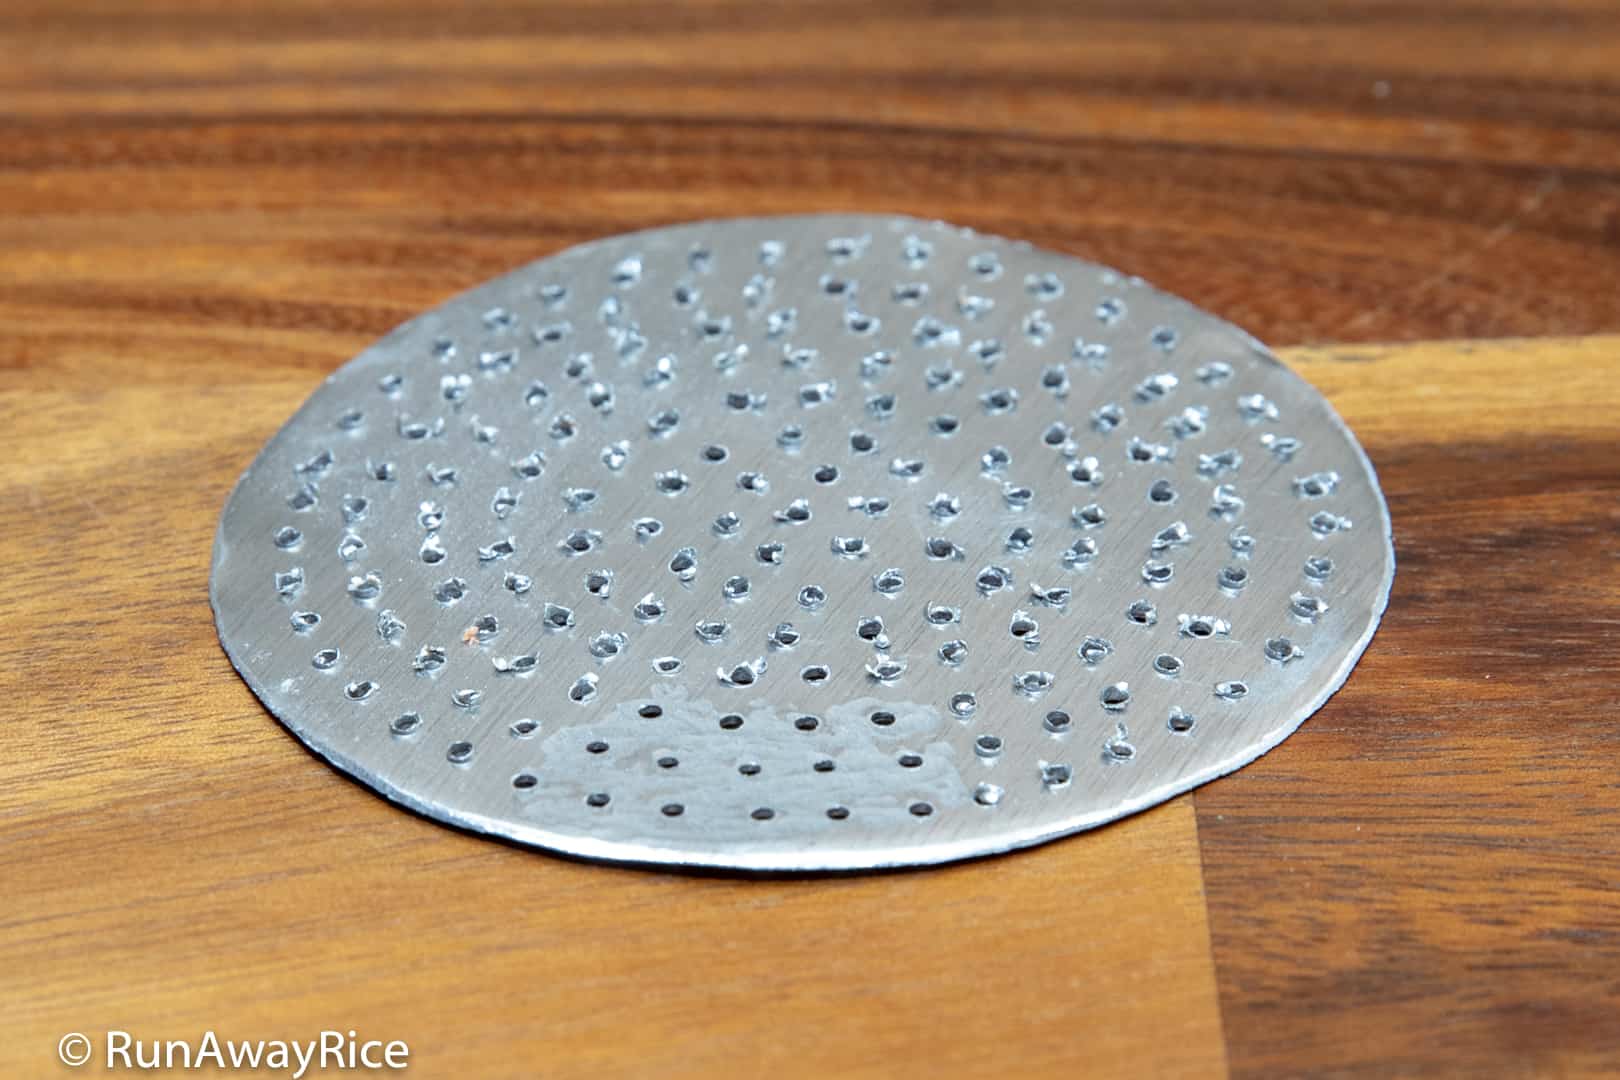
- Mark all holes using an ultra-fine point Sharpie.
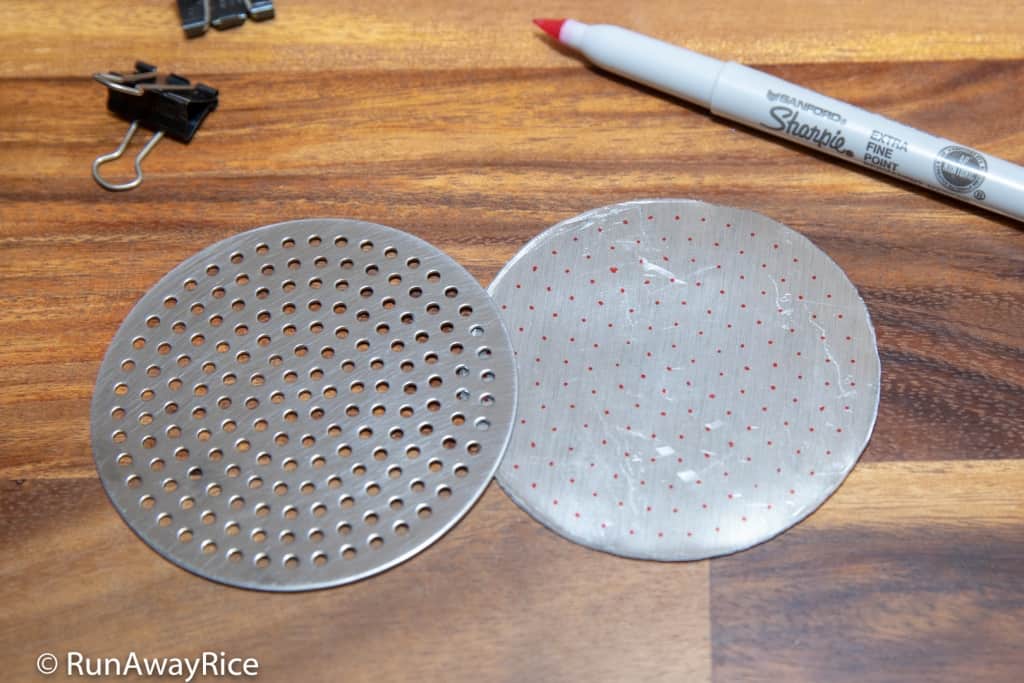
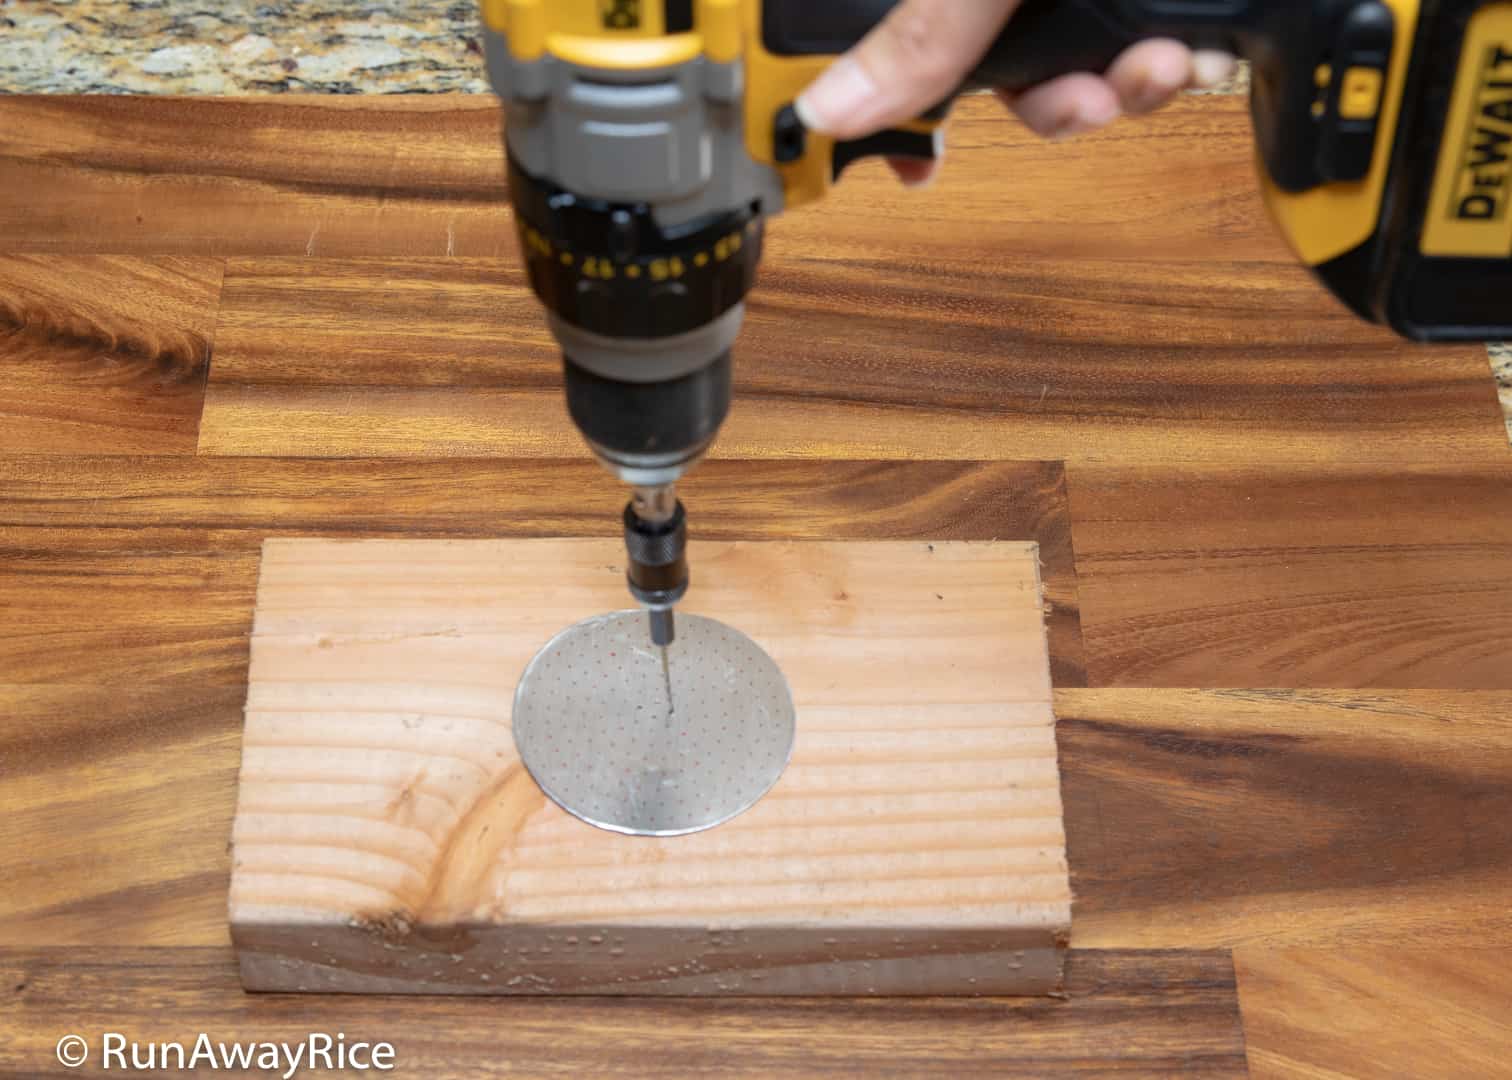
- Using a 1/16 inch drill bit, drill all marked holes. (In case you’re curious, there are 170 holes.)
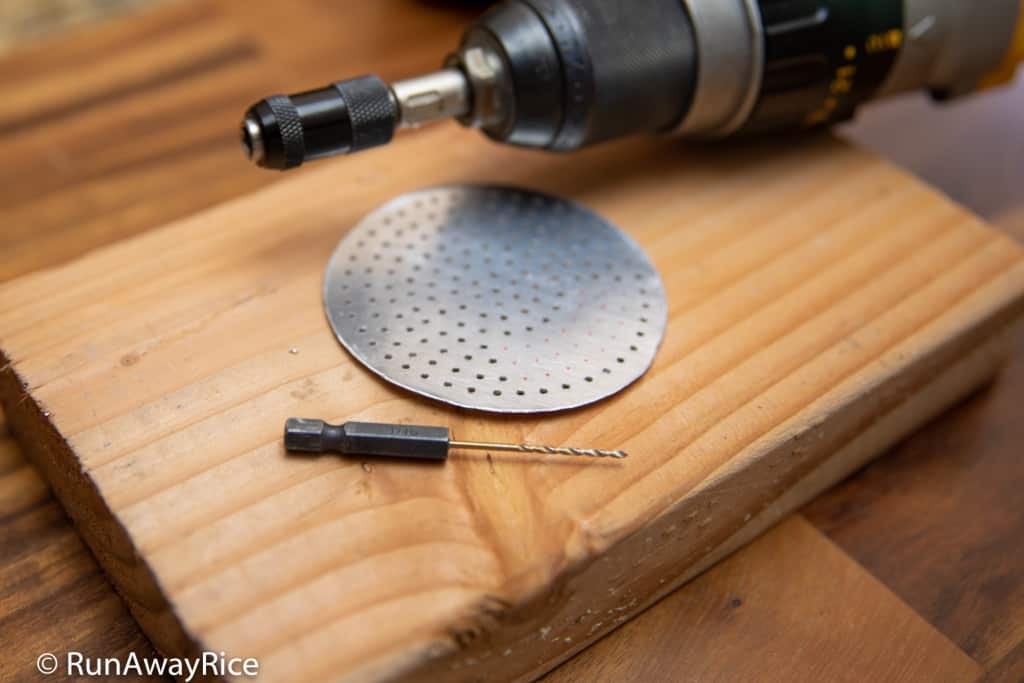
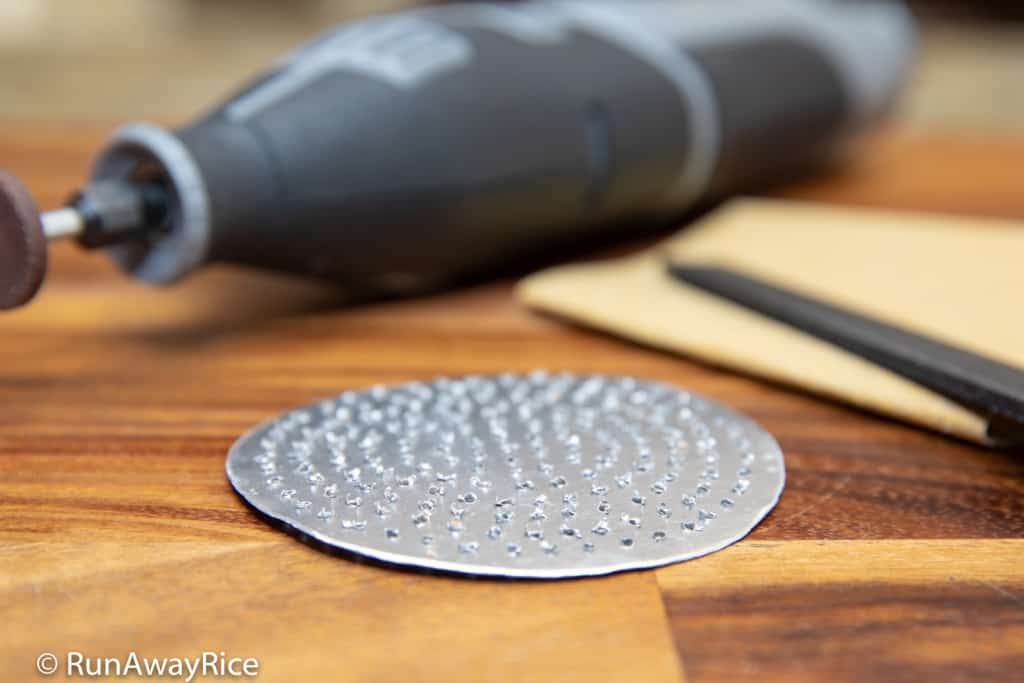
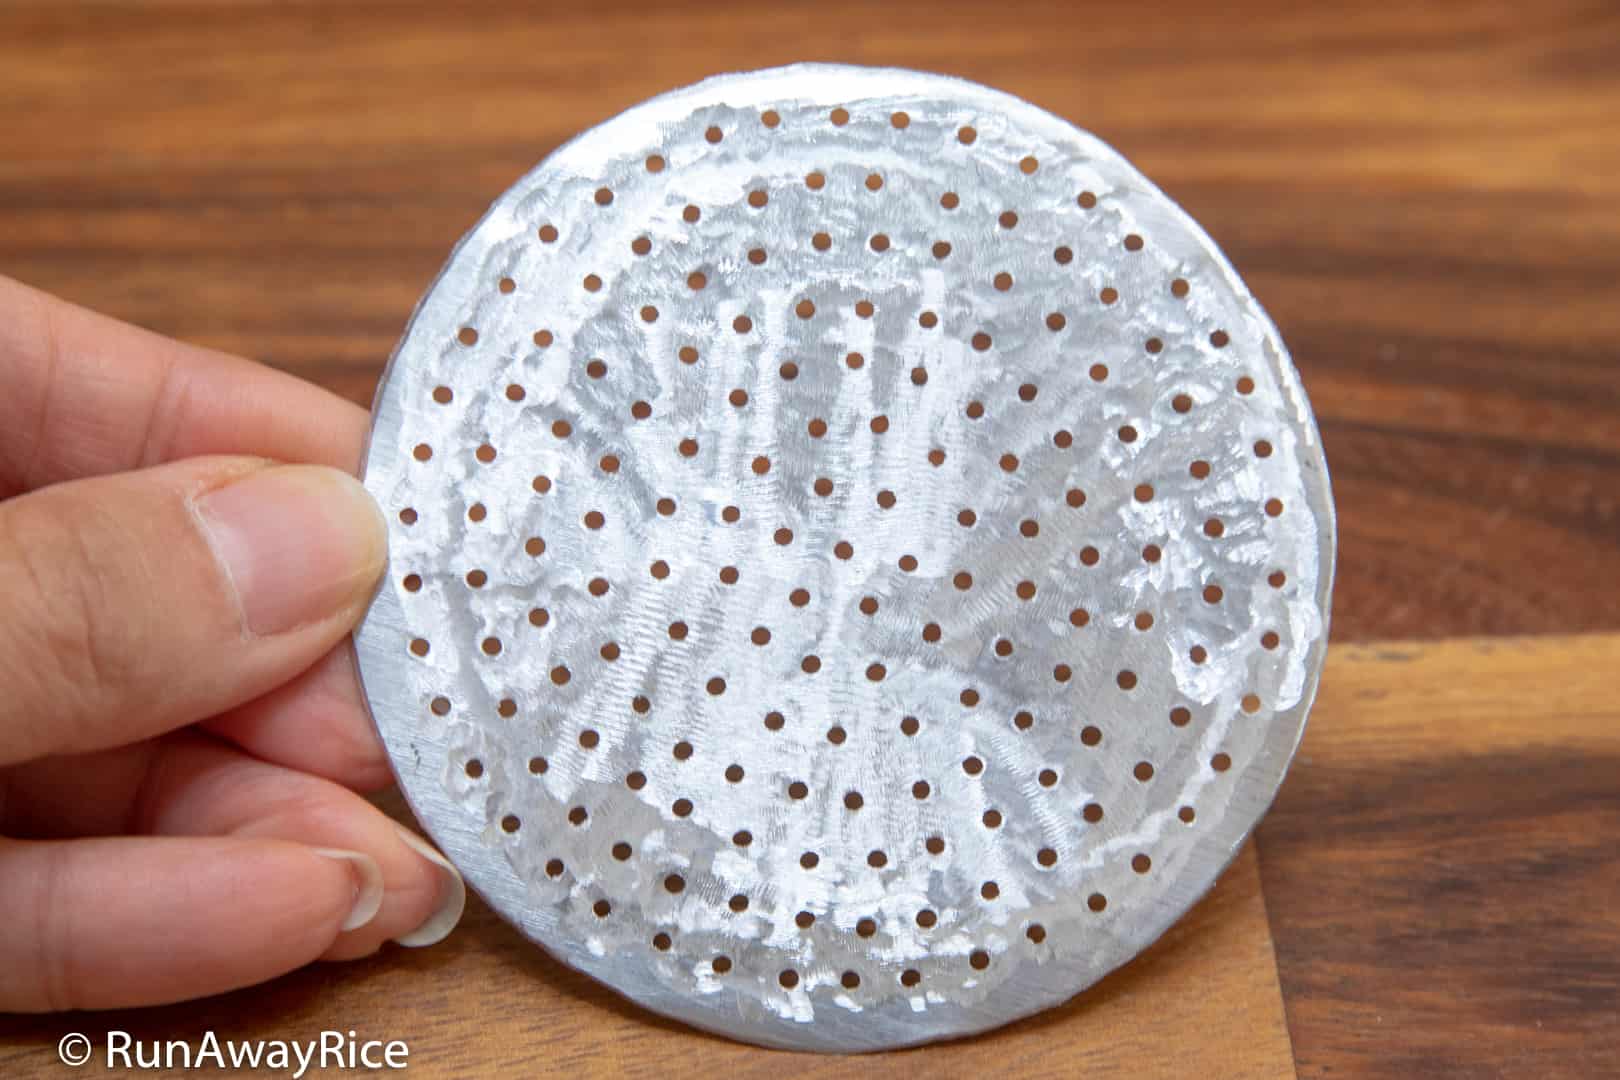
- Sand around the drilled holes, removing burrs or ridges. Check for burrs on both sides of the disk.


- Check the holes and make sure they are clear of debris. You should be able to see through all holes.

- Wash the new disk thoroughly with soap and hot water and then dry well. Your new vermicelli disk is now ready to use! 🙂


Notes for Making the Vermicelli Disk
Using tin from a can is the simplest (least amount of effort) and least expensive approach. Select the right size can and you just need to remove the tin bottom with a can opener. The tin circle should fit inside the potato ricer perfectly without any additional cutting. A can of pineapple chunks costs about $1.50 and you can snack on the yummy fruit while making the disk. 🙂

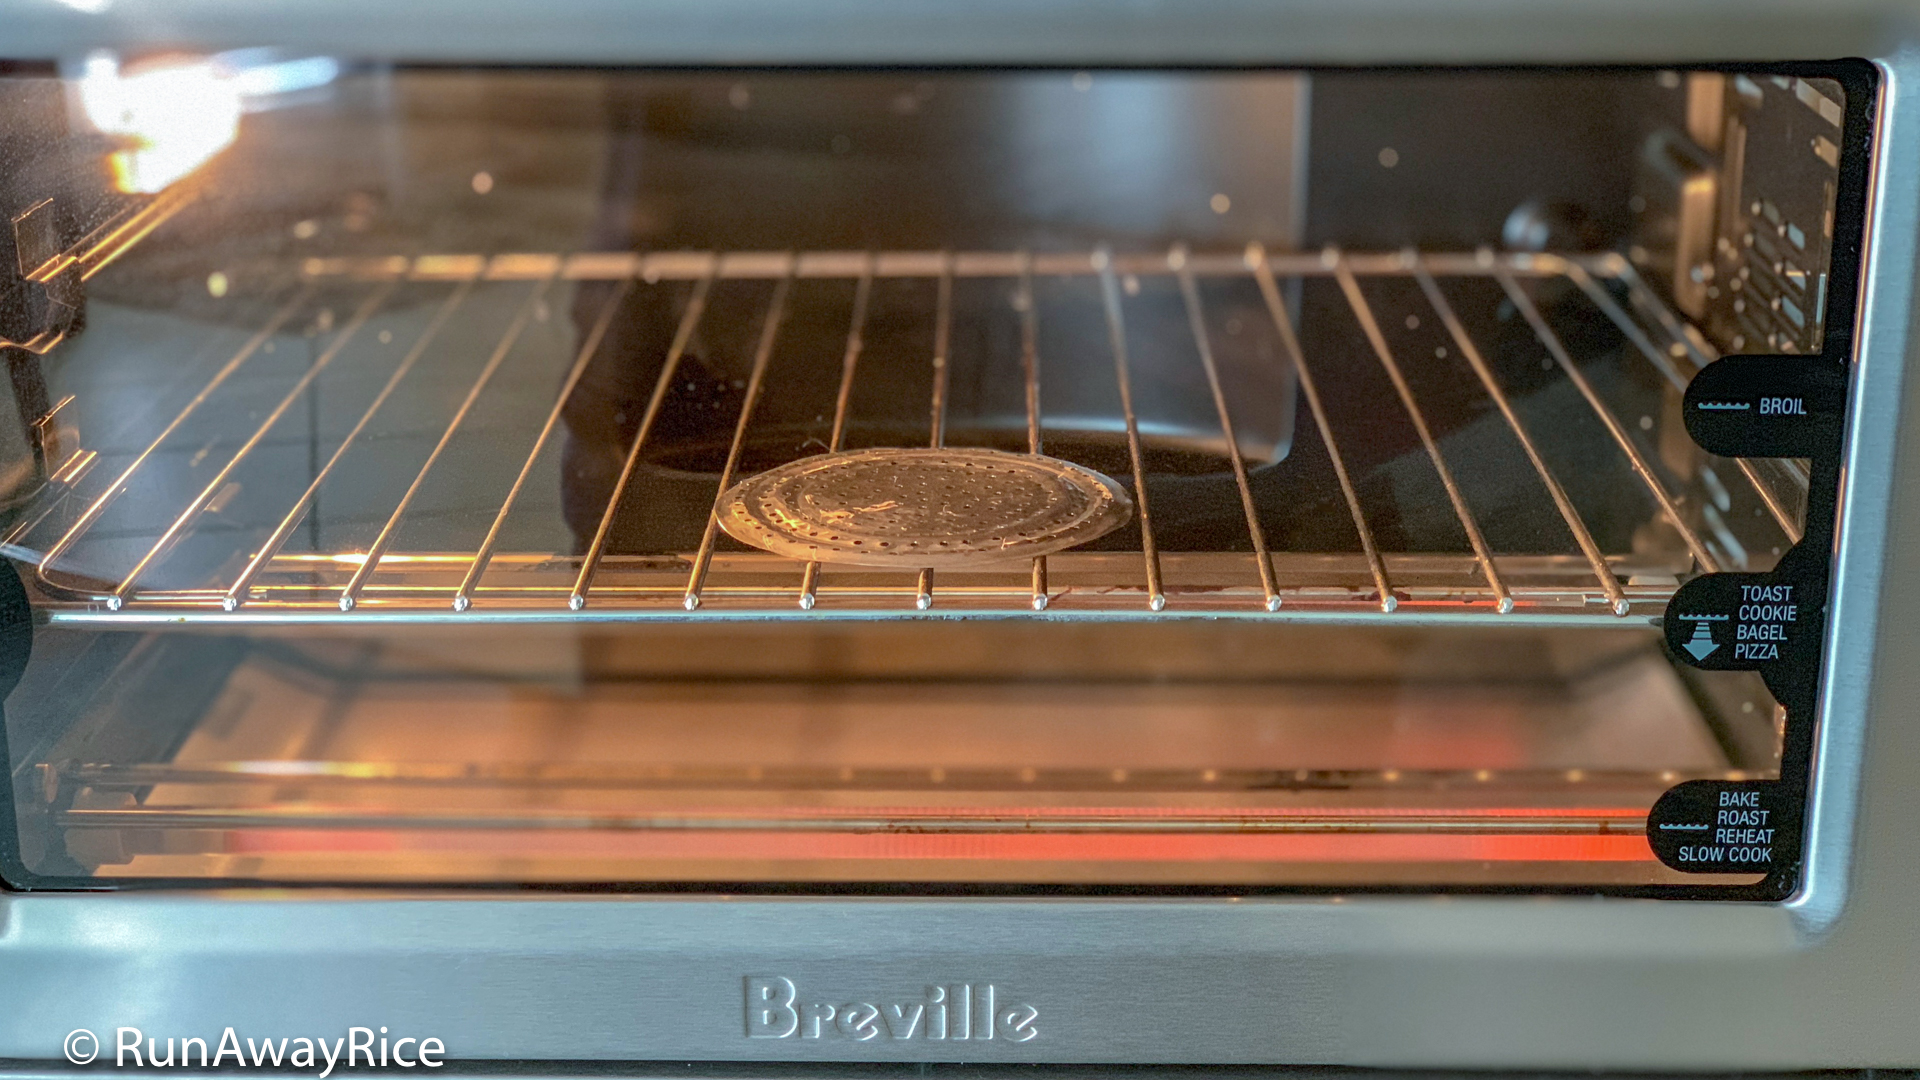
There is one downside: tin rusts. After using the vermicelli disk to make noodles, wash and dry it immediately. Any bit of moisture will cause the disk to rust. Here’s a trick I use for fast drying: Pop the tin disk into the toaster oven and heat for 2 minutes. (I just use the Toast setting.) Let it cool completely before touching. Now the disk is completely dry and less likely to rust.
Drilling the holes is the longest part of the process. Your hands may get tired holding the drill, especially if your drill is heavy like mine. Take some breaks as needed. Also, I recommend drilling on top of a thick piece of scrap wood so you don’t drill through your work surface. 🙂
Be careful when working with metals as they can be extremely sharp. Wear work gloves when cutting and sanding the metal. Protect your eyes with safety glasses as well.
Use sand paper, a hand file or Dremel rotary tool with filing attachment to remove the burrs, ridges and sharp edges. The Dremel is an awesome tool and gets the job done fast but not necessary for the project if you don’t have one.

If you don’t have the same potato ricer, you can still use my instructions as guidelines for making your vermicelli disk. Some potato ricers have disks with holes that are really close together. If this is the case, you do not want to use these holes as the template for making your vermicelli disk. Free-hand mark the holes keeping them approximately .20 inches (5 mm) apart. The gaps are needed to keep the extruded noodles from sticking together.
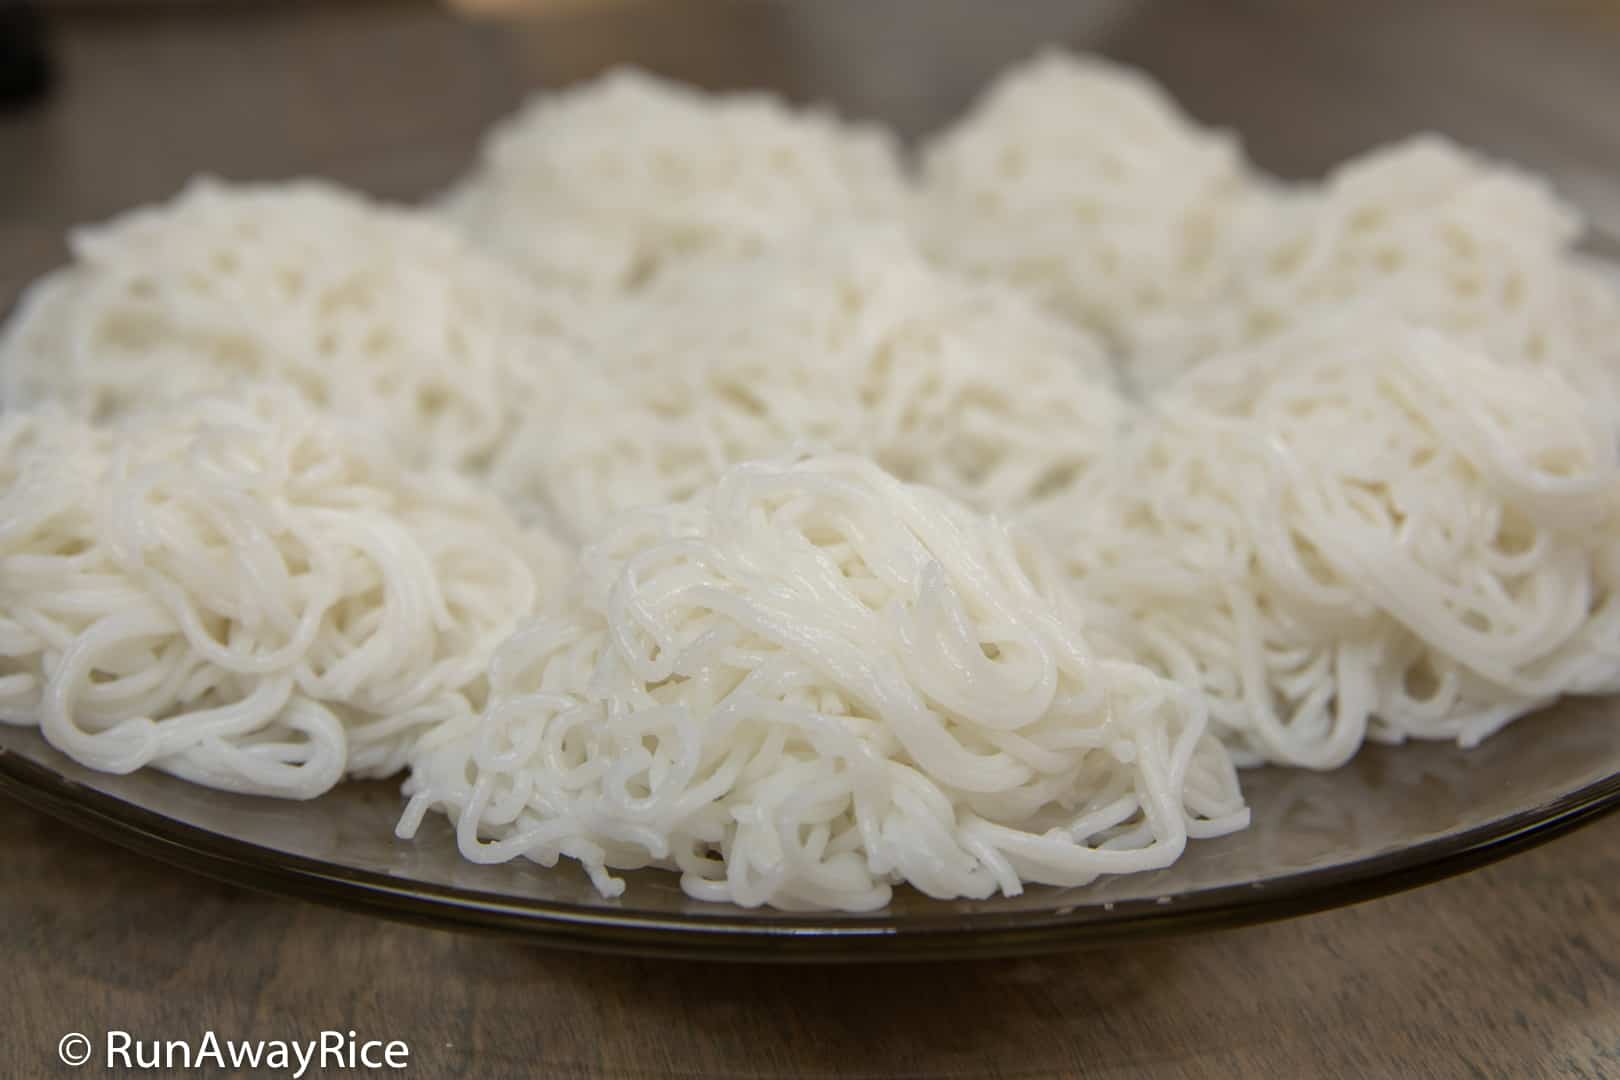
With a little bit of handy work, you can make a really nice vermicelli disk that extrudes beautifully thin noodles. Kudos for being a do-it-yourselfer and have fun using the new disk to make delicious, fresh rice vermicelli. Enjoy!
Let me know if you have any questions and please share pics of your vermicelli disk with me. Good Luck!
Watch the video and learn how to make Rice Vermicelli (Bun Tuoi) using your new vermicelli / thin noodle disk.
If you enjoy this “How to Make a Vermicelli / Thin Noodle Disk” post, you may also like:
How to Freeze Green Onions / Scallions
How to Clean a Stained Aluminum Steamer

How To Keep Boiled Pork from Turning Brown / Oxidizing – Easy 60 Second Trick
Tools I Love and Use in My Kitchen
This is SO COOL OMG. I love your creativity and upcycling! Can lids…who would have thunk??
Hi sis, how are you doing? I been watching all your videos on YouTube. You have an amazing recipe and I love all your cooking. I would like to ask a favor from you. Can I buy that disk from you. I’m disabled person I can’t do it myself. I have a potato presser. I want to make fresh noodles for my kids.
Hi Kim,
I moved recently and everything is still in boxes. If you are still interested, I would be happy to send it to you.
Happy Cooking!
You are so hardcore. I love it!
What is the purpose to xan than gum? The bag that you shows on amazon, where is the original manufactured? China? Vietnam? I could not find the exact location but it says packing from ohio facility. Thanks.
Hi Lan,
Xanthan Gum provides elasticity to the noodles. My package doesn’t specify the source/origin of the product. (It’s the same label you see online.) I sent the packager an email asking about the source and country of origin. When I get a response, I’ll share it here.
Hi chi,
I am one of your devoted readers and I am so happy to see this posts. The disk was easy for my husband to make. He made one with the tin can method and it works great! He says he will make another one with aluminum so it lasts longer. Thank you for sharing the steps and helping us eat healthy!
Hi Hong Mai,
I am thrilled to hear your husband made a vermicelli disk for you. Great job! Enjoy making fresh rice vermicelli. It’s the best! 🙂