 I am counting down the days to the Mid-Autumn Festival. Every year as this holiday approaches, I wish I had more time to make these beautiful mooncakes. They are fun to make, lovely to look at and so delicious to eat. The only downside is they are labor-intensive. Over the years, I’ve developed a method of making these cakes over two days so it’s more manageable. I make the filling and syrup one day. Then on the following day, I make the dough and form the cakes. In sharing these videos, I am following the same timeline. Below is the first part of the recipe where we make the simple syrup and filling balls. Please click this link for Snowskin Mooncakes Part 2.
Notes on the Recipe, Tips and Tricks
When making the syrup, remember there’s no stirring while it’s cooking. (I know this is difficult. 🙂 ) Stirring causes the sugar to recrystallize and we don’t want this. The lemon juice also helps to prevent recrystallization as well.
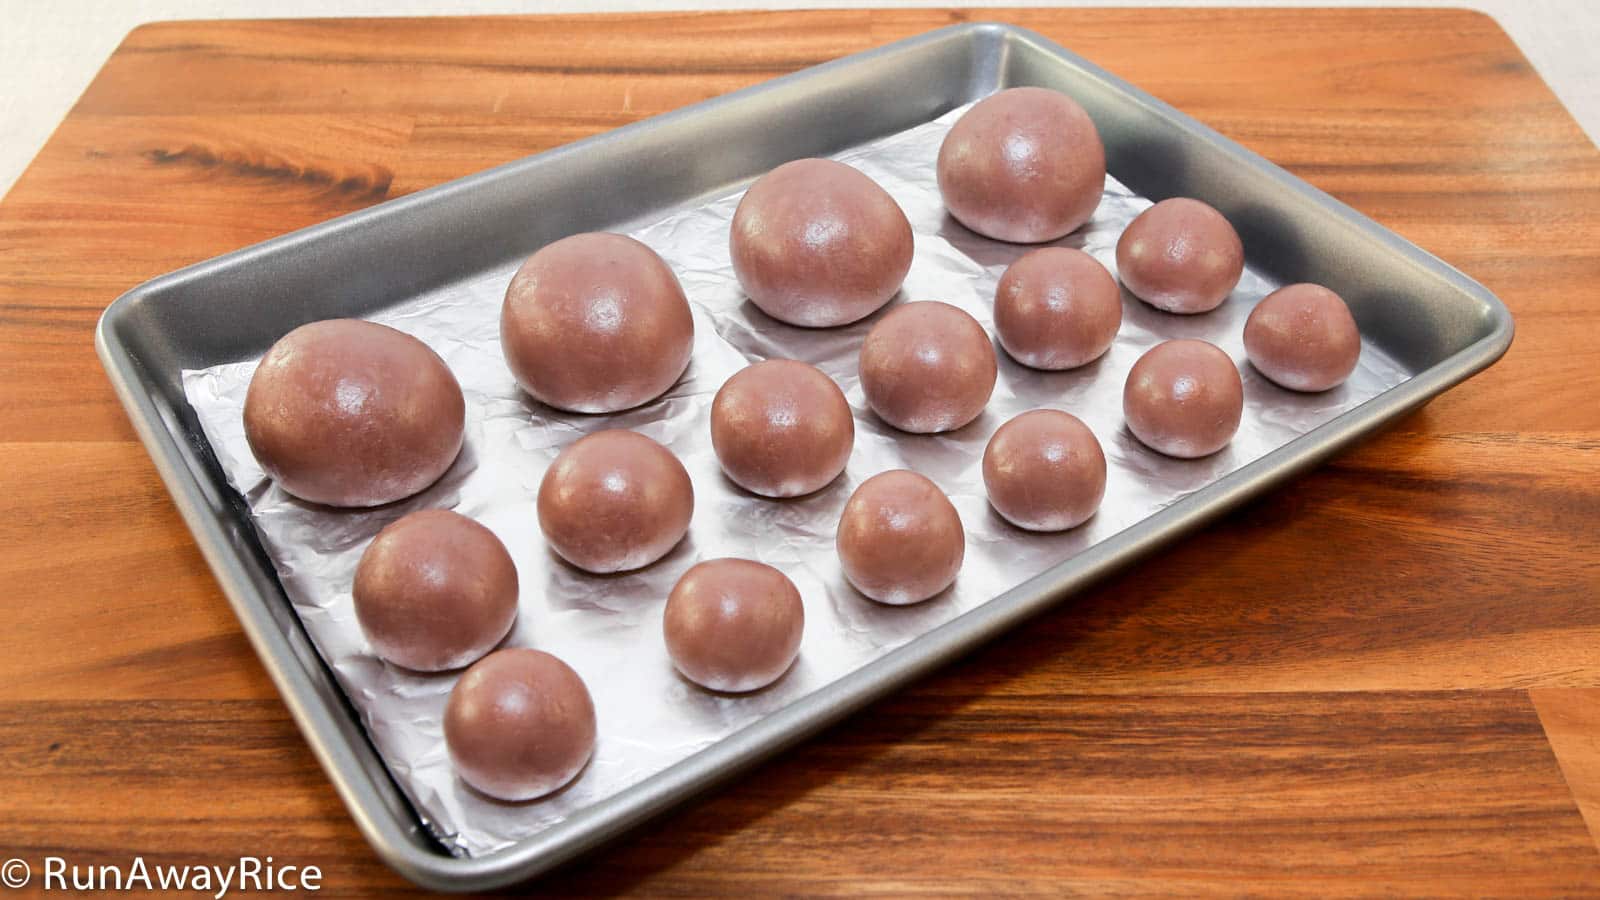
I don’t typically cook in grams, but for this recipe it’s best, as most mooncake molds are sized in grams. You can eye-ball the measurements but I do recommend using a food scale to size the filling balls appropriately.
The typical dough to filling ratio is 1:1 although this is not a hard and fast rule. For a 200 gram mold, you would make the dough 100 grams and the filling 100 grams. I prefer slightly more dough to filling in my mooncakes. For a 200 gram cake, I use 120 grams for the dough and 80 grams for the filling. Again, there’s no set rule so feel free to adjust to your preference.
There’s just enough water in the recipe to cook the taro root and provide liquid for processing. If you over-boil the taro root, you won’t have enough liquid and will unwittingly overwork the food processor as the taro root is quite starchy. If you need to add more water during processing to make the filling smooth, go ahead but be sure to use hot water. It’s better to have a looser filling where we can cook-off the liquid later than a filling that is too dry.
It is very common for taro root filling to get crusty or form a skin on the pan when cooking. We can add more vegetable oil if you don’t mind the extra oil or we can be diligent about stirring continually and scrapping the bottom and sides of the pan. If the pan gets too crusty, transfer to a clean one and continue cooking.
If the filling is initially loose and drippy, you may need to cook for more than 20-25 minutes. In this case, add an extra 1/2 Tbsp vegetable oil after 20 minutes so the filling doesn’t get too dry.
[fbshare url=” http://youtu.be/tsKQyYa5Ryk” type=”button” float=”right”]Watch the video below for instructions.
If you enjoyed this video, you may also like: Sweet Fillings for Desserts and Pastries: Mung Bean and Coconut, Pumpkin Spice (Nhan Dau Xanh, Nhan Bi Do) and How to Roast Sesame Seeds.
Simple Syrup
Ingredients
4 cups water
4 cups sugar
1 Tbsp lemon juice
Directions
Add the water and sugar into a saucepan. Whisk until the sugar is completely dissolved. Put away the whisk. There’s no stirring after this step.
Set the heat to Medium and bring to a gentle boil. Reduce the heat to Low and simmer for 10 minutes.
Add the lemon juice. Gently swirl the pan combining the lemon juice and syrup. Bring the syrup to a gentle boil again.
Turn off the heat and allow to cool completely.
If not using right away, store in a jar or air-tight container. No refrigeration is needed.
Yields: 5 cups
Taro Root Filling
Ingredients
1 1/2 lbs taro root (fresh or frozen)
1/2 tsp salt
1 3/4 cups water
Optional: 1 oz cooked purple sweet potato or yam
1 Tbsp butter
3 Tbsp powdered milk or creamer
1/2 cup sugar
1 tsp roasted/cooked glutinous rice flour
1 Tbsp vegetable oil
Directions
Remove the skin of the taro root using a vegetable peeler. Cut into small chunks. Place in a saucepan along with salt and water. Cover the pan and bring to a boil over High heat. When it comes to a boil, stir the taro root. Reduce the heat to Low and simmer for 5-7 minutes or until the taro root is soft and can be easily mashed. Let cool for 10 minutes.
Transfer the taro root along with the liquid into a food processor. Optionally add the purple sweet potato or yam. Add the butter, powdered milk, sugar, and cooked glutinous rice flour. Process for 2 minutes or until the filling is smooth and resembles a thick cake batter.
In a large frying pan or skillet, add the vegetable oil and then the filling. Cook the filling over Low heat making sure to stir it constantly so it doesn’t stick to the pan. Cook the filling for approximately 20-25 minutes. As the liquid is cooked-off, the filling becomes much thicker, resembling dough. When the filling can be folded several times, hold its shape and not flatten, it’s done. Turn-off the heat and allow to cool for 10 minutes.
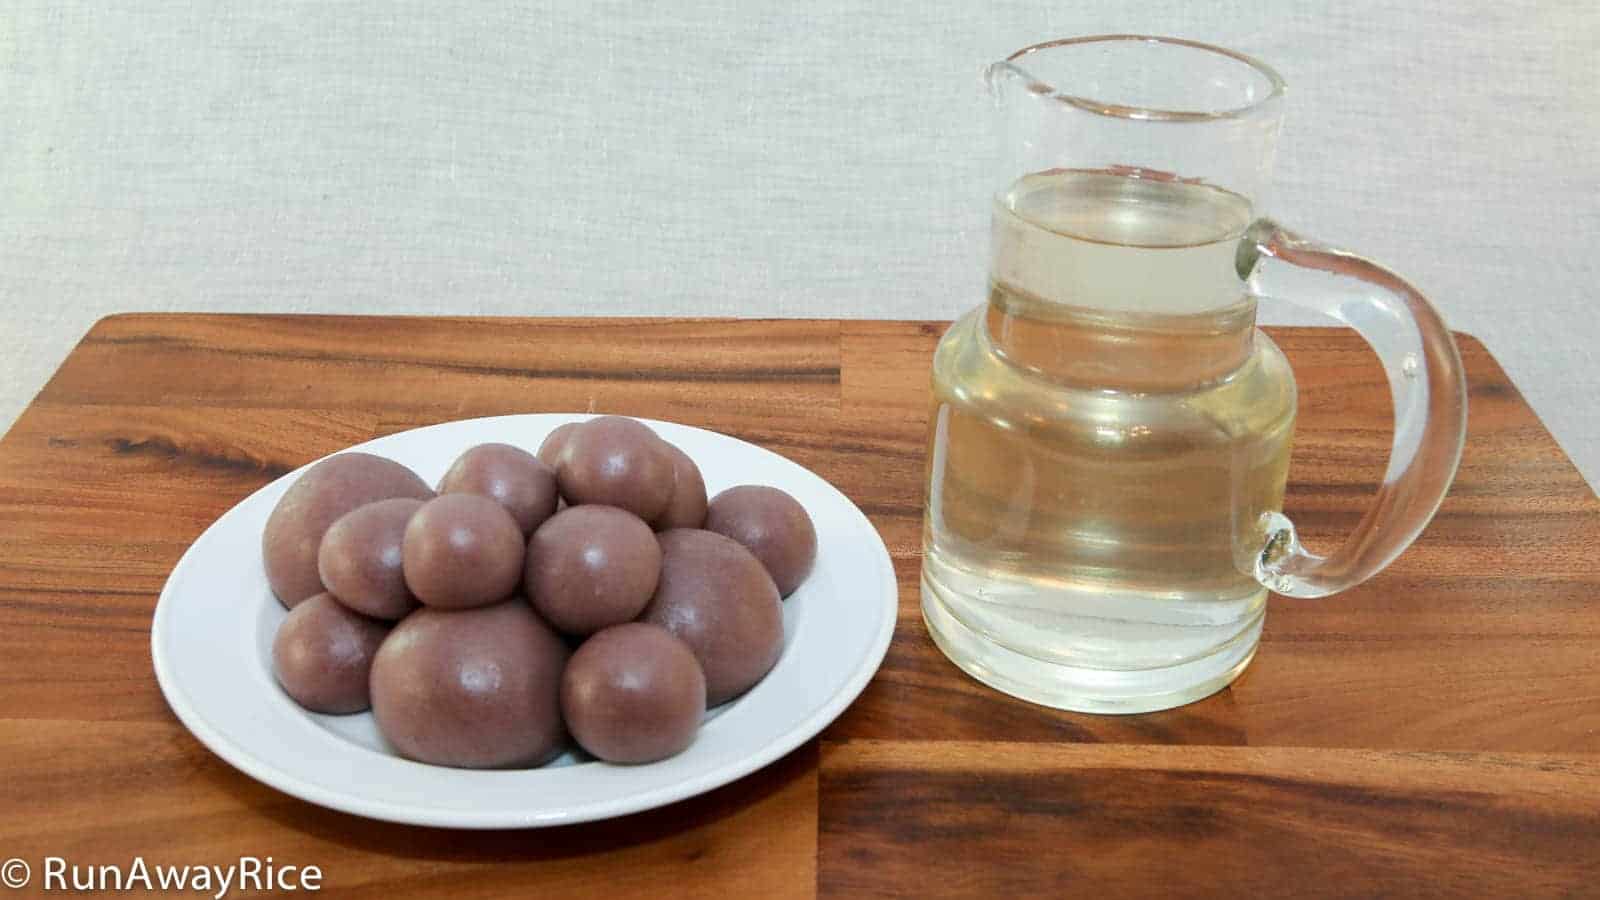
Divide the filling into the sized needed for your mooncakes. Roll into balls and allow to cool completely.
Cover and refrigerate the balls if not using right away. Allow to come to room temperature before using to make mooncakes.
Yields: 1 1/2 lbs or 680 grams


Can you convert to glutinous rice flour to gram? I have 125 grams mold. How much skin and filling should I use?
Hi Lee,
1 3/4 cups cooked glutinous rice flour is approximately 215 grams. For 125 gram mold, you can use 1:1 ratio for skin and filling so approximately 62.5 grams each. Good Luck with the recipe and stop back to share your results.
where can i find the cooked rice flour? I have died the asian stores herein Houston Texas, can”t seem to find the cooked flour. Can I dry fry i myself ? How long?
Hi Ron,
Sorry to hear you’re not having much luck finding the cooked glutinous rice flour. Cooking the flour at home doesn’t work as I’ve tried multiple times without success. It’s still raw no matter how long it’s cooked.
I’ll share a recipe alternative in a future posts so please stay tuned.
Can this taro filling be used in banh bao to make banh bao khoai mon?
Hi Ann,
Yes, you can definitely use this filling for banh bao khoai mon. I use this filling for banh bao often. Enjoy!
Hello! I made the filling last night and had problems getting it to reduce to a dough texture. Could it have been because I steamed my taro instead of boiling? I stirred constantly for about 45 minutes with no results.
Hi Amelia,
Steaming it shouldn’t be a problem. How much water did you add? Usually, you just cook off the liquid. If it’s not setting into a dough-like consistency, here’s a quick trick, add cooked glutinous rice flour to thicken it up. You may also want to try a different variety of taro root next time to see if you get better results. Good Luck!
Hi,
I like your video, the moon cake looks delicious. Do you know where to buy these moon cake molds?
Thanks for your posting.
Hi Lydia,
I am not sure which molds you are interested in and so I’ll provide all of the links. I purchased the stamp-style molds on eBay and the traditional orange folds in Little Saigon in Westminster, CA. They are available online as well. Let me know if you have any questions.
Moon Cake Mold 63g, Round with 4 Stamps
http://www.ebay.com/itm/moon-cake-mold-63g-round-set-with-4-stamps-/180588547485?pt=LH_DefaultDomain_0&hash=item2a0bea8d9d
Moon Cake Mold 75g, Round with 4 Stamps
http://www.ebay.com/itm/moon-cake-mold-75g-83g-round-with-four-stamps-/170632876192?pt=LH_DefaultDomain_0&hash=item27ba8310a0
Moon Cake Molds 200g, Square – Buy from Hoa Binh Market, Garden Grove, CA or from ebay, see links below:
http://www.ebay.com/itm/Moon-cake-plastic-molds-200-22-Khuon-Trung-Thu-/300511060936?pt=LH_DefaultDomain_0&hash=item45f7dae3c8
http://www.ebay.com/itm/Moon-cake-plastic-molds-200-20-Khuon-Trung-Thu-/300511026914?pt=LH_DefaultDomain_0&hash=item45f7da5ee2