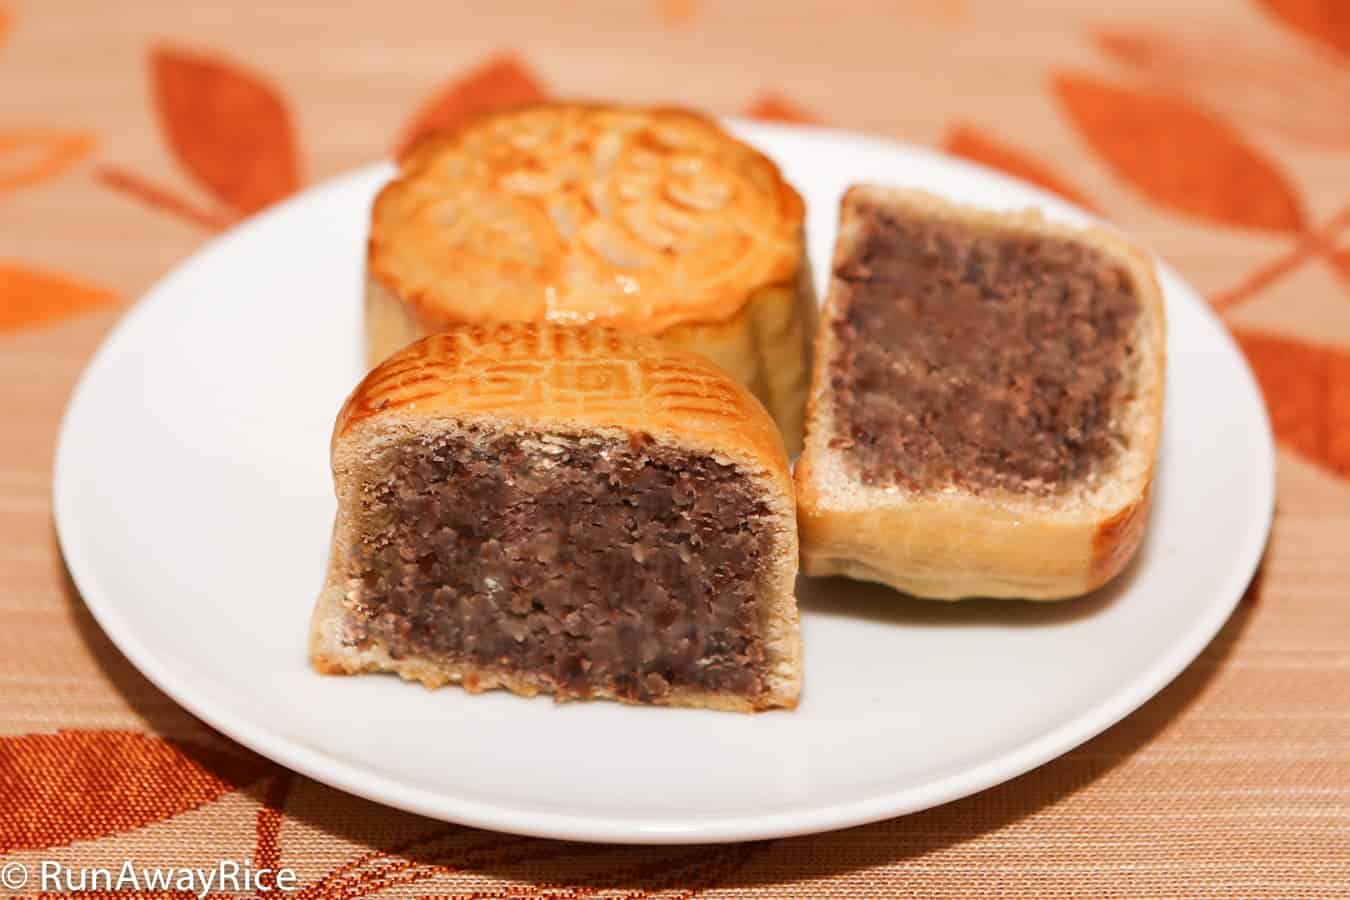
This is a follow-up to my earlier post on Mooncakes. In keeping with a more traditional recipe, these sumptuous baked treats have a sweet red bean filling. Depending on where you live, finding mooncake molds can be challenging. In the below video recipe, I show you how to make mooncakes using a silicone mini pan. These mini pans are easy to find in stores and online and come in all sorts of cute shapes and sizes. They work really well and are great substitutes when you don’t have the mooncake molds but still want to make and enjoy these wonderful cakes.
Some Notes:
General rule: the filling to dough ratio is 2:1.
In the video, I use a Wilton Silicone Mini Leaf and Pumpkin Mold. The proportions are:
Filling: 2 1/2 oz or approximately 75 grams
Dough: 1 1/4 oz or approximately 38 grams
The traditional mooncake mold I use is 63-75 grams. The proportions are:
Filling: 1 3/4 oz or approximately 50 grams
Dough: 7/8 oz or approximately 25 grams
Check-out the Piggy Mooncakes recipe I shared earlier for more helpful tips.
[fbshare url=”http://youtu.be/sPZxZ4rAQN8″ type=”button” float=”right”]Watch the video below for instruction.
Ingredients
for the Filling:
1 cup dried red beans
1/4 tsp salt
1/2 cup sugar (adjust to your taste)
1 tsp vanilla sugar
1 Tbsp peanut oil
for the Dough:
1 cup all-purpose flour
1/4 cup cake flour
1/3 cup syrup
2 Tbsp peanut oil
1 egg yolk
for Rolling the Cakes:
1/4 cup all-purpose flour
for the Egg Wash:
1 egg yolk
1 tsp water
1/2 tsp sesame oil
Directions
Rinse the red beans with cool water several times until the water is clear. Add the beans into a large pot along with the salt. Fill the pot halfway with water. Cover and bring to a boil over High heat. Once boiling, remove lid and stir. Cover and simmer over Low heat for 30 minutes or until the beans are soft. (You should be able to easily smash a bean between your thumb and forefinger.)
Scoop out the cooked beans using a slotted spoon and reserve the liquid. To the cooked beans, add sugar and vanilla sugar and combine well. Transfer 1 cup cooked beans into a food processor (more if your food processor is larger). For every 1 cup cooked beans, add 1/3 cup liquid from cooking the beans. Puree until smooth and creamy. Do the same for the remainder of the beans.
Transfer the pureed bean filling into a pan. Add vegetable oil to the filling. Cook the pureed beans over Low heat stirring constantly. Initially the filling is soft, wet and spreadable. After 5-7 minutes the filling dries out and starts to pull away from the pan. After another 3-4 minutes the filling sticks together resembling a dough. (Total cooking time is approximately 10 minutes.) Remove from the heat and allow to cool until it can be handled. Roll into balls depending on the size of your pan. Cover with plastic wrap until ready to use.
Sift together all-purpose flour and cake flour. In a small bowl or cup add syrup, oil and egg yolk. Mix together until evenly blended. Make a well in the flour and slowly pour in the syrup mixture. Using a fork, combine the flour and syrup mixture together by stirring in circles from the edge of the bowl to the center. After a minute, a soft dough forms. Continue stirring until all the dry flour is worked into the dough. Gently knead the dough a few times with your hands. Don’t overwork the dough. Wrap in plastic wrap and allow to rest for 30 minutes.
Position an oven rack in the middle of the oven. Preheat the oven to 375 degrees Fahrenheit.
Line a tray with a Silpat Non-Stick Baking Mator parchment paper.
Sift the remaining 1/4 cup all-purpose flour. (This is used to roll the cakes.)
Sprinkle some sifted flour on your work surface and knead the dough gently several times. Cover with plastic wrap so the dough doesn’t dry out.
Pinch off some dough. Using a rolling pin, flatten the dough into a circle. Place a filling ball in the center and then gently work the dough around the filling so it’s smooth. Pinch the dough together to seal the edges. Roll between your palms until smooth.
If using a silicone mold, brush the mold with a generous amount of flour and shake out the excess flour. Place the dough ball into the cake mold and gently press the dough into the mold. Poke a few holes in the cake using a toothpick. Flip the mold over and shake it gently to release the cake.
If using a mooncake stamp mold, brush the mold with a generous amount of flour and shake out the excess flour. Place the dough ball into the mold and gently press the dough into the mold. Poke a few holes in the cake using a toothpick. Flip the mold over so the flat side is resting on your work surface. Press the handle to release the cake.
Remove any bubbles in the dough by pricking with a toothpick. Use a small pastry brush to brush off any excess flour.
Bake at 375 degrees Fahrenheit for 10 minutes.
To make the egg wash, combine the egg yolk, water and sesame oil. Stir together and then strain the mixture. Set aside for now.
Remove the cakes from oven and allow to cool for 5 minutes. Spritz each cake with a bit of water. Brush the egg wash on each cake coating it evenly.
Increase the oven temperature to 425 degrees Fahrenheit. Return the cakes to oven and bake for another 7-8 minutes until they are lightly brown.
Remove from oven and allow to cool. Store in air-tight container. Enjoy the following day.
Yields: 6-8 cakes
*This post contains affiliate links.*


I’ve seen moon cake recipes that call for alkaline or lye water. Your recipes don’t have that. Is it necessary to use that for moon cakes or can I substitute something else for it in recipes that call for it? Thanks.
Hi Mary, my recipe does not call for alkaline or lye water. It is difficult for me to comment on if it is required on someone else’s recipe. I would suggest you reach out to the creator of the recipe you are looking at. Good luck and let us know how it works out!
do i have to use peanut oil?
Hi Connor,
Not at all, substitute with an oil you like but be sure it has a high smoke point. Good Luck!
Hi Trang,
Your recipe looks yummy.. I just have one clarification.. after boiling and scooping out the red beans out of the pan you said add sugar and vanilla sugar and combine well.
Where do you add the sugar and vanilla sugar?.. to the scooped out red beans or to the reserved liquid?
Thank you SO much, can’t wait to try this yummy recipe and will do as soon as I get a response from you.
Sincerely,
Maria-Dee
H Maria-Dee,
Add the sugar and vanilla sugar to the cooked beans. I hope you make these yummy mooncakes and stop back to share your results! They’re so much fun to make. Good Luck! 🙂
how many 75 g mooncake can this receipt make?
Hi Lily,
10 cakes using 75 g mooncake molds. Good Luck!
His Trang how do you make the syrup that’s in the ingredients . Thank you
Hi Minerva,
The syrup is breakfast or pancake syrup from the grocery store. You can also use a cooking syrup like Lyle’s Golden Syrup.
Hello Friend,
I could’nt wait to get on the computer to write to you. I just made the moon cakes (I mixed mung bean and lotus), following your instructions, and used the Wilton autumn mold… They came out perfectly. I never thought that one day I would be making banh trung thu. It’s thanks to you and your wonderful way of teaching that make it so possible. By the way, I bought the British syrup Lyle’s on ebay. Only one adjustment to make. The syrup was kind of thick, so I had to add one TBp of peanut oil, and it worked very well.
Thanks again and keep up the good work.
Take care,
AM
Hello Anne Marie,
I am so happy to hear you were successful with making mooncakes! Kudos to you!! They are so much fun to make and I hope you try other cake variations now. Good job making adjustments with the Lyle’s syrup as needed. You can also buy Lyle’s syrup on Amazon.
I’d love to see pictures next time. Please feel free to share to my Facebook, Instagram or direct email. Take care! 🙂