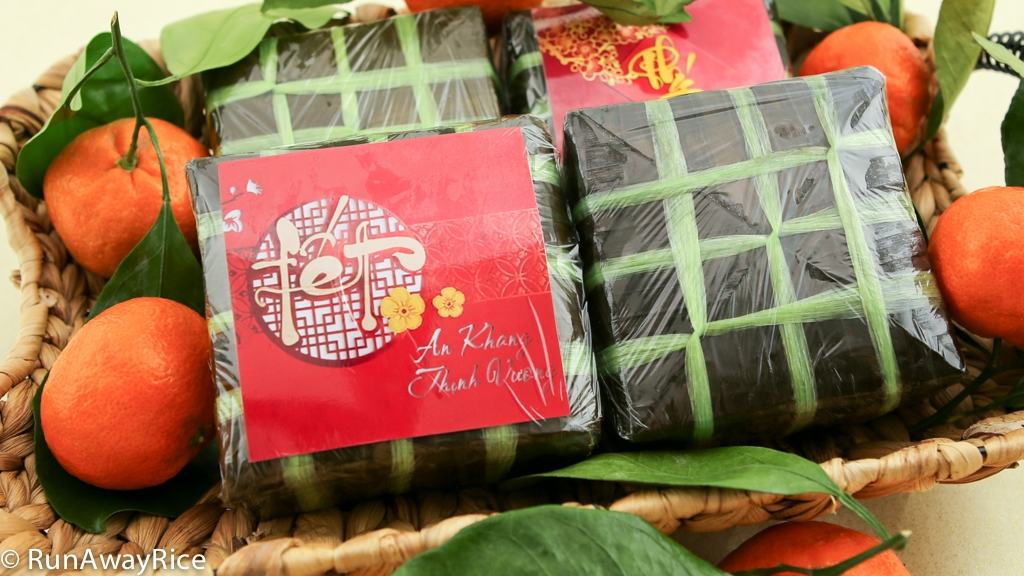
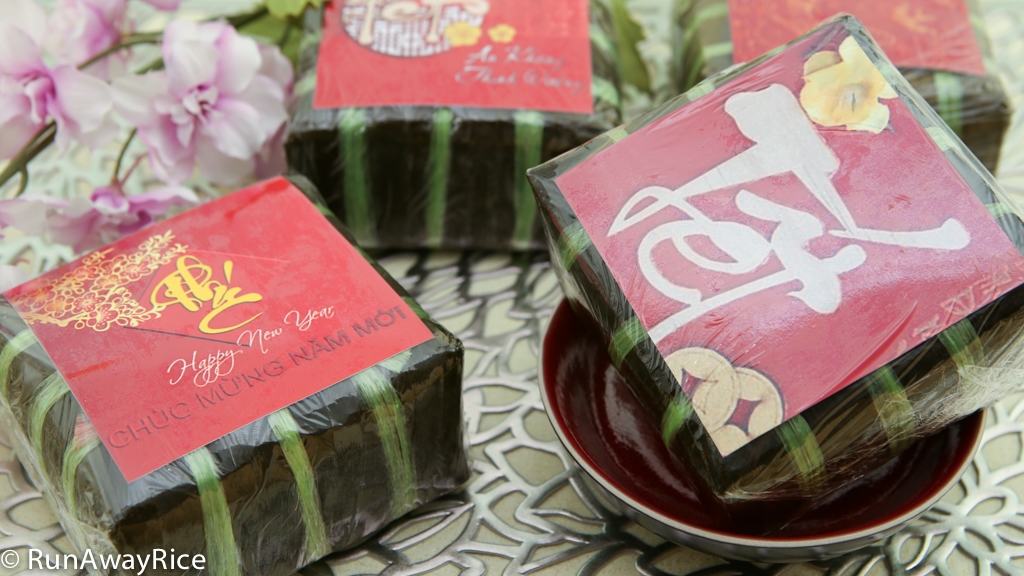
This Instant Pot recipe for Square Sticky Rice and Mung Bean Cakes (Banh Chung) is an essential Lunar New Year dish. Celebrating the new year would not be complete without these delicious savory cakes made of mung bean and pork filling encased in glutinous rice. Wrapped in banana leaves and artfully tied with colorful string, these hearty cakes have a distinct square shape and festive appeal. The banana leaves impart wonderful aroma and lovely color to the rice making a cake that is delightful to all your senses. The making of Square Sticky Rice and Mung Bean Cakes is a labor of love. Yes, they are time-consuming and there aren’t many shortcuts but, the effort is all worth it! You’ll love the artistry involved and your family and friends will surely appreciate your efforts. Give it a try friends and share your results with me. Happy Lunar New Year!
Watch the video for instructions.
Notes on the Instant Pot Square Sticky Rice and Mung Bean Cakes (Banh Chung) Recipe, Tips and Tricks
For the card stock, I use a manila folder and cut it to size.
Make the 4 inch square form using cardboard or purchase a 4 inch square box from your office supply store and then trim to size.
The food mold/cutter used to make the filling should be between 3 1/2 – 3 3/4 inches. You can make one with cardboard or use something close in size, like a food storage container.
When selecting banana leaves, choose sections with the spine. This will give the leaf more support and structure. When cutting the leaves using the 8 inch x 9 inch template, include the spine in the 8 inch length.
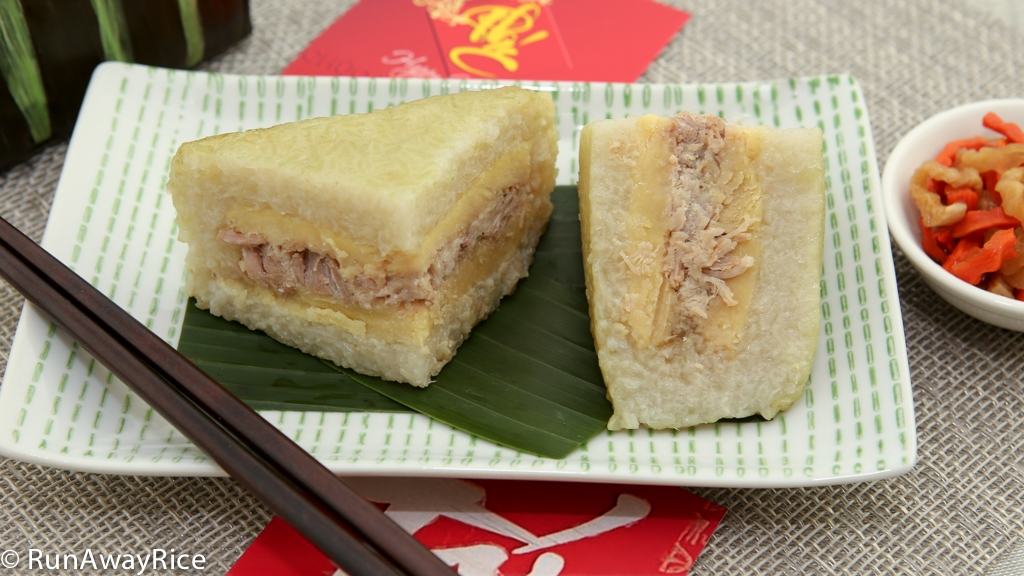
I recommend using a fattier cut of pork in this recipe. The fat melts off during cooking and seeps into the rice making it really tasty.
When making the filling squares, if the mashed mung bean is too crumbly, pop in the microwave for 30 seconds and it will be more spreadable.
Keep the filling in the freezer until you’re ready to use. When wrapping the cakes, take out one filling piece at a time. They’re easier to work with when they are frozen.
When folding the banana leaves, keep the following rule in mind: For the first 2 leaves, put the shiny, darker green side facing out. This will make the cakes look prettier. For the remaining 2 leaves, have the shiny, darker green sides facing in so the banana essence is imparted into the rice.
Use a small spatula or butter knife to push the rice evenly to the corners. This will help to make the cake square.
Avoid tying the string too tightly–just enough to hold everything together. Leave room for the glutinous rice to expand during cooking.
Don’t use too much weight when pressing the cakes. This will cause the sides of the cake to balloon and the cake won’t be square.
If banana leaves are difficult to find, substitute with bamboo leaves or corn husks. Optionally, you can wrap with parchment paper or foil. If you only have small amounts of banana leaves, line the parchment paper with a few pieces and this will impart the lovely banana leaf essence into the cake.
I am using the 6 quart Instant Pot and 4 cakes fit snugly into the pot. Don’t wrap the cakes with too much foil because they may not all fit. Also, avoid cramming the cakes into the pot. If there’s not enough room, cook in 2 batches. Leave room for the cakes to expand during cooking.
An alternative to pressure cooking the Square Sticky Rice and Mung Bean Cakes is boiling on the stove. Boil using Medium Low heat for 4 hours. Make sure the cakes are completely submerged in water during the entire cooking process. Use a heavy bowl or plate to weight the cakes down. Check the water levels every hour and add boiling water as needed. Never add cold water to the pot. This makes the glutinous rice hard and will ruin the cakes.
After the Square Sticky Rice and Mung Bean Cakes are pressed, wrap each cake with plastic wrap or parchment paper to prevent the banana leaves from drying.
Store the Square Sticky Rice and Mung Bean Cakes at room temperature for up to 2 days. Refrigerate for up to 2 weeks. Freeze the whole cakes for up to 6 months. To enjoy again, allow to come to room temperature and warm in the microwave using Low power.
If you enjoy this Instant Pot Square Sticky Rice and Mung Bean Cakes (Banh Chung) recipe, you may also like:
Instant Pot Square Sticky Rice and Mung Bean Cakes / Lunar New Year Cake / Banh Chung
Ingredients
Cakes
2 lbs banana leaves, cleaned
1 lb pork butt
2 shallots
1/2 tsp sugar
2 tsp fish sauce
1/2 tsp coarsely ground black pepper
1 cup peeled split mung bean
3 cups long-grain glutinous/sweet rice
1 1/2 tsp salt, divided
1 1/2 cups water
Other Materials
8 inch x 9 inch piece of card stock
4 inch x 4 inch piece of card stock
2 inch x 10 inch piece of card stock
ruler
plastic wrap
3 3/4 inch square food mold
4 inch square x 2 inch tall cardboard form
4 (8 feet) lengths of cooking string or twine
aluminum foil
Directions
Preparing the Banana Leaves
Use the 8 inch x 9 inch template to cut out 16 sheets of banana leaf.
Use the 2 inch x 10 inch to cut out 8 strips of banana leaf.
Use the 4 inch x 4 inch template to cut out 4 pieces of banana leaf.
Each cake requires 2 (8 inch x 9 inch) sheets banana leaves, 2 (2 inch x 10 inch) strips banana leaves and 1 (4 inch x 4 inch) section banana leaf plus an 8 feet length of cooking string.
Marinating the Pork
Cut the pork into 1/2 inch thick slices and then cut into smaller pieces.
Peel and chop the shallots.
Add the chopped shallots into a medium bowl along with the sugar, fish sauce, and ground black pepper. Stir together.
Add the pork and combine well.
Cover the bowl and then refrigerate overnight.
Preparing the Mung Bean and Glutinous Rice
Wash the mung bean by swirling in a bowl of cold water and then draining the rinse water. Repeat 2 more times or until the water is mostly clear. Fill the bowl with cold water and let the beans soak overnight or for at least 8 hours.
Wash the glutinous rice by swirling in a bowl of cold water and then draining the rinse water. Repeat 2 more times or until the water is mostly clear. Fill the bowl with cold water and let the rice soak overnight or for at least 8 hours.
Cooking the Mung Bean
Rinse the mung bean again and then drain well. Transfer to a rice cooker.
Add 1/2 tsp salt and the water. Spread out the beans into an even layer.
Set to “Cook”.
When the rice cooker switches over to the “Keep Warm” mode, approximately 20 minutes later, mash the mung bean using a paddle spoon.
Transfer the mashed mung bean onto a piece of plastic wrap and shape into an 8 inch long log.
Measure and cut into 8 (1 inch) pieces.
Making the Filling
Cover the work surface with a piece of plastic wrap and place the food mold on top.
Place a piece of the mashed mung bean into the food mold and spread out evenly.
Add 4 oz marinated pork on top of the mung bean.
Add another piece of mashed mung bean on top of the pork. Spread out the mung bean, covering the pork and filling the mold.
Remove the mold. Wrap the square filling in the plastic wrap.
Repeat these steps to make the remaining 3 fillings.
Place the filling in the freezer until ready to use.
Making the Cakes
Drain the glutinous rice using a large colander. Gently toss the rice to remove the remaining water. Add the remaining 1 tsp salt and combine. Divide the rice into 4 equal portions, approximately 1 1/4 cups or 7.5 oz per portion.
Fold the banana leaves (as shown in the video) and arrange in the 4-inch square cardboard form.
Add a heaping 1/3 cup rice. Smooth out the rice so it covers the bottom completely and evenly.
Add the mung bean and pork filling square.
Add another heaping 1/3 cup rice on top. Push the rice to the sides and around the filling. Tap the sides to settle the rice.
Add the remaining rice and smooth out the top.
Add the 4 inch x 4 inch banana leaf on top of the rice with the shiny side down.
Fold down the leaves as you would a present.
Tie the cake using the cooking string. (See video for demonstration.)
Repeat these steps to make the remaining 3 cakes.
Cooking the Cakes
Wrap the cakes in aluminum foil.
Place the cakes into a 6 quart pressure cooker. Fill the cooker to the maximum line with boiling water. Cover with the lid.
Cook using High pressure for 90 minutes.
After the high pressure cook is completed, allow the cakes to continue cooking using the “Keep Warm” function for another 90 minutes.
Pour out the hot water from the cooker and fill with cold water. Let the cakes soak for 10 minutes.
Remove the foil and transfer the cakes to a large bowl of cold water. Gently rinse the cakes and then pat dry.
Cover a large baking dish with a kitchen towel and place the cakes inside. Cover the cakes with another towel. Place a cutting board on top of the cakes and then place 2 (4 lb) bags of sugar on top of the cutting board. Press the cakes for 6-8 hours.
Serving and Storing the Cakes
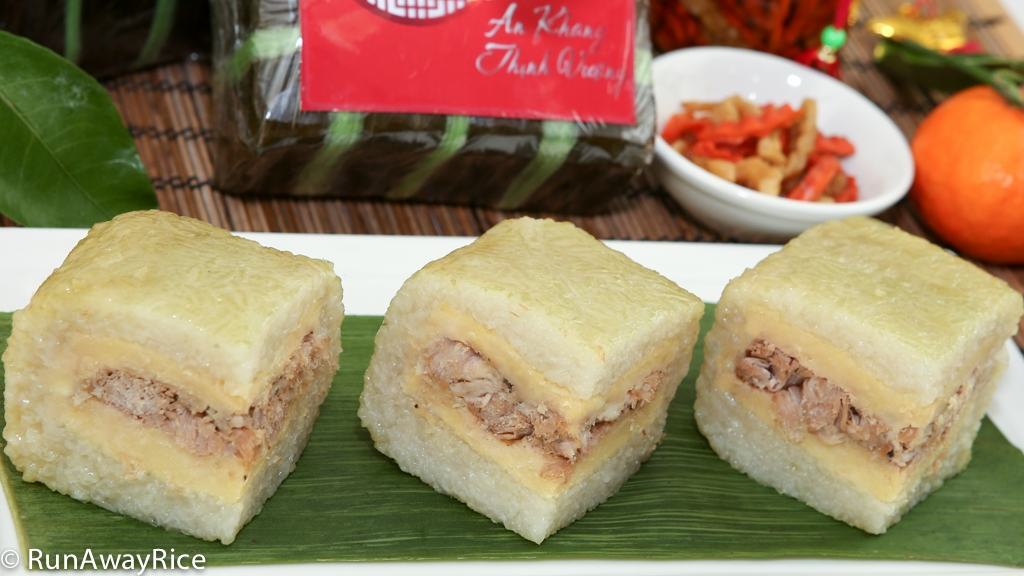
To Serve: Cut off the string. Unwrap the cake by removing the banana leaves and discarding. Cut the cake into thick slices using a sharp knife or with cooking twine. (See the video for a demonstration.)
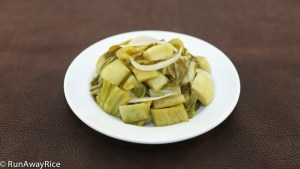
Enjoy the Square Sticky Rice and Mung Bean Cakes with savory Dried Carrot and Radish Pickles. They go together wonderfully!
Store the Square Sticky Rice and Mung Bean Cakes at room temperature for up to 2 days. Refrigerate for up to 2 weeks. Freeze the whole cakes for up to 6 months.
Yields: 4 cakes
Tools I Love and Use in My Kitchen
Check out these posts for more delicious Lunar New Year recipes:
Steamed Rice Cakes and Pork Roll (Banh Day)
Pickled Mustard Greens (Dua Cai Chua)
Chewy Sesame Peanut Candy (Keo Me Dau Phong)
Candied Orange Peels (Mut Vo Cam)
Sticky Rice Balls in Ginger Syrup (Che Troi Nuoc)
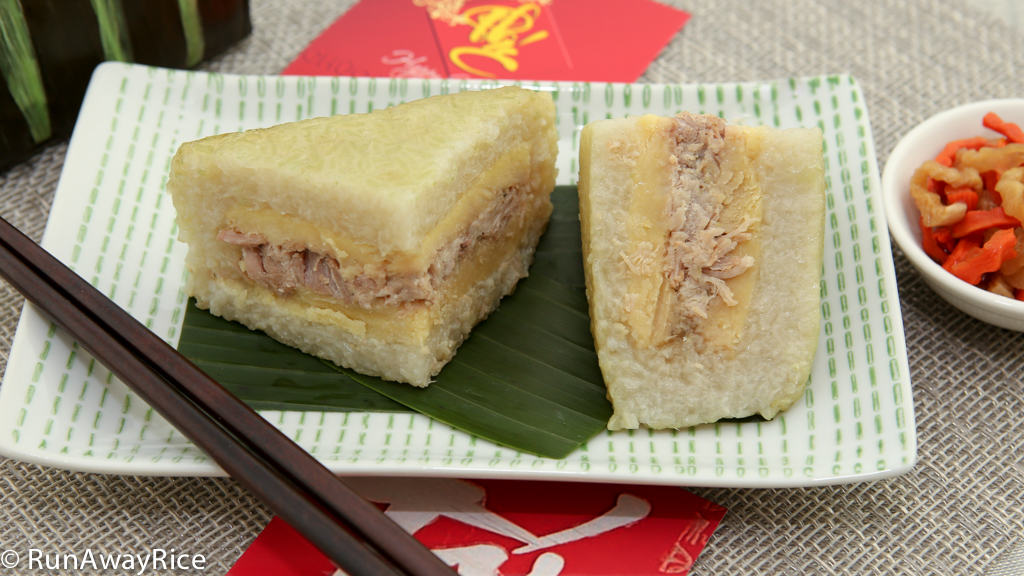
Instant Pot Square Sticky Rice and Mung Bean Cakes / Banh Chung
Ingredients
Cakes
- 2 lbs banana leaves , cleaned
- 1 lb pork butt
- 2 shallots
- 1/2 tsp sugar
- 2 tsp fish sauce
- 1/2 tsp coarsely ground black pepper
- 1 cup peeled split mung bean
- 3 cups long-grain glutinous/sweet rice
- 1 1/2 tsp salt , divided
- 1 1/2 cups water
Other Materials
- 8 inch x 9 inch piece of card stock
- 4 inch x 4 inch piece of card stock
- 2 inch x 10 inch piece of card stock
- ruler
- plastic wrap
- 3 3/4 inch square food mold
- 4 inch square x 2 inch high cardboard form
- 4 (8 feet) lengths of cooking string or twine
- aluminum foil
Instructions
Preparing the Banana Leaves
-
Use the 8 inch x 9 inch template to cut out 16 sheets of banana leaf.
-
Use the 2 inch x 10 inch to cut out 8 strips of banana leaf.
-
Use the 4 inch x 4 inch template to cut out 4 pieces of banana leaf.
-
Each cake requires 2 (8 inch x 9 inch) sheets banana leaves, 2 (2 inch x 10 inch) strips banana leaves and 1 (4 inch x 4 inch) section banana leaf plus an 8 feet length of cooking string.
Marinating the Pork
-
Cut the pork into 1/2 inch thick slices and then cut into smaller pieces.
-
Peel and chop the shallots.
-
Add the chopped shallots into a medium bowl along with the sugar, fish sauce, and ground black pepper. Stir together.
-
Add the pork and combine well.
-
Cover the bowl and then refrigerate overnight.
Preparing the Mung Bean and Glutinous Rice
-
Wash the mung bean by swirling in a bowl of cold water and then draining the rinse water. Repeat 2 more times or until the water is mostly clear. Fill the bowl with cold water and let the beans soak overnight or for at least 8 hours.
-
Wash the glutinous rice by swirling in a bowl of cold water and then draining the rinse water. Repeat 2 more times or until the water is mostly clear. Fill the bowl with cold water and let the rice soak overnight or for at least 8 hours.
Cooking the Mung Bean
-
Rinse the mung bean again and then drain well. Transfer to a rice cooker.
-
Add 1/2 tsp salt and the water. Spread out the beans into an even layer.
-
Set to "Cook".
-
When the rice cooker switches over to the "Keep Warm" mode, approximately 20 minutes later, mash the mung bean using a paddle spoon.
-
Transfer the mashed mung bean onto a piece of plastic wrap and shape into an 8 inch long log.
-
Measure and cut into 8 (1 inch) pieces.
Making the Filling
-
Cover the work surface with a piece of plastic wrap and place the food mold on top.
-
Place a piece of the mashed mung bean into the food mold and spread out evenly.
-
Add 4 oz marinated pork on top of the mung bean.
-
Add another piece of mashed mung bean on top of the pork. Spread out the mung bean, covering the pork and filling the mold.
-
Remove the mold. Wrap the square filling in the plastic wrap.
-
Repeat these steps to make the remaining 3 fillings.
-
Place the filling in the freezer until ready to use.
Making the Cakes
-
Drain the glutinous rice using a large colander. Gently toss the rice to remove the remaining water. Add the remaining 1 tsp salt and combine. Divide the rice into 4 equal portions, approximately 1 1/4 cups or 7.5 oz per portion.
-
Fold the banana leaves (as shown in the video) and arrange in the 4-inch square cardboard form.
-
Add a heaping 1/3 cup rice. Smooth out the rice so it covers the bottom completely and evenly.
-
Add the mung bean and pork filling square.
-
Add another heaping 1/3 cup rice on top. Push the rice to the sides and around the filling. Tap the sides to settle the rice.
-
Add the remaining rice and smooth out the top.
-
Add the 4 inch x 4 inch banana leaf on top of the rice with the shiny side down.
-
Fold down the leaves as you would a present.
-
Tie the cake using the cooking string. (See video for demonstration.)
-
Repeat these steps to make the remaining 3 cakes.
Cooking the Cakes
-
Wrap the cakes in aluminum foil.
-
Place the cakes into a 6 quart pressure cooker. Fill the cooker to the maximum line with boiling water. Cover with the lid.
-
Cook using High pressure for 90 minutes.
-
After the high pressure cook is completed, allow the cakes to continue cooking using the "Keep Warm" function for another 90 minutes.
-
Pour out the hot water from the cooker and fill with cold water. Let the cakes soak for 10 minutes.
-
Remove the foil and transfer the cakes to a large bowl of cold water. Gently rinse the cakes and then pat dry.
-
Cover a large baking dish with a kitchen towel and place the cakes inside. Cover the cakes with another towel. Place a cutting board on top of the cakes and then place 2 (4 lb) bags of sugar on top of the cutting board. Press the cakes for 6-8 hours.
Serving and Storing the Cakes
-
To Serve: Cut off the string. Unwrap the cake by removing the banana leaves and discarding. Cut the cake into thick slices using a sharp knife or with cooking twine. (See the video for a demonstration.)
-
Enjoy the Square Sticky Rice and Mung Bean Cakes with savory Dried Carrot and Radish Pickles. They go together wonderfully!
-
Store the Square Sticky Rice and Mung Bean Cakes at room temperature for up to 2 days. Refrigerate for up to 2 weeks. Freeze the whole cakes for up to 6 months.
Recipe Video
Notes, Tips & Tricks
- For the card stock, I use a manila folder and cut to size.
- Make the 4 inch square form using cardboard or purchase a 4 inch square box from your office supply store and then trim to size.
- The food mold/cutter used to make the filling should be between 3 1/2 - 3 3/4 inches. You can make one with cardboard or use something close in size, like a food storage container.
- When selecting banana leaves, choose sections with the spine. This will give the leaf more support and structure. When cutting the leaves using the 8 inch x 9 inch template, include the spine in the 8 inch length.
- I recommend using a fattier cut of pork in this recipe. The fat melts off during cooking and seeps into the rice making it really tasty.
- When making the filling squares, if the mashed mung bean is too crumbly, pop in the microwave for 30 seconds and it will be more spreadable.
- Keep the filling in the freezer until you're ready to use. When wrapping the cakes, take out one filling piece at a time. They're easier to work with when they are frozen.
- When folding the banana leaves, keep the following rule in mind: For the first 2 leaves, put the shiny, darker green side facing out. This will make the cakes look prettier. For the remaining 2 leaves, have the shiny, darker green sides facing in so the banana essence is imparted into the rice.
- Use a small spatula or butter knife to push the rice evenly to the corners. This will help to make the cake square. Avoid tying the string too tightly--just enough to hold everything together. Leave room for the glutinous rice to expand during cooking.
- Don’t use too much weight when pressing the cakes. This will cause the sides of the cake to balloon and the cake won't be square.
- If banana leaves are difficult to find, substitute with bamboo leaves or corn husks. Optionally, you can wrap with parchment paper or foil. If you only have small amounts of banana leaves, line the parchment paper with a few pieces and this will impart the lovely banana leaf essence into the cake.
- I am using the 6 quart Instant Pot and 4 cakes fit snugly into the pot. Don't wrap the cakes with too much foil because they may not all fit. Also, avoid cramming the cakes into the pot. If there's not enough room, cook in 2 batches. Leave room for the cakes to expand during cooking.
- An alternative to pressure cooking the Square Sticky Rice and Mung Bean Cakes is boiling on the stove. Boil using Medium Low heat for 4 hours. Make sure the cakes are completely submerged in water during the entire cooking process. Use a heavy bowl or plate to weight the cakes down. Check the water levels every hour and add boiling water as needed. Never add cold water to the pot. This makes the glutinous rice hard and will ruin the cakes.
- After the Square Sticky Rice and Mung Bean Cakes are pressed, wrap each cake with plastic wrap or parchment paper to prevent the banana leaves from drying.
- Store the Square Sticky Rice and Mung Bean Cakes at room temperature for up to 2 days. Refrigerate for up to 2 weeks. Freeze the whole cakes for up to 6 months. To enjoy again, allow to come to room temperature and warm in the microwave using Low power.
Nutrition FactsInstant Pot Square Sticky Rice and Mung Bean Cakes / Banh ChungAmount Per ServingCalories 856 Calories from Fat 63% Daily Value*Fat 7g11%Saturated Fat 2g13%Cholesterol 68mg23%Sodium 1205mg52%Potassium 1177mg34%Carbohydrates 148g49%Fiber 12g50%Sugar 5g6%Protein 43g86%Vitamin A 60IU1%Vitamin C 3.5mg4%Calcium 107mg11%Iron 7.3mg41%* Percent Daily Values are based on a 2000 calorie diet.


Hello chi Trang, I hope you are doing well but busy and will come back to blogging the first chance you get.
I made banh tet based on your recipe and they turned out very nicely. I know that Tet is over but I want to make banh chung. Your recipe and directions are so thoroughly that I know my first attempt to make banh chung will be just as successful. I will let you know how they turn out.
May the New Year bring you and your family much health, happiness and wealth!
Hi Ann,
I hope you are doing well! I am glad to hear you made banh tet and want to make banh chung. It’ll be easy for you since you already know how to make banh tet.
I love to make extra cakes and store them in the freezer for a special treat throughout the year. Let me know how your banh chung turns out for you. 🙂
Hi,
Thank you so much for the work you do and share. Oh the nostalgia! My daughter just made these for me today, and we are at the placing weights on the cakes phase. Are we supposed to leave them unrefrigerated for 6-8 hours? We live in the tropics, so I hesitate to leave them out of the fridge fir that long, but then I can’t fit the dish and weights in the fridge? Can you please clarify the proper technique? Is it OK for me to refrigerate and not weight them down (I’m guessing the weights are mainly for the shape).
Thanks again,
Marie
Hi Marie-Odile,
In warmer climate, press the cakes for 2-4 hours. The pressing helps to remove the excess water and to make a denser cake. If the cakes are wrapped well for cooking and do not absorb excess water, you are ok with minimal pressing. I hope you and your daughter enjoyed the recipe.
Another Excellent recipe! The seasonings are perfect. My cakes turned out just like how we like it.
Thank you.
Hi Kim,
Awesome! Glad to hear everything worked out! Thanks for taking the time to share your results! Happy Lunar New Year to you and your family. 🙂
HI
We made these today and they turned out great!
thank you for the recipe!
Question: after freezing what is the best way to reheat?
Thaw and steam?
Does it taste the same? My husband said it won’t taste good cuz the rice turns out crunchy?
Hi Khanh,
I think banh chung tastes great even after freezing. Let it thaw completely and reheat in the microwave using Low power. Steaming works great too and adds moisture to the cake. I don’t find the rice “crunchy” when frozen as long as you leave the cakes wrapped in the banana leaves. Enjoy!
Hi chi Trang,
Last Tet was my first time ever making Banh Tet. I followed your recipe and they came out perfect (shape and taste). Thank you very very much for your detailed instruction. I’m planning to make Banh Chung this year (it’ll be my first time making it). Since I have 8qt IP, and I’d like to make a 5” cake, what size should I use for the big leave (8×9)? Also for the mini ones, what size would the leaves be if the cake is 3” square? Thank you so much chi!
Hi Thythy,
I am so glad to hear your Banh Tet turned out well and you want to try Banh Chung this year. You didn’t mention how tall/thick for the 5″ banh chung, so I’ll assume 2 inches. For a 5x5x2 cake, cut the banana leaf 10″ (wide) x 11″ (length). The width of the leaf is double the dimension of your cake. For the length, it’s the width of the cake (5″) + the height (2″) + 75% of width (3.75″) = 5+2+3.75= 10.75 inches, round to 11″ for a bit extra. For a 3x3x1.25 cake, the large leaf is 6″ wide x 7″. I hope that helps. Let me know if you have any questions.
Thank you chi. I guess the thickness will be 2”. I’m planning to make them the week before Tet. Will let you know how they turn out. I’m not sure how to share the pictures of my Banh tet from last year with you ;-). Thank you again chi and Happy New Year!
Hi Thythy, Good Luck with making Banh Chung! Share your Banh Tet pictures to my Facebook page https://www.facebook.com/therunawayrice or on Instagram. You can also send via email to me at runawayrice@gmail.com
I look forward to seeing them! 🙂