
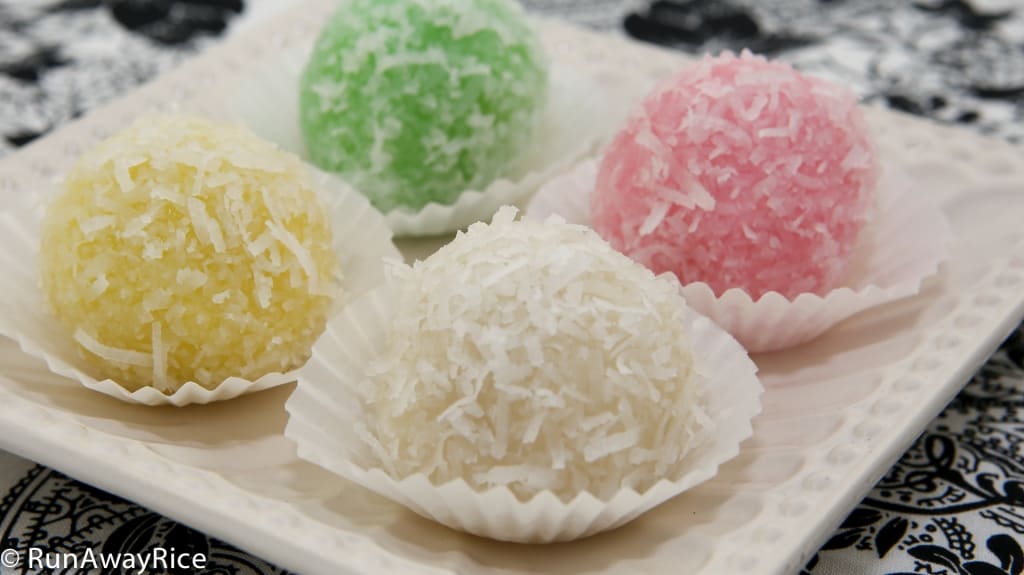
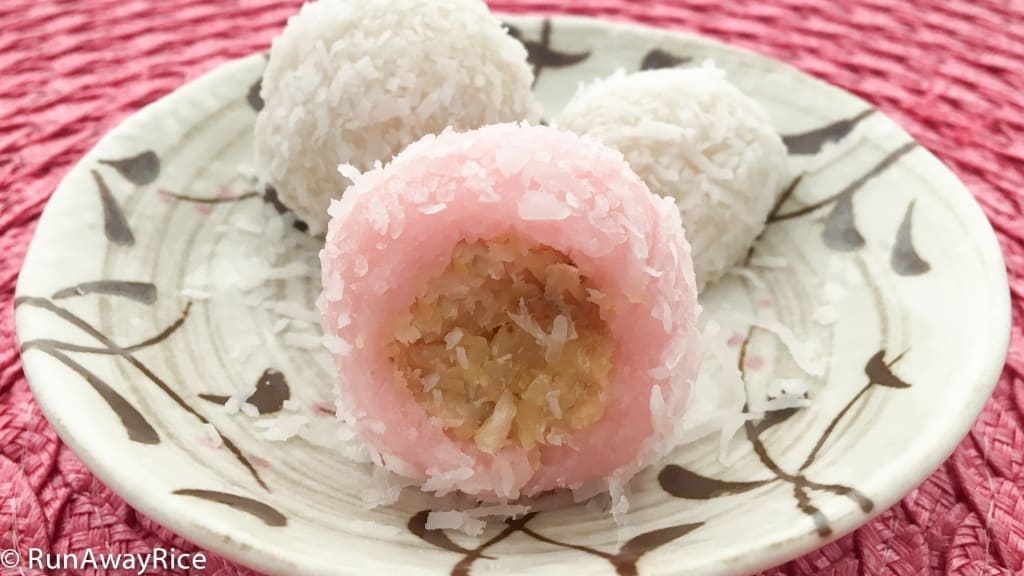
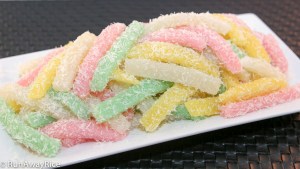
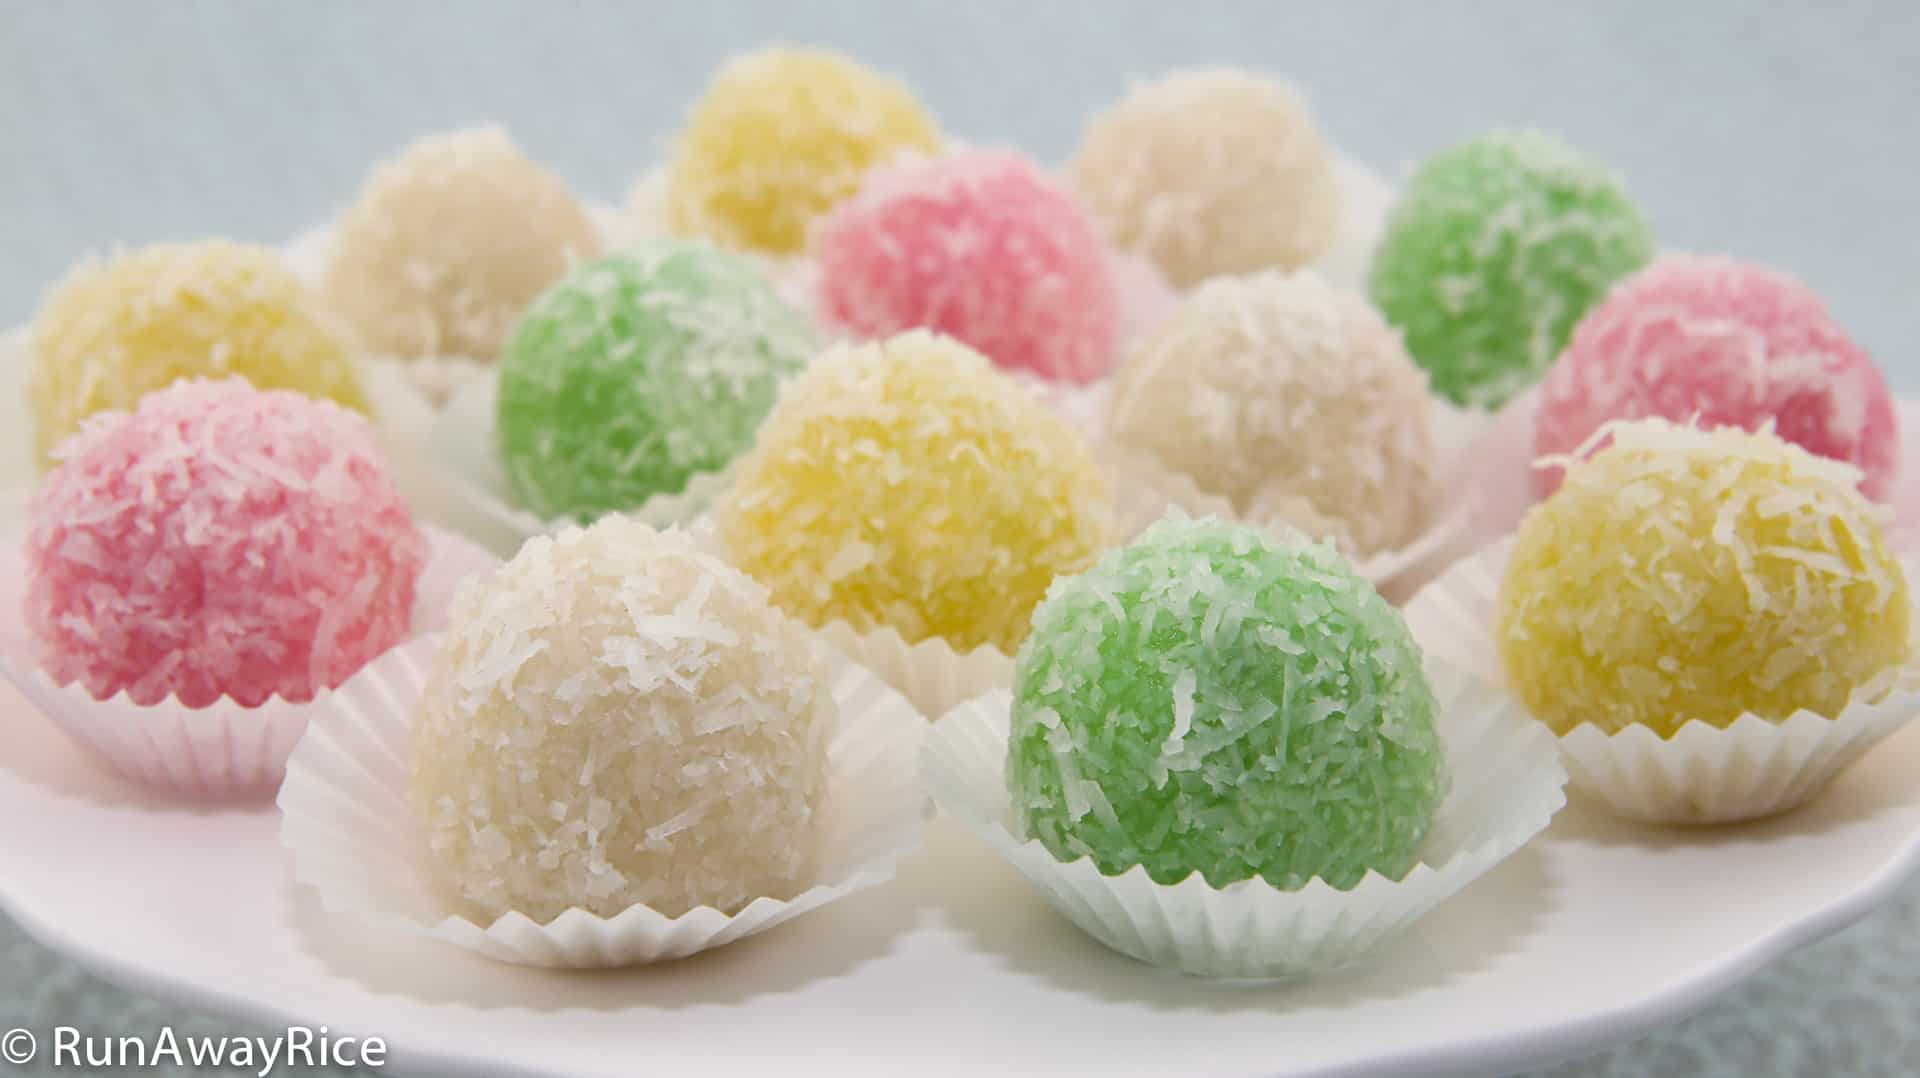
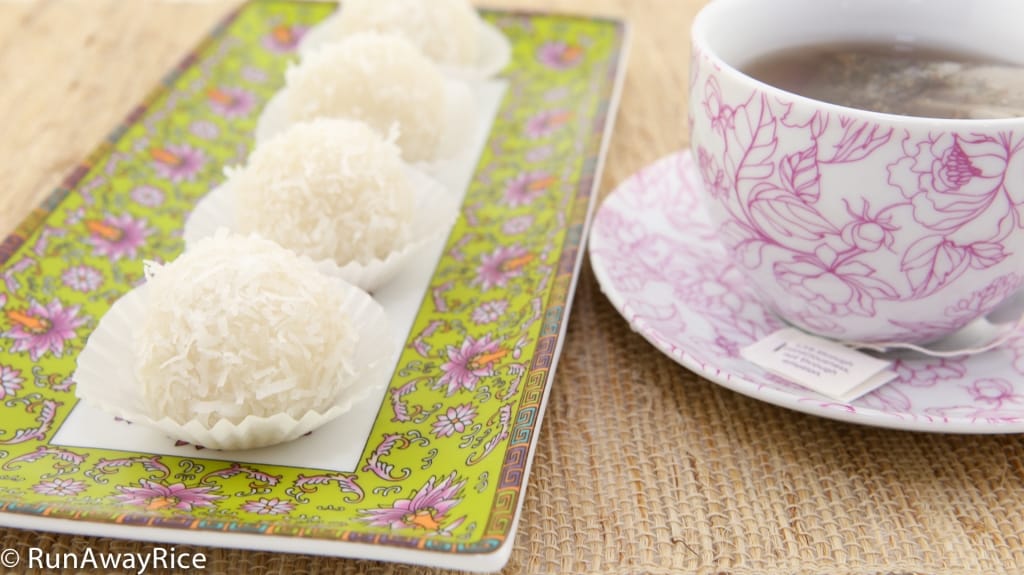
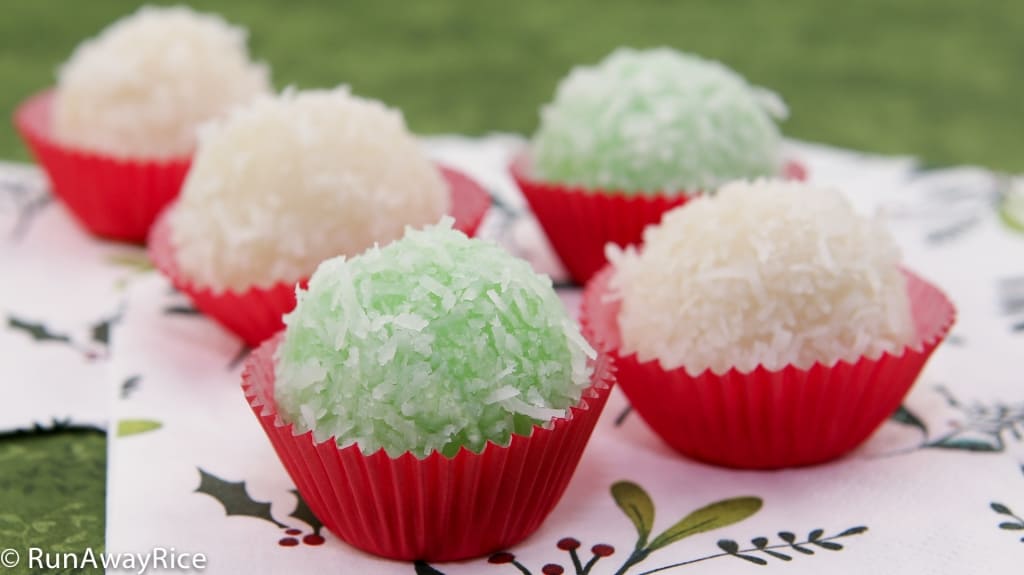
This Snowball Cakes (Banh Bao Chi) recipe makes delicious coconut-coated glutinous cakes filled with grated coconut, roasted peanuts and mashed mung bean. The combination of nutty flavors and sticky texture makes for a tantalizing snack cake that is absolutely addicting. The Snowball Cakes are bite-sized and make perfect sweet treats to enjoy with a cup of hot tea or coffee, wonderful lunchbox treats or tasty petite cakes to serve at a dessert buffet. Even though the snowballs may look like the real thing, the only place you’ll want to “throw” these is in your mouth! 🙂 Make a batch to enjoy today!
Jump to Video Jump to Recipe Card
Notes on the Snowball Cakes (Banh Bao Chi) Recipe, Tips and Tricks
The traditional Snowball Cakes (Banh Bao Chi) recipe does not include mashed mung bean, just peanuts and coconut. I find this filling really dry and heavy so I add mashed mung bean to make it moist and more palatable.
For more delicious coconutty taste, use fresh young coconut in the filling. Grate fresh young coconut or buy it already grated and frozen. Sadly, I couldn’t find either when I went shopping for the ingredients.
If you have peanut allergies, substitute with another nut or use a combination of other nuts. This recipe is gluten-free and dairy-free.
For a recipe short-cut, use only sweetened shredded coconut. Add 1/2 cup water (instead of 1/4 cup) to rehydrate the coconut when making the filling. Use the remaining coconut to coat the cakes. Also, if needed, reduce the sugar in the filling since the coconut is already sweetened.
I use Mochiko Sweet Rice Flour in this recipe. If using another brand, such as the Elephant/Erawan brand from Thailand, you may need to adjust the water and flour a bit to get the right dough consistency. The dough should be soft, pliable and tacky. It should not ooze or lose its shape (too moist) or crumble or crack (too dry). The dough is forgiving but adjust using small teaspoon increments.
Make sure the liquid is hot, between 120-140 F, when making the dough. If the liquid cools, simply reheat in the microwave using High power for 20-25 seconds.
After boiling, don’t let the snowballs sit for long. The balls need to be warm so the shredded coconut sticks.
The Snowball Cakes are best enjoyed the day they are made. Refrigerate any remaining cakes for up to 1 week. To serve again, warm in the microwave using Low power for 20-30 seconds. Freeze for up to 3 months. Allow frozen cakes to thaw completely and then reheat in the microwave.
Watch the video for instructions.
If you enjoy this Snowball Cakes (Banh Bao Chi) recipe, you may also like:
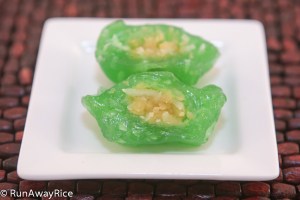 Tapioca and Mung Bean Cake
(Banh Xu Xe / Banh Phu The)
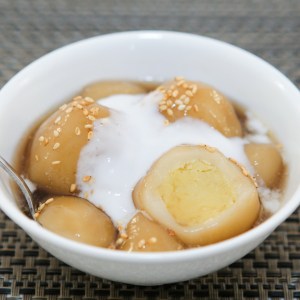
Sticky Rice Balls in Ginger Syrup
(Che Troi Nuoc)
Snowball Cakes / Banh Bao Chi
Ingredients
Filling
1/3 cup peeled split mung bean
1/8 tsp salt
1/2 cup water
1 cup frozen grated coconut, thawed
1/2 cup roasted peanuts, unsalted
1/4 cup water
1/4 cup sugar
Dough
2 cups Mochiko glutinous/sweet rice flour
1 cup boiling water
1/4 cup sugar
food coloring: yellow, pink and Pandan paste
Cake Coating
1 cup sweetened shredded coconut
Directions
Making the Mashed Mung Bean
Transfer the mung bean into a large bowl and fill with cold water. Wash the beans by swirling in the water and then pouring out the rinse water. Repeat this process 2 more times or until the water is mostly clear. Fill the bowl with cold water and let the beans soak for 2 hours.
Wash the beans one more time. Drain using a colander. Transfer the beans into a rice cooker. Add the salt and water. Spread out the beans into an even layer. Close the lid and cook using a basic white rice setting.
Transfer the cooked beans to a medium bowl. Using a paddle spoon, quickly mash the beans while they are still hot. Set aside for now.
Making the Filling
Transfer the thawed grated coconut into a small colander. Rinse the coconut with cold water. Stir to remove any remaining water.
Transfer the roasted peanuts into a small food processor and chop for a few seconds.
In a large non-stick skillet over Medium heat, add the water and sugar. Stir together dissolving the sugar. When the syrup comes to a boil, add the grated coconut and combine together. Stirring occasionally, cook until the coconut turns translucent, approximately 3-4 minutes. Add the chopped peanuts and combine together. Add the mashed mung bean and combine well. The filling should become a thick paste once all ingredients are fully incorporated.
While the filling is still warm, use a small cookie scoop to transfer small mounds onto a plate. Make a total of 24 mounds. Roll each filling mound between your palms forming a ball. After all filling balls are made, cover with plastic wrap to prevent drying.
Making the Dough
In a measuring cup, add the boiling water and sugar. Stir together until the sugar is dissolved. Divide the liquid evenly among 4 small bowls. In one bowl, add yellow food coloring. In another bowl, add pink food coloring. In a third bowl, add the Pandan paste. Leave the fourth bowl as-is, with just the clear liquid. Stir the liquid to blend the color in each bowl.
Add the clear liquid into the mixing bowl. Add 1/2 cup glutinous/sweet rice flour. Using Low speed, mix together until a soft dough forms. This takes approximately 1 – 1 1/2 minutes. Scrape the dough from the bowl and shape into a rough ball. Transfer into a small bowl and cover with plastic wrap.
Repeat the same steps to make the remaining dough using the yellow, pink and green-colored liquids.
Making the Snowball Cakes
Transfer the first batch, the white dough to a work surface. Shape into a log about 6-inches long. Using a pizza wheel or knife, cut the log into 6 equal pieces. Separate the dough pieces. Cover with plastic wrap to prevent drying.
Take a section of dough: Using your fingers, flatten the edges, making a circle about 2-inches in diameter. Place a filling ball in the center of the dough circle and wrap the dough around the filling. Pinch the dough together to cover the filling completely. Roll between your palms to form a smooth ball.
Continue with these same steps making balls using the different colored dough. Make 6 balls of each color: white, yellow, pink and green.
Bring a large pot of water to a rapid boil. Transfer the white and yellow balls into the pot. Stir the balls gently so they don’t stick to the bottom of the pot. Boil using Medium heat stirring occasionally. In about 5-6 minutes the balls should start floating to the top of the water. After all balls float to the top, rotate gently and continue boiling for 2 more minutes.
Transfer the balls into a large colander. Leave some space around the balls so they don’t stick together. Let cool for 3 minutes.
Put the sweetened shredded coconut into a large plate. Roll the warm balls in the coconut coating them evenly. Transfer each snowball into a mini cupcake liner.
Follow the same above steps to make the remaining pink and green balls.
Enjoy the Snowball Cakes while they’re fresh!
Refrigerate any remaining cakes for up to 1 week. Freeze for up to 3 months.
Yields: 24 cakes
Tools I Love and Use in My Kitchen

Snowball Cakes / Banh Bao Chi
Ingredients
Filling
- 1/3 cup peeled split mung bean
- 1/8 tsp salt
- 1/2 cup water
- 1 cup frozen grated coconut thawed
- 1/2 cup roasted peanuts unsalted
- 1/4 cup water
- 1/4 cup sugar
Dough
- 2 cups Mochiko glutinous/sweet rice flour
- 1 cup boiling water
- 1/4 cup sugar
- food coloring: yellow, pink and Pandan paste
Cake Coating
Instructions
Making the Mashed Mung Bean
-
Transfer the mung bean into a large bowl and fill with cold water. Wash the beans by swirling in the water and then pouring out the rinse water. Repeat this process 2 more times or until the water is mostly clear. Fill the bowl with cold water and let the beans soak for 2 hours.
-
Wash the beans one more time. Drain using a colander. Transfer the beans into a rice cooker. Add the salt and water. Spread out the beans into an even layer. Close the lid and cook using a basic white rice setting.
-
Transfer the cooked beans to a medium bowl. Using a paddle spoon, quickly mash the beans while they are still hot. Set aside for now.
Making the Filling
-
Transfer the thawed grated coconut into a small colander. Rinse the coconut with cold water. Stir to remove any remaining water.
-
Transfer the roasted peanuts into a small food processor and chop for a few seconds.
-
In a large non-stick skillet over Medium heat, add the water and sugar. Stir together dissolving the sugar. When the syrup comes to a boil, add the grated coconut and combine together. Stirring occasionally, cook until the coconut turns translucent, approximately 3-4 minutes. Add the chopped peanuts and combine together. Add the mashed mung bean and combine well. The filling should become a thick paste once all ingredients are fully incorporated.
-
While the filling is still warm, use a small cookie scoop to transfer small mounds onto a plate. Make a total of 24 mounds. Roll each filling mound between your palms forming a ball. After all filling balls are made, cover with plastic wrap to prevent drying.
Making the Dough
-
In a measuring cup, add the boiling water and sugar. Stir together until the sugar is dissolved. Divide the liquid evenly among 4 small bowls. In one bowl, add yellow food coloring. In another bowl, add pink food coloring. In a third bowl, add the Pandan paste. Leave the fourth bowl as-is, with just the clear liquid. Stir the liquid to blend the color in each bowl.
-
Add the clear liquid into the mixing bowl. Add 1/2 cup glutinous/sweet rice flour. Using Low speed, mix together until a soft dough forms. This takes approximately 1 - 1 1/2 minutes. Scrape the dough from the bowl and shape into a rough ball. Transfer into a small bowl and cover with plastic wrap.
-
Repeat the same steps to make the remaining dough using the yellow, pink and green-colored liquids.
Making the Snowball Cakes
-
Transfer the first batch, the white dough to a work surface. Shape into a log about 6-inches long. Using a pizza wheel or knife, cut the log into 6 equal pieces. Separate the dough pieces. Cover with plastic wrap to prevent drying.
-
Take a section of dough: Using your fingers, flatten the edges, making a circle about 2-inches in diameter. Place a filling ball in the center of the dough circle and wrap the dough around the filling. Pinch the dough together to cover the filling completely. Roll between your palms to form a smooth ball.
-
Continue with these same steps making balls using the different colored dough. Make 6 balls of each color: white, yellow, pink and green.
-
Bring a large pot of water to a rapid boil. Transfer the white and yellow balls into the pot. Stir the balls gently so they don't stick to the bottom of the pot. Boil using Medium heat stirring occasionally. In about 5-6 minutes the balls should start floating to the top of the water. After all balls float to the top, rotate gently and continue boiling for 2 more minutes.
-
Transfer the balls into a large colander. Leave some space around the balls so they don't stick together. Let cool for 3 minutes.
-
Put the sweetened shredded coconut into a large plate. Roll the warm balls in the coconut coating them evenly. Transfer each snowball into a mini cupcake liner.
-
Follow the same above steps to make the remaining pink and green balls.
-
Enjoy the Snowball Cakes while they're fresh!
-
Refrigerate any remaining cakes for up to 1 week. Freeze for up to 3 months.
Recipe Video
Notes, Tips & Tricks
- For more delicious coconutty taste, use fresh young coconut in the filling. Grate fresh young coconut or buy it already grated and frozen.
- If you have peanut allergies, substitute with another nut or use a combination of other nuts. This recipe is gluten-free and dairy-free.
- For a recipe short-cut, use only sweetened shredded coconut. Add 1/2 cup water (instead of 1/4 cup) to rehydrate the coconut when making the filling. Use the remaining coconut to coat the cakes. Also, if needed, reduce the sugar in the filling since the coconut is already sweetened.
- I use Mochiko Sweet Rice Flour in this recipe. If using another brand, such as the Elephant/Erawan brand from Thailand, you may need to adjust the water and flour a bit to get the right dough consistency. The dough should be soft, pliable and tacky. It should not ooze or lose its shape (too moist) or crumble or crack (too dry). The dough is forgiving but adjust using small teaspoon increments.
- Make sure the liquid is hot, between 120-140 F, when making the dough. If the liquid cools, simply reheat in the microwave using High power for 20-25 seconds.
- After boiling, don't let the snowballs sit for long. The balls need to be warm so the shredded coconut sticks.
- The Snowball Cakes are best enjoyed the day they are made. Refrigerate any remaining cakes for up to 1 week. To serve again, warm in the microwave using Low power for 20-30 seconds. Freeze the cakes for up to 3 months. Allow frozen cakes to thaw completely and then reheat in the microwave.
Nutrition FactsSnowball Cakes / Banh Bao ChiAmount Per ServingCalories 123 Calories from Fat 36% Daily Value*Fat 4g6%Saturated Fat 2g13%Sodium 37mg2%Potassium 94mg3%Carbohydrates 19g6%Fiber 1g4%Sugar 6g7%Protein 2g4%Vitamin A 5IU0%Vitamin C 0.2mg0%Calcium 9mg1%Iron 0.5mg3%* Percent Daily Values are based on a 2000 calorie diet.
Can I use tapioca starch instead of glutinous rice flour
Hi, I love your recipe, but sadly, I don’t have a stand mixer to make the dough. Can I still make the dough by hand kneading? Thanks.
Hi Choco,
Of course, it takes a bit longer but kneading by hand works too. Good Luck! 🙂
I made these for a Tet celebration on Saturday and they were soooooooo soft and delicious. Not too sweet, but just sweet enough! I really appreciate rolling the balls before cooking the dough in the microwave. Made things so much easier! I didn’t make 24 balls though, because my scooper was bigger so I ended up making 17. Hahaha But they were awesome! Thank you sooooo much! I always look forward to your recipes! YOU ARE A GENIUS!!!!!!
Hi Ann,
I am thrilled to hear you liked the Snowball Cakes recipe. LOL…I like the larger-sized Snow Balls too. Thanks for trying my recipe and taking the time to share your results. 🙂
Lovely snack cake. For covering the snowballs, can i use dried grated coconut ? Or better i use fresh grated coconut ?
Hi Natalie, I use dried coconut. The fresh grated coconut is delicious if you have time to prepare it. Enjoy the recipe!
Hi Trang,
In the past I tried the recipe where you cook the dough in the microwave but didn’t like it because it’s such a sticky messy process. I was so delighted to see you have a different method. I just made the first batch and the snowballs are so wonderful, the dough is so soft and the filling is perfect. My husband and girls love them. Thank you for sharing your recipes with us!
Hi Lisa,
Thanks for trying my recipe. I am so glad you like it! Yes, the microwave recipe may seem quicker but the clean-up process is much longer…lol! 🙂
The snow balls are so pretty! I am glad this is a make ahead recipe which would help out tremendously for a big party. How do I keep them soft and moist through out the party?
Hi Thinh,
When serving for a party, keep the Snowball Cakes covered with plastic wrap or store them in a covered cake plate or pan. Enjoy!