
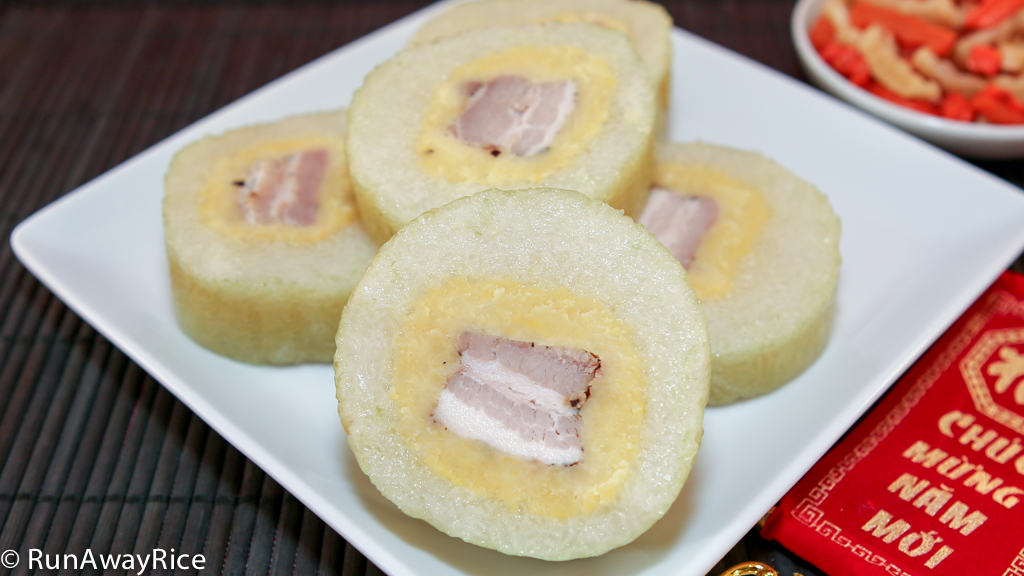
Sticky Rice and Mung Bean Cakes (Banh Tet) are must-have foods for Vietnamese New Year / Tet. There are many variations on the filling, some sweet and others savory. This recipe is the savory version with a mung bean and pork filling. Unlike their square-shaped siblings, Square Sticky Rice and Mung Bean Cakes (Banh Chung), these cakes are smaller, cylindrical and overall easier to make. If you live in an area with a large Asian community, you’ll find these cakes everywhere, especially around this time of the year. It may be tempting to just buy them. However, if you have the time, I encourage you to make these at home. They are just amazing when homemade! The glutinous rice is deliciously soft and sticky when freshly cooked and you can season the filling to your taste. Plus, making the cakes is a such a fun activity and a wonderful opportunity to get the whole family involved. No arguments, these Sticky Rice and Mung Bean Cakes are time-consuming to make, but, when you take that first bite of cake you’ll agree the effort was all worth it. Happy New Year!!
Watch the video for instructions.
PART 1: Making the Filling and Preparing the Banana Leaves
PART 2: Making and Cooking the Sticky Rice and Mung Bean Cakes
Notes on the Sticky Rice and Mung Bean Cakes Recipe (Banh Tet), Tips and Tricks
If the mashed mung bean becomes difficult to work with, microwave for 20-30 seconds to soften.
The glutinous rice called for in this recipe is generous and you may have some leftover. I adjusted the rice to consider several important variables: 1) brand of rice 2) soaking time 3) size of filling logs 4) amount of rice preferred in cakes. Each cake uses approximately 2 cups hydrated glutinous rice. You can add up to another 1/2 cup per cake and have enough rice for all 4 cakes. My cakes measure: Diameter: 2 3/4 inches, Circumference: 8 3/4 inches, Height: 7 inches
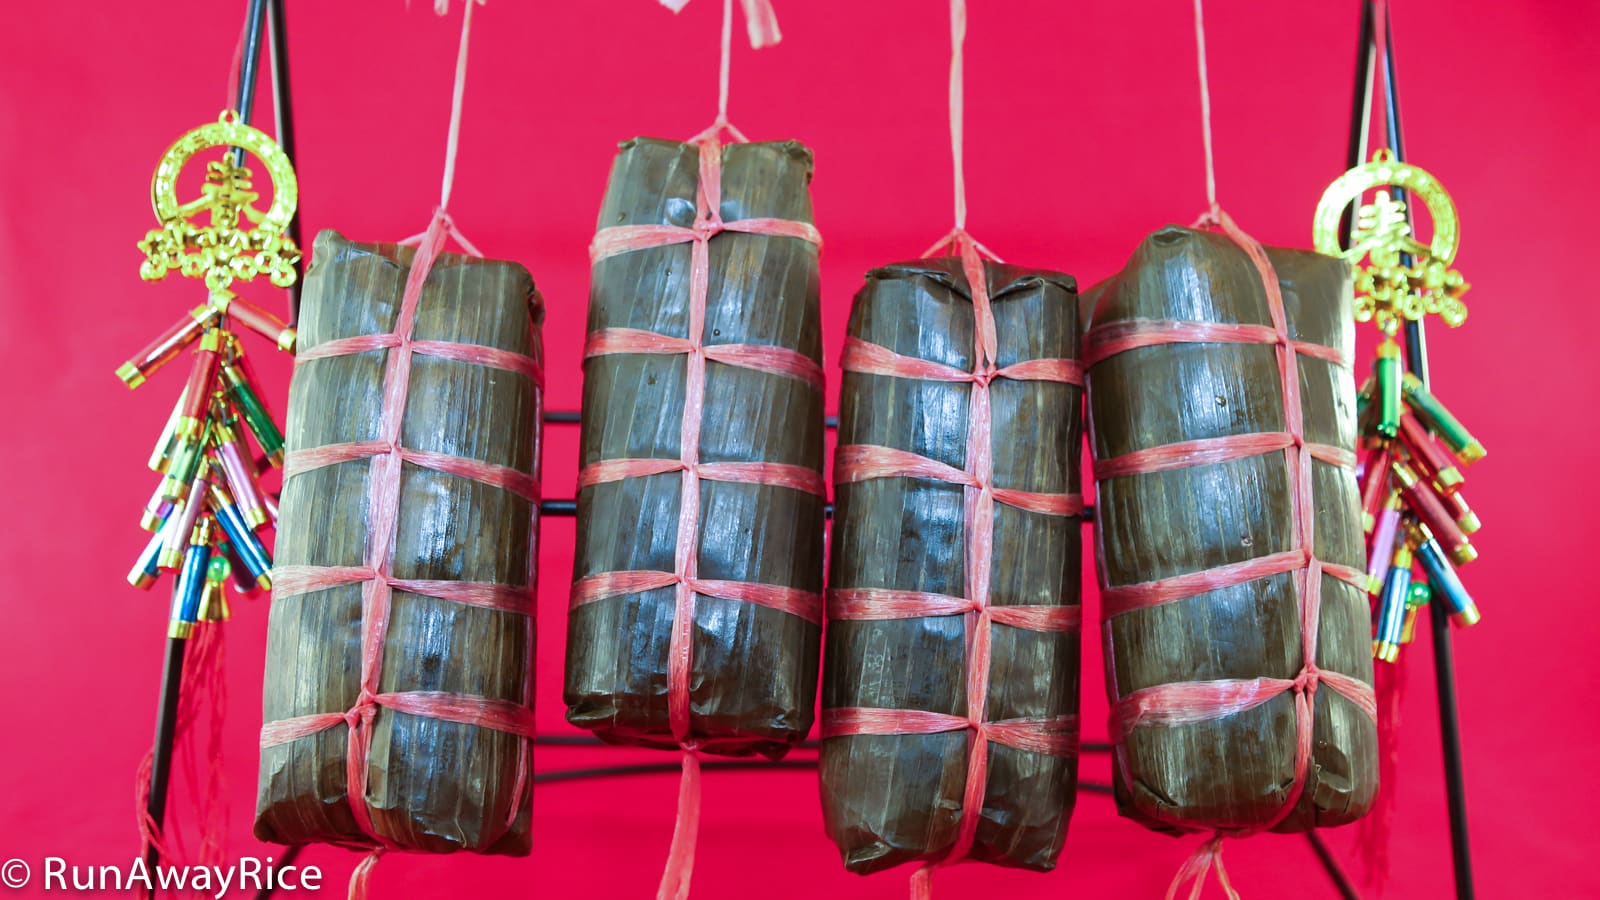
Please note I made a double recipe and that’s why there are 8 cakes in my stockpot.
When tying the cakes with string, use a moderate amount of tension. The string should be tight enough to hold everything together put not so tight that it creases the banana leaves. You should be able to slide the string with your fingers if needed.
The technique for tying the string is what makes the cakes so unique and eye-catching. However, if working with string is not your forte, simply make a series of simple knots around the cake.
You need a pretty big pot to cook these cakes. The one I have is a 20 quart stockpot. The pot should be at least 3 inches taller than the cakes to allow room for water. If you don’t have a pot that is tall enough, you can lay the cakes on their sides and cook them this way.
Be sure to use a heavy lid, bowl or plate to weigh down the cakes. The cakes need to be submerged in water during the entire cooking process or they will cook unevenly.
Check the water levels every hour and add more water as needed. When adding water to the pot, only use boiling water. Do not add lukewarm or cold water to the pot. This will stop the cakes from cooking and ruin them.
Some people hang their cakes after cooking to allow the water to drip out of the cakes. If you wrap the cakes in a generous amount of foil, water won’t seep into the cake and there’s no need to hang dry.
Instead of boiling on the stove top, you can cook the cakes using a pressure cooker. Pressure cook on High for 2 hours. After the pressure cook time is completed, let the cakes continue cooking in the “Keep Warm” mode for at least 1 hour. More is just fine. You may not be able to stand the cakes upright and laying them horizontally is just fine. Be sure to add water to the “Max” line or enough to cover the cakes. You can place something heavy to submerge the cakes but this isn’t necessary if you use plenty of water.
Store the Sticky Rice and Mung Bean Cakes at room temperature for up to 2 days. Refrigerate for up to 2 weeks. Freeze the whole cakes for up to 6 months. To enjoy again, allow to come to room temperature and warm in the microwave using Low power.
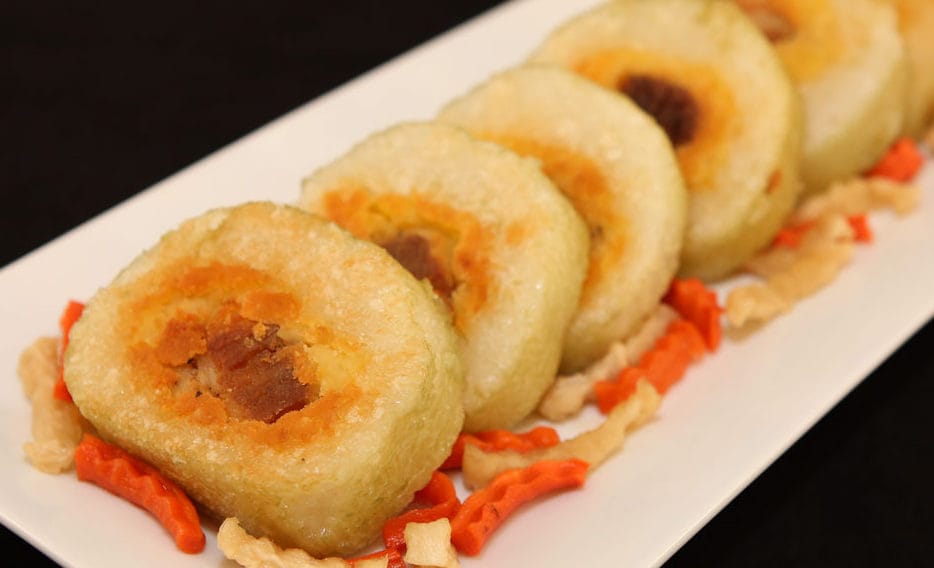
Have lots of leftover cake? A scrumptious way to enjoy leftover Sticky Rice and Mung Bean Cakes is to pan-fry them until they are golden brown on both sides.
If you enjoy this Sticky Rice and Mung Bean Cakes (Banh Tet) recipe, you may also like:

Dried Carrot and Radish Pickles (Dua Mon)
Square Sticky Rice and Mung Bean Cakes (Banh Chung)
Sticky Rice and Mung Bean (Xoi Vo)

Sticky Rice and Mung Bean Cakes / Banh Tet

Ingredients
Cakes
3/4 lb pork belly
1/2 tsp coarsely ground black pepper
1/2 tsp sugar
2 1/2 tsp salt, divided
2 Tbsp minced shallots
1/2 Tbsp fish sauce
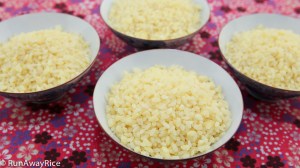
3 cups mashed mung beans
16 oz frozen banana leaves
6 cups long-grain glutinous/sweet rice
Other Materials
ruler
2 (8 1/2 x 11 inch) sheets of paper
scotch tape
4 (16 inch) lengths of string, used as temporary ties
4 (9 feet) lengths of cooking string or twine
aluminum foil
Directions
Making the Filling Logs
Cut the pork belly into 4 (1 inch) wide strips and then trim so each strip to 5 inches long. Optionally, remove the pork skin and discard.
Combine the pork with ground black pepper, sugar, 1/2 tsp salt, minced shallots and fish sauce. Marinate in refrigerator for at least 1 hour.
Lay a piece of plastic wrap on the work surface. Take 3/4 cup mashed mung beans and divide in half. Spread out each mung bean half into 5 inch long sections.
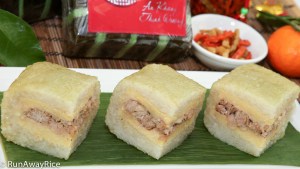
Place a piece of marinated pork on top of one of the mung bean strips. Place the other mung bean strip on top. Using your hands, press the mashed mung bean around the pork. Roll and shape into a log.
Wrap the log in plastic wrap.
Repeat the above steps, making a total of 4 logs.
Measure the logs and make sure they’re approximately 5 inches long.
Freeze the filling logs overnight.
Preparing the Banana Leaves
Tape together the 2 sheets of 8 1/2 x 11 inch paper to form an 11 inch square paper template.
Thaw the banana leaves at room temperature for at least 1 hour. Gently unfold and separate the banana leaves. Using the paper template, cut out 12 sheets of banana leaves. (You’ll need 3 sheets of banana leaves per cake). Cut a few extra sheets just in case some tear while washing.
Clean the banana leaves by washing both sides in hot water. Wipe both sides of the leaves dry with paper towels.
Moisten 2 large sheets of paper towels and place the cleaned banana leaves between the towels. Place the cleaned banana leaves back into the original plastic bag and then seal with tape.
Refrigerate the banana leaves until they’re ready to use.
Preparing the Glutinous Rice
Wash the glutinous rice by rinsing with cool water until the water is mostly clear. Fill the basin with cold water and let the rice soak overnight.
Making the Cakes
Remove the filling logs from the freezer.
Rinse the glutinous rice with cold water one more time. Drain in a large colander. Toss the rice in the colander to remove any excess water. Add the remaining 2 tsp salt and combine with the rice.
Place a 16 inch string vertically on the work surface.
Place the first banana leaf on the work surface with the shiny side down and veins running horizontally. Place the second banana leaf on top of the first in the same way. Place the third banana leaf on top of the other 2 leaves with the shiny side up and veins running vertically.
Place 1/2 cup glutinous rice on the center of the banana leaves. Spread out the rice so it’s 1/4 inch high and just a bit bigger than the filling log. Place the filling log on top of the rice.
Bring the banana leaves up and hold together with one hand. Add another 1/2 cup glutinous rice on top of the filling log. Using a spoon, add more rice to the sides of the cake. Smooth out the top, encasing the filling with an even amount of rice.
While holding the top portion of banana leaves, wrap the bottom portion securely around the log. Bring the top portion of the leaves down and wrap firmly around the cake. Tie the string around the middle of the cake to secure in place.
Fold the leaves over on the one end and stand the cake up. Pat the cake with your palms to settle the rice. Add 4 heaping tablespoons rice to the end, cover the filling. Fold the banana leaves (like you would a present) covering the end completely.
Flip the cake over, standing it on the folded end now. Repeat the same process of adding rice and folding the banana leaves for the remaining end.
Tie the cakes securely with a 9 feet section of cooking string. (Please see video for this part.)
Continue with these same steps until all 4 cakes are made.
Wrap the cakes with a generous amount of aluminum foil.
Cooking the Cakes
Transfer the cakes into a 20 quart stockpot standing each cake on its end.
Fill the pot with water until it almost covers the cakes. Place a heavy lid or plate on top of the cakes. Add more water until the cakes are completely immersed in water.
Cover the pot and bring to a boil using High heat.
Reduce heat to Low and cook for 4 hours.
Check the water level every 1 hour and add boiling water as needed. (Do not add cold water. This will halt the cooking process and ruin the cakes.)
After boiling for 2 hours, flip the cakes.
After 4 hours, carefully remove the cakes from the pot using tongs.
Remove the foil and rinse each cake with cold water.
Dry the cakes with a kitchen towel.
Wrap each cake in plastic wrap and allow to cool for 4 hours.
Serving and Storing the Cakes
To Serve: Cut off the string. Unwrap the cake by removing the banana leaves and discarding. Cut the cake into thick slices using a sharp knife or with cooking twine. (See the video for a demonstration.)
Enjoy the Sticky Rice and Mung Bean Cakes with savory Dried Carrot and Radish Pickles.
Store the Sticky Rice and Mung Bean Cakes at room temperature for up to 2 days. Refrigerate for up to 2 weeks. Freeze the whole cakes for up to 6 months.
Yields: 4 cakes
Tools I Love and Use in My Kitchen

Sticky Rice and Mung Bean Cakes / Banh Tet
Sticky Rice and Mung Bean Cakes (Banh Tet) are must-have foods for Vietnamese New Year / Tet. There are many variations on the filling, some sweet and others savory. This recipe is the savory version with a mung bean and pork filling. Unlike their square-shaped siblings, Square Sticky Rice and Mung Bean Cakes (Banh Chung), these cakes are smaller, cylindrical and overall easier to make. If you live in an area with a large Asian community, you'll find these cakes everywhere, especially around this time of the year. It may be tempting to just buy them. However, if you have the time, I encourage you to make these at home. They are just amazing when homemade!
Ingredients
Cakes
- 3/4 lb pork belly
- 1/2 tsp coarsely ground black pepper
- 1/2 tsp sugar
- 2 1/2 tsp salt , divided
- 2 Tbsp minced shallots
- 1/2 Tbsp fish sauce
- 3 cups mashed mung beans
- 16 oz frozen banana leaves
- 6 cups long-grain glutinous/sweet rice
Other Materials
- ruler
- 2 (8 1/2 x 11 inch) sheets of paper
- scotch tape
- 4 (16 inch) lengths of string , used as temporary ties
- 4 (9 feet) lengths of cooking string or twine
- aluminum foil
Instructions
Making the Filling Logs
-
Cut the pork belly into 4 (1 inch) wide strips and then trim so each strip to 5 inches long. Optionally, remove the pork skin and discard.
-
Combine the pork with ground black pepper, sugar, 1/2 tsp salt, minced shallots and fish sauce. Marinate in refrigerator for at least 1 hour.
-
Lay a piece of plastic wrap on the work surface. Take 3/4 cup mashed mung beans and divide in half. Spread out each mung bean half into 5 inch long sections.
-
Place a piece of marinated pork on top of one of the mung bean strips. Place the other mung bean strip on top. Using your hands, press the mashed mung bean around the pork. Roll and shape into a log.
-
Wrap the log in plastic wrap.
-
Repeat the above steps, making a total of 4 logs.
-
Measure the logs and make sure they're approximately 5 inches long.
-
Freeze the filling logs overnight.
Preparing the Banana Leaves
-
Tape together the 2 sheets of 8 1/2 x 11 inch paper to form an 11 inch square paper template.
-
Thaw the banana leaves at room temperature for at least 1 hour. Gently unfold and separate the banana leaves. Using the paper template, cut out 12 sheets of banana leaves. (You'll need 3 sheets of banana leaves per cake). Cut a few extra sheets just in case some tear while washing.
-
Clean the banana leaves by washing both sides in hot water. Wipe both sides of the leaves dry with paper towels.
-
Moisten 2 large sheets of paper towels and place the cleaned banana leaves between the towels. Place the cleaned banana leaves back into the original plastic bag and then seal with tape.
-
Refrigerate the banana leaves until they're ready to use.
Preparing the Glutinous Rice
-
Wash the glutinous rice by rinsing with cool water until the water is mostly clear. Fill the basin with cold water and let the rice soak overnight.
Making the Cakes
-
Remove the filling logs from the freezer.
-
Rinse the glutinous rice with cold water one more time. Drain in a large colander. Toss the rice in the colander to remove any excess water. Add the remaining 2 tsp salt and combine with the rice.
-
Place a 16 inch string vertically on the work surface.
-
Place the first banana leaf on the work surface with the shiny side down and veins running horizontally. Place the second banana leaf on top of the first in the same way. Place the third banana leaf on top of the other 2 leaves with the shiny side up and veins running vertically.
-
Place 1/2 cup glutinous rice on the center of the banana leaves. Spread out the rice so it's 1/4 inch high and just a bit bigger than the filling log. Place the filling log on top of the rice.
-
Bring the banana leaves up and hold together with one hand. Add another 1/2 cup glutinous rice on top of the filling log. Using a spoon, add more rice to the sides of the cake. Smooth out the top, encasing the filling with an even amount of rice.
-
While holding the top portion of banana leaves, wrap the bottom portion securely around the log. Bring the top portion of the leaves down and wrap firmly around the cake. Tie the string around the middle of the cake to secure in place.
-
Fold the leaves over on the one end and stand the cake up. Pat the cake with your palms to settle the rice. Add 4 heaping tablespoons rice to the end, cover the filling. Fold the banana leaves (like you would a present) covering the end completely.
-
Flip the cake over, standing it on the folded end now. Repeat the same process of adding rice and folding the banana leaves for the remaining end.
-
Tie the cakes securely with a 9 feet section of cooking string. (Please see video for this part.)
-
Continue with these same steps until all 4 cakes are made.
-
Wrap the cakes with a generous amount of aluminum foil.
Cooking the Cakes
-
Transfer the cakes into a 20 quart stockpot standing each cake on its end.
-
Fill the pot with water until it almost covers the cakes. Place a heavy lid or plate on top of the cakes. Add more water until the cakes are completely immersed in water.
-
Cover the pot and bring to a boil using High heat.
-
Reduce heat to Low and cook for 4 hours.
-
Check the water level every 1 hour and add boiling water as needed. (Do not add cold water. This will halt the cooking process and ruin the cakes.)
-
After boiling for 2 hours, flip the cakes.
-
After 4 hours, carefully remove the cakes from the pot using tongs.
-
Remove the foil and rinse each cake with cold water.
-
Dry the cakes with a kitchen towel.
-
Wrap each cake in plastic wrap and allow to cool for 4 hours.
Serving and Storing the Cakes
-
To Serve: Cut off the string. Unwrap the cake by removing the banana leaves and discarding. Cut the cake into thick slices using a sharp knife or with cooking twine. (See the video for a demonstration.)
-
Enjoy the Sticky Rice and Mung Bean Cakes with savory Dried Carrot and Radish Pickles.
-
Store the Sticky Rice and Mung Bean Cakes at room temperature for up to 2 days. Refrigerate for up to 2 weeks. Freeze the whole cakes for up to 6 months.
Recipe Video
Notes, Tips & Tricks
- If the mashed mung bean becomes difficult to work with, microwave for 20-30 seconds to soften.
- The glutinous rice called for in this recipe is generous and you may have some leftover. I adjusted the rice to consider several important variables: 1) brand of rice 2) soaking time 3) size of filling logs 4) amount of rice preferred in cakes. Each cake uses approximately 2 cups hydrated glutinous rice. You can add up to another 1/2 cup per cake and have enough rice for all 4 cakes.
- My cakes measure: Diameter: 2 3/4 inches, Circumference: 8 3/4 inches, Height: 7 inches
- When tying the cakes with string, use a moderate amount of tension. The string should be tight enough to hold everything together put not so tight that it creases the banana leaves. You should be able to slide the string with your fingers if needed.
- The technique for tying the string is what makes the cakes so unique and eye-catching. However, if working with string is not your forte, simply make a series of simple knots around the cake.
- You need a pretty big pot to cook these cakes. The one I have is a 20 quart stockpot. The pot should be at least 3 inches taller than the cakes to allow room for water. If you don't have a pot that is tall enough, you can lay the cakes on their sides and cook them this way.
- Be sure to use a heavy lid, bowl or plate to weigh down the cakes. The cakes need to be submerged in water during the entire cooking process or they will cook unevenly.
- Check the water levels every hour and add more water as needed. When adding water to the pot, only use boiling water. Do not add lukewarm or cold water to the pot. This will stop the cakes from cooking and ruin them.
- Some people hang their cakes after cooking to allow the water to drip out of the cakes. If you wrap the cakes in a generous amount of foil, water won't seep into the cake and there's no need to hang dry.
- Instead of boiling on the stove top, you can cook the cakes using a pressure cooker. Pressure cook on High for 2 hours. After the pressure cook time is completed, let the cakes continue cooking in the "Keep Warm" mode for at least 1 hour. More is just fine. You may not be able to stand the cakes upright and laying them horizontally is just fine. Be sure to add water to the "Max" line or enough to cover the cakes. You can place something heavy to submerge the cakes but this isn't necessary if you use plenty of water.
- Store the Sticky Rice and Mung Bean Cakes at room temperature for up to 2 days. Refrigerate for up to 2 weeks. Freeze the whole cakes for up to 6 months. To enjoy again, allow to come to room temperature and warm in the microwave using Low power.
Nutrition FactsSticky Rice and Mung Bean Cakes / Banh TetAmount Per ServingCalories 1634 Calories from Fat 423% Daily Value*Fat 47g72%Saturated Fat 16g100%Cholesterol 61mg20%Sodium 1680mg73%Potassium 790mg23%Carbohydrates 257g86%Fiber 19g79%Sugar 4g4%Protein 37g74%Vitamin A 35IU1%Vitamin C 2.1mg3%Calcium 76mg8%Iron 7.1mg39%* Percent Daily Values are based on a 2000 calorie diet.
Hi. My aunt made some for me but the rice seems like it was still not as tender in the middle of the banh. Is there anything it can do? Can I boil it more or can I steam them in individual slices in a steamer?
Hi Maliya,
If the cakes haven’t been refrigerated, you can wrap them up and boil them again. If they’ve been refrigerated, cut them into small pieces and steam on High heat with lots of water. Alternatively, you can pan-fry the cakes. Hope that helps.
Hi chi Trang,
Thank you sooooo much for the awesome instruction! I already wrapped the cakes but it’s too late to boil them now (11pm here). Do you think it would be okay to wait till 6pm tomorrow to boil them? Also, our pot is not tall enough, is it okay if I place the cakes down instead of standing them up in the pot?
Thanks again!
Nhi
Hi Nhi,
The cakes will be just fine at room temperature until the morning. Placing them down works as well. I look forward to hearing how your cakes turn out. Good Luck!
Chi Trang oi, due to time constraint, I made banh tet this week instead of banh chung and let me tell you, for a first attempt, they came out almost as good looking as the ones that are sold at the stores! Thank you very much for such concise direction! I wish I could cut into them right now but they are still too hot. By the way, if I was to cook these in a pressure cooker, how long do you think I should cook them? Thank you!
Hi Ann,
Great Job! I am so happy to hear your banh tet came out well. 🙂 I am looking forward to seeing some pictures. High Pressure cook these cakes for 2 hours and then allow to continue cooking using the residual heat for another 1 1/2 hours. Enjoy!
Hi chi Trang, I will try to share a pic of the banh tet with you. We polished off 2 and I gave one each to my mom and my mom in law. My mom in law was so surprised that my first attempt at making banh tet was so successful! Needless to say, my mom was very impressed too. I’m so psyched up that I’m going to make more next week. Regarding the pressure cooker, I’m a bit of a newbie so please help me. When you say residual heat, do you mean we shut off the heat and leave the lid on for the duration? As always, I appreciate you taking the time to teach us these yummy recipes.
Hi Ann,
I just knew you would be successful! Great job em! Regarding the pressure cooker, you are correct–just turn off the heat and leave the pressure cooker as is and let the cakes continue to cook using the residual/remaining heat. Let me know if you have any questions. Good Luck and looking forward to hearing how the pressure cooker method turns out for you.
Chi Trang oi, I have one word ‘PHENOMINAL’! I made another batch yesterday using the pressure cooker and I’m very pleased with the finished products. From now on, I don’t have to wait for Tet to get my fill of banh tet. What’s more, I can have it cooked in less than 3 hours. Talk about saving money on the gas bill! Thank you for your help! Mung nam moi to you and your family! See you next year
Hi Chi, can we freeze what we make before we cook so that we can have like 20 and then cook them all at onc. THank you
Hi V,
I have not tried freezing the uncooked cakes for later cooking. However, my experience with glutinous rice is once it is soaked and refrigerated or frozen, the rice doesn’t cook properly and no matter how long you cook it, it seems raw and crunchy. (in Vietnamese the word is sượng) If you want to experiment, try it with one cake and see if the cooked cakes are acceptable. Good Luck!
I can’t wait to try this recipe! I’m curious, have you tried making banh tet/Chung in your instant pot?
Hi Christine,
Yes, I’ve made banh tet and banh chung in the Instant Pot. (My latest blog is making Banh Chung in an Instant Pot. 🙂 ) If you have the 8 qt Instant Pot, 4 banh tet will fit just fine. If you have the 6 qt, you should make the banh tet a bit smaller. Good Luck!
How long do you cook it in the instant pot?
Hi Tracy,
For 4 banh tet fitting into the 6 qt Instant Pot, High Pressure cook for 90 minutes and then let continue cooking on the Keep Warm function for another 60 minutes. If using the 8-quart Instant Pot for 4 full-sized banh tet, High pressure cook for 2 hours and then Keep Warm for 60 minutes. Hope that helps.
Thank you! I will try it out!!
Awesome, thank you! I knew I should’ve purchased the 8 quart one instead! 🙂
Hello Chi Trang – I just attempted this recipe and when I unwrapped it from the foil, I found the cake sitting in a lot of yellow oil. I’m assuming this is from the pork belly. Can you confirm that this is normal? Thank you for sharing your recipe!
Hi Kelly,
I haven’t experienced this pool of yellow oil you’re describing but I usually choose leaner pieces of meat. Was the pork considerably shrunken as compared to its original shape?
I just want to let you know I’ve been lurking around your website and YouTube channel for awhile and I love it! I don’t live close enough to my mom to ask her to cook for me anymore and your website is a miracle when I’m craving Vietnamese food. I think I’m going to attempt to make both banh tet and banh chung this year using your recipe and I was wondering how would I test for doneness? I’m a bit skeptical about my stove and I don’t think it’ll cook in 4 hours. Again, thanks for all your hard work on this page! I hope you have a wonderful and prosperous new years!
Hi Ngoc,
I love lurkers on my website…lol, and I happy to hear you found a recipe you’d like to try. If this is your first time making banh tet, I would suggest that you cook for longer than my suggested time of 4 hours. Banh Tet and Banh Chung can be over-boiled and they won’t be ruined. It’s really tough to tell whether the cakes are cooked unless you cut them in half. After 4 hours, you’ll have to sacrifice a cake by cutting it in half to check for doneness. If it’s not done, just wrap a layer of banana leaves around the entire cake covering the part you cut, wrap the cake with a double layer of foil and then continue boiling. If you don’t want to cut one open, you can continue boiling for another 1-2 hours. If your cakes are approximately the same size as mine, 6 hours of cooking should be more than adequate. Good Luck and I would love to hear how your cakes turn out. Wishing you a happy and prosperous New Year as well!
Hi Chi Trang,
I love your technique of wrapping the Banh tet. It looks so easy. I think I will try to goi banh tet with your technique for Tet 2015.:) Are you going to show us how to wrap banh chung too? Hope you will make another video on goi banh chung before Tet 2015 so I can try out both kinds of wrapping for Tet 2015.:) Thank you so much for the good tips and techniques on cooking vietnamese foods, chi Trang.:) Wish you good health and lots of happiness always, chi Trang!
Hong
Hello Hong,
Thank you for your kind words. I hope you give the Banh Tet recipe a try and let me know how it turns out for you. I was planning on sharing my Banh Chung recipe this year but it looks like I won’t have time to get it all done by this year’s Tet. I will share other well-loved Tet recipes so please stay tuned. Wishing you much health, happiness and prosperity in the new year as well!
Hi Chi Trang,
Chuc mung nam moi. Chuc chi va gia dinh an khang thinh vuong va tran day hanh phuc nha!:) Em lam banh tet theo recipe cua chi day roi. An ngon lam chi. Ca nha dieu khen do! Cam on chi nhieu lam! My first try is not bad. It takes me about half an hour to wrap one roll. lol. But it was worth it. I m looking forward chi day tui em wrap banh chung next do. Hope chi will make a video on that soon. Next Tet I will wrap both. hee hee. Chuc chi mot ngay an lanh nhe.:) Thanks for everything you have done for us on this website!
Hi Hong,
Chuc Mung Nam Moi! I am very happy to hear you were successful with making the Banh Tet and your family enjoyed these wonderful cakes. Great Job! They are time-consuming to make but really worth the effort. I always feel good about giving my family homemade Banh Tet versus the store-bought ones. I am definitely planning on sharing a Banh Chung video and will probably film it this summer just to be prepared for next Tet 🙂 Thank you for your kind New Year’s wishes and your support of my channel and website. Best wishes to you and your family!
chi Trang, em ko hieu 4-9 feet lengths of string la bao nhieu vay chi
Hi KT,
Cong thuc lam duoc 4 cai banh. Em cat 4 so string dai 9 feet/2.75 meter. Chuc em thanh cong!
Hi Trang,
Linh da thu recipe nay roi. Rat ngon!!! Thank you Trang da chia se.
Linh.
Hi Chị Linh,
Em rat vui khi biet chi da thanh cong voi banh nay. Cam on chi ghe website!