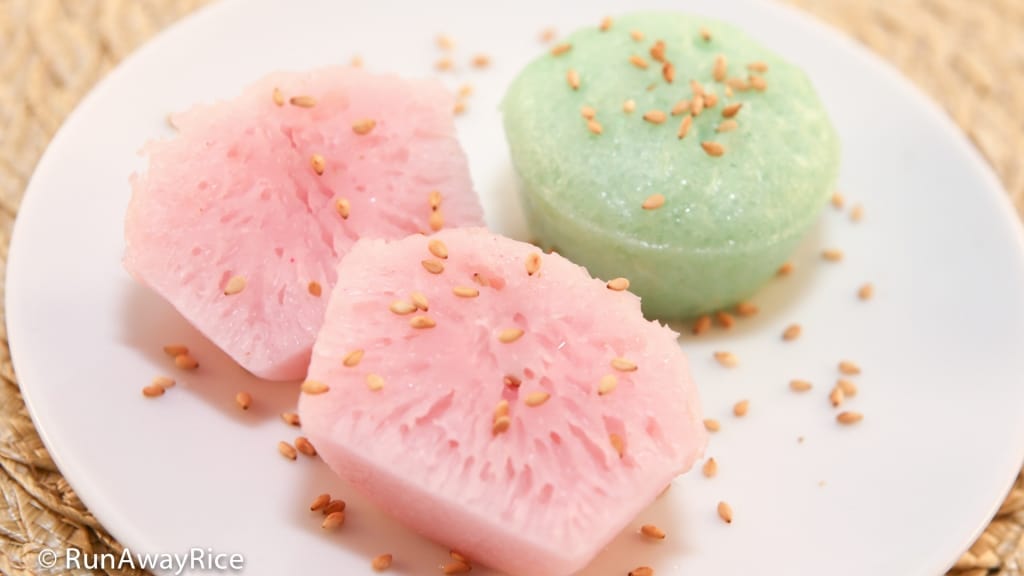
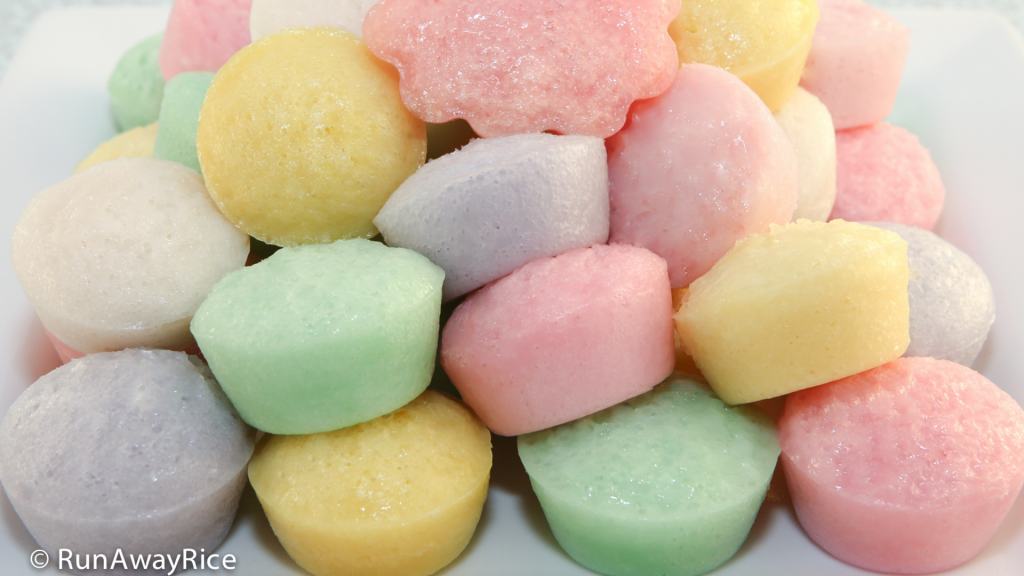
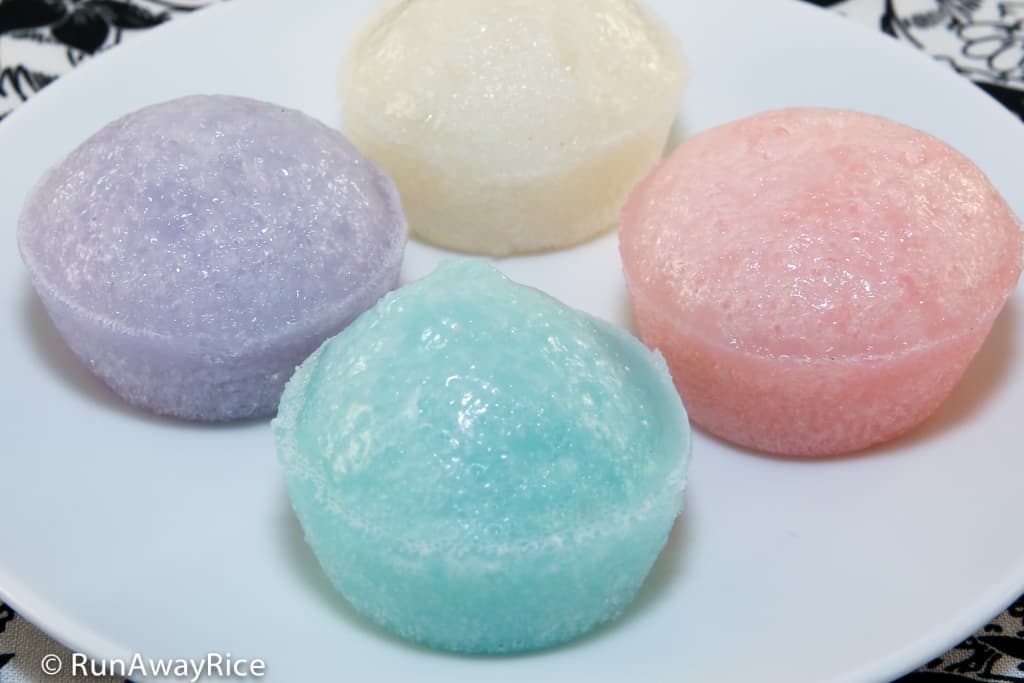
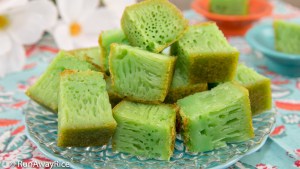
This Steamed Rice Cakes (Banh Bo Hap) recipe is from my childhood and conjures up so many happy memories. Known by a few different names, Cow Cakes or Steamed Honeycomb Cakes, the cakes are sweet, soft and deliciously spongy. As a young child, my sister always called these “Cow Cakes” because “Bánh” in Vietnamese means “Cake” and “Bò” means “Cow”. My Mom would laugh and explain to her that “Bò” also means “to crawl”. That’s what the batter does when it’s steamed–it “crawls” upward rising into a puffy cake. My sister’s nickname for this cake stuck in our house. Moving to southern California, I was pleasantly surprised to also hear others call them “Cow Cakes”. Depending on whom you ask, you will definitely get different explanations on the name. Recently I read on Wikipedia the word “Bò” is intended to mean “Cow” as the cakes resemble a cow’s udder. Well, that I don’t really see. Call them what you will, these cakes are scrumptious and pretty easy to recognize. They are sweet, soft and moist and when cut open have honeycombs throughout which give the cakes their interesting spongy and light texture. The Viet version of these cakes are small and they are usually enhanced with food coloring (green, pink, and yellow) for eye-catching appeal.
Steamed Rice Cake is a wonderful dessert everyone should learn to make and it’s not as difficult as you may think. There are some key techniques to learn but once you get them down, you’ll see it’s easy peasy. Please watch the video, read the recipe along with the tips and tricks and follow the directions closely. Good Luck!
Watch the video for instructions.
Notes on the Steamed Rice Cakes (Banh Bo Hap) Recipe, Tips and Tricks
Use fresh active dry yeast. Activate the yeast using warm water that is approximately 100 degrees. If the yeast isn’t frothy after resting for 10 minutes, the yeast has expired.
During the colder months, the batter may not rise as quickly. To encourage the batter to rise, place the bowl in the oven with the light on and close the door. The light will generate additional heat and further activate the yeast. During the summer months (air temperature in the 70’s), letting the batter rest on the kitchen counter is just fine.
Use liquid or gel food coloring. Gel food coloring requires lots of mixing. Be sure to mix it into the batter evenly so there are no streaks or blotches of color. When adding food coloring, keep in mind the colors brighten when the cakes are steamed so go easy on the food coloring and don’t add too much.
Since the batter is near the warm stove, you may notice bubbles forming on top of the batter. Use a spoon or skimmer to scoop off the bubbles and discard. These bubbles make the tops of the cakes uneven and bumpy.
As flour has a tendency to settle in liquid, be sure to stir the batter several times before pouring into the pan or dishes.
When preparing the steamer, fill the bottom pan with plenty of water, about three-quarters full. The steam needs to be strong and steady when cooking these cakes. The goal is to steam these cakes quickly over High heat.
Having two sets of mini-muffin pans is best. As one batch is cooling you can start steaming another one. You’ll be able to make the cakes quickly. As an alternative to using mini muffin pans, use any small dishes or cups. Try to keep them about the same size so they are done steaming at the same time. To test for doneness, insert a toothpick into a cake and if it comes out clean, it’s done. The mini-muffins steam for 6 minutes. Adjust the steaming time according to the size of your dishes or cups.
Be sure to steam the empty muffin pan or dishes before adding the batter. The hot pan or dishes will help the batter to rise and make the cakes fluffy.
Wrap a large kitchen towel around the steamer lid to absorb the moisture. This saves time as you don’t have to continually wipe the lid as the cakes are steaming. If the moisture from the lid drips down onto the cakes, little blisters may form on the cakes. Also, water drips from the lid could affect the consistency of the cakes, making them wet.
Consider using your wok to make the Steamed Rice Cakes if you don’t have a steamer large enough to hold a mini-muffin pan.
Store any Steamed Rice Cakes not eaten within the day in an airtight container and refrigerate. Warm the cakes in the microwave for 15-30 seconds or steam for 1 minute. Enjoy the Steamed Rice Cakes within the week.
If you enjoy this Steamed Rice Cakes (Banh Bo Hap) recipe, you may also like:
Silkworm Cassava Cake
(Banh Tam Khoai Mi)
Honeycomb Cake
(Banh Bo Nuong)
Steamed Rice Cakes / Cow Cakes / Steamed Honeycomb Cakes / Banh Bo Hap
Ingredients
Yeast
1/2 cup water
2 tsp active dry yeast
1 tsp sugar
Batter
3 3/4 cups (1 lb) rice flour
1/3 cup tapioca starch
3 cups water, divided
1 1/2 cups sugar
.28 oz packet vanilla sugar
14 oz can coconut milk
food coloring: green, pink and yellow
1/4 cup vegetable oil for oiling muffin pans
Directions
Activating the Yeast
Heat 1/2 cup water to approximately 100 F (38 C). Add the active dry yeast and sugar and stir together. Let the mixture rest for 10 minutes or until it becomes frothy.
Making the Batter
In a large bowl, add the rice flour, tapioca starch and 2 cups water. Whisk together until the mixture is smooth and free of lumps. Add the yeast mixture to the flour mixture and combine well. Cover the bowl with plastic wrap and let the batter rest on the counter for 2 hours. (If making this during the winter months, please see the notes above.)
In a large measuring cup or bowl, combine the sugar, vanilla sugar, coconut milk and remaining 1 cup water. Whisk together until the sugar is dissolved. Microwave the liquid on High for 1 minute. Let the coconut milk mixture cool until the temperature is approximately 100 F (38 C).
Pour the coconut milk mixture into the batter and whisk together combining well. Strain the batter. Pour the batter into 4 separate cups or bowls, approximately 1 3/4 cups in each. Add your choice of food coloring to each batch. Let the batter rest for 30 minutes.
Steaming the Cakes
Fill a steamer basin three-quarters full with water. Cover and bring to a rapid boil over High heat.
Using a small brush, lightly oil each of the muffin cups with vegetable oil. Place the empty mini-muffin pan into the steamer tray and steam for 1 minute.
Stir the batter a few times and then pour the batter into the muffin cups filling each cup almost to the top. (Leave some room so the cakes can expand and rise.) Cover and steam the cakes for 3 minutes. Remove the steamer lid and wipe off the moisture with a kitchen towel. Replace the lid and steam for another 3 minutes.
Remove the mini-muffin pan from the steamer. Allow the Steamed Rice Cakes to cool for 5 minutes before removing from the pan.
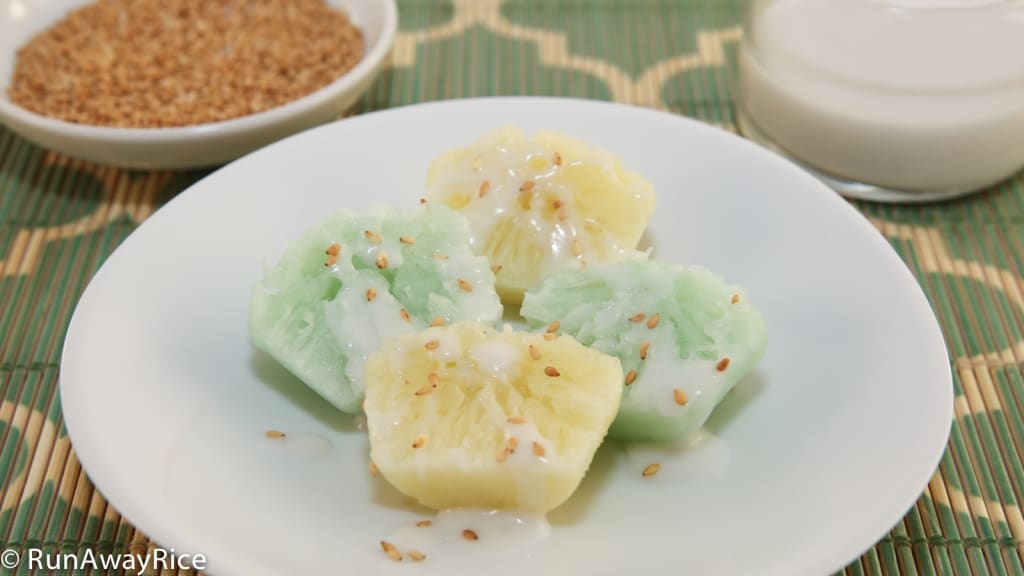
A simply and delicious way to serve these cakes is to drizzle them with creamy coconut sauce and then top with roasted sesame seeds.
Refrigerate any remaining portions for up to 1 week. To reheat, warm in the microwave.
Yields: 5 dozen cakes
Tools I Love and Use in My Kitchen
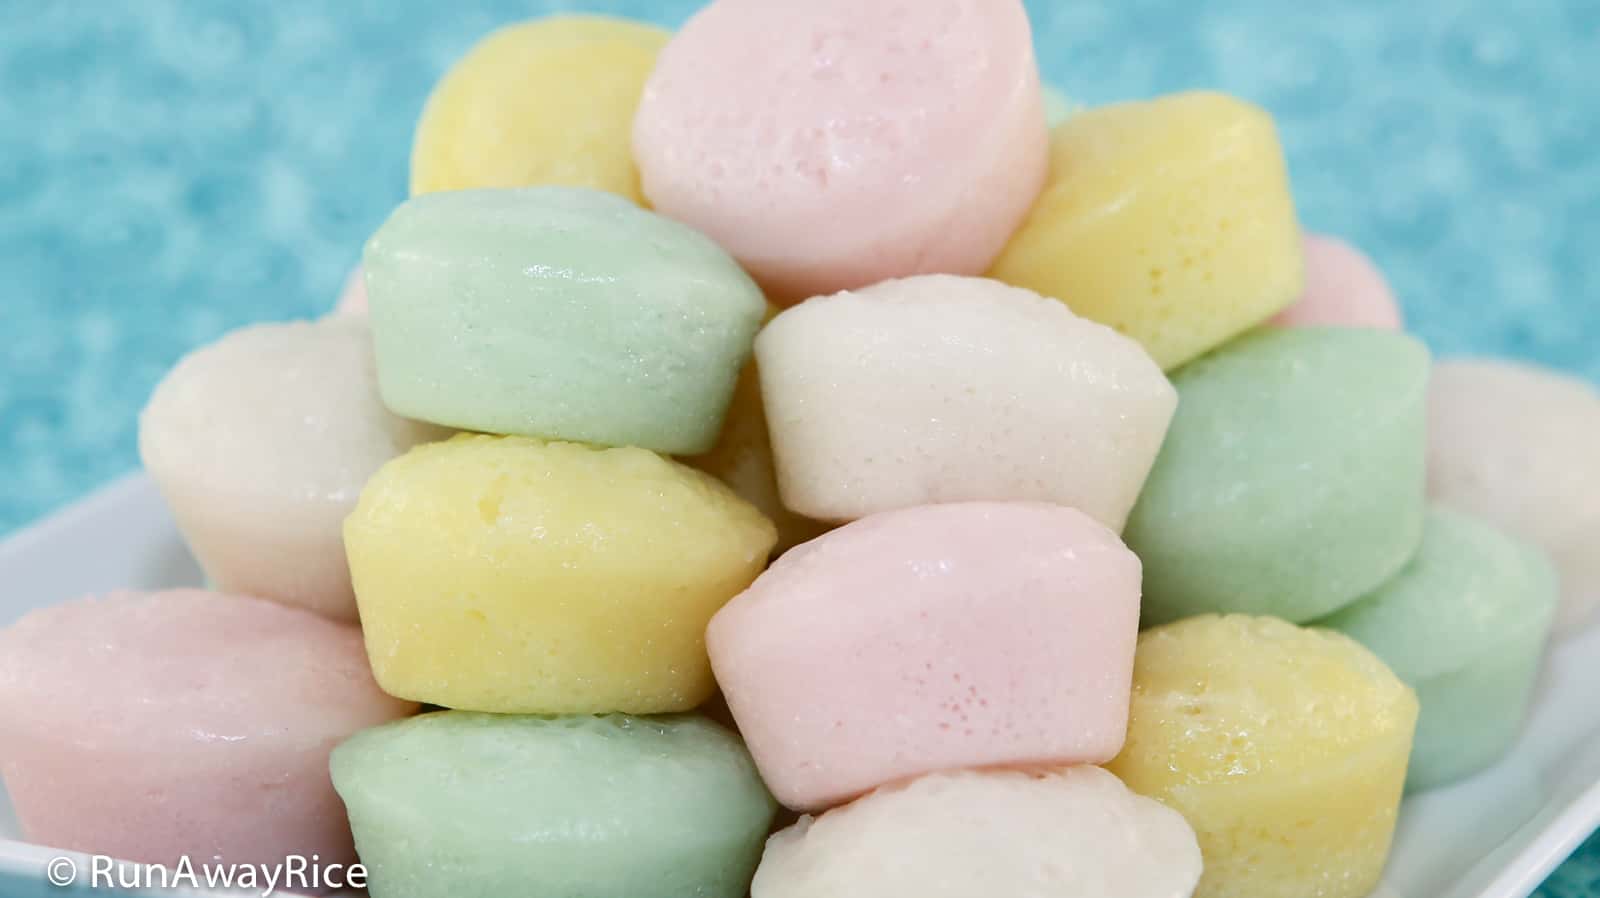
Steamed Rice Cakes / Cow Cakes / Steamed Honeycomb Cakes / Banh Bo Hap
This Steamed Rice Cakes (Banh Bo Hap) recipe is from my childhood and conjures up so many happy memories. They are sweet, soft and moist and when cut open have honeycombs throughout which give the cakes their interesting spongy and light texture. The Viet version of these cakes are small and they are usually enhanced with food coloring (green, pink, and yellow) for eye-catching appeal.
Ingredients
Yeast
- 1/2 cup water
- 2 tsp active dry yeast
- 1 tsp sugar
Batter
- 3 3/4 cups rice flour , 1 lb
- 1/3 cup tapioca starch
- 3 cups water , divided
- 1 1/2 cups sugar
- .28 oz packet vanilla sugar
- 14 oz coconut milk
- food coloring: green pink and yellow
Other
- 1/4 cup vegetable oil , for oiling muffin pans
Instructions
Activating the Yeast
-
Heat 1/2 cup water to approximately 100 F (38 C). Add the active dry yeast and sugar and stir together. Let the mixture rest for 10 minutes or until it becomes frothy.
Making the Batter
-
In a large bowl, add the rice flour, tapioca starch and 2 cups water. Whisk together until the mixture is smooth and free of lumps. Add the yeast mixture to the flour mixture and combine well. Cover the bowl with plastic wrap and let the batter rest on the counter for 2 hours. (If making this during the winter months, please see the notes above.)
-
In a large measuring cup or bowl, combine the sugar, vanilla sugar, coconut milk and remaining 1 cup water. Whisk together until the sugar is dissolved. Microwave the liquid on High for 1 minute. Let the coconut milk mixture cool until the temperature is approximately 100 F (38 C).
-
Pour the coconut milk mixture into the batter and whisk together combining well. Strain the batter. Pour the batter into 4 separate cups or bowls, approximately 1 3/4 cups in each. Add your choice of food coloring to each batch. Let the batter rest for 30 minutes.
Steaming the Cakes
-
Fill a steamer basin three-quarters full with water. Cover and bring to a rapid boil over High heat.
-
Using a small brush, lightly oil each of the muffin cups with vegetable oil. Place the empty mini-muffin pan into the steamer tray and steam for 1 minute.
-
Stir the batter a few times and then pour the batter into the muffin cups filling each cup almost to the top. (Leave some room so the cakes can expand and rise.) Cover and steam the cakes for 3 minutes. Remove the steamer lid and wipe off the moisture with a kitchen towel. Replace the lid and steam for another 3 minutes.
-
Remove the mini-muffin pan from the steamer. Allow the Steamed Rice Cakes to cool for 5 minutes before removing from the pan.
-
A simply and delicious way to serve these cakes is to drizzle them with creamy coconut sauce and then top with roasted sesame seeds.
-
Refrigerate any remaining portions for up to 1 week. To reheat, warm in the microwave.
Recipe Video
Notes, Tips & Tricks
- During the colder months, the batter may not rise as quickly. To encourage the batter to rise, place the bowl in the oven with the light on and close the door. The light will generate additional heat and further activate the yeast. During the summer months (air temperature in the 70's), letting the batter rest on the kitchen counter is just fine.
- Use liquid or gel food coloring. Gel food coloring requires lots of mixing. Be sure to mix it into the batter evenly so there are no streaks or blotches of color. When adding food coloring, keep in mind the colors brighten when the cakes are steamed so go easy on the food coloring and don't add too much.
- Having two sets of mini-muffin pans is best. As one batch is cooling you can start steaming another one. You'll be able to make the cakes quickly. As an alternative to using mini muffin pans, use any small dishes or cups. Try to keep them about the same size so they are done steaming at the same time. To test for doneness, insert a toothpick into a cake and if it comes out clean, it's done.
- Wrap a large kitchen towel around the steamer lid to absorb the moisture. This saves time as you don't have to continually wipe the lid as the cakes are steaming.
Nutrition FactsSteamed Rice Cakes / Cow Cakes / Steamed Honeycomb Cakes / Banh Bo HapAmount Per ServingCalories 80 Calories from Fat 18% Daily Value*Fat 2g3%Saturated Fat 2g13%Sodium 1mg0%Potassium 23mg1%Carbohydrates 14g5%Sugar 5g6%Vitamin C 0.1mg0%Calcium 3mg0%Iron 0.3mg2%* Percent Daily Values are based on a 2000 calorie diet.

Hi! I loved the recipe! I added different ingredients instead of the vanilla sugar and it worked perfectly! Unfortunately I do not have a steamer, so I baked them in the oven. They were still delicious!
However I did not have any honeycombs inside, I suppose it is due to my baking method… but they weren’t heavy so that’s great. 🙂 I will make more when I buy a steamer!
My grandma used to bake some when my dad was young so I tried it. Will make them again.
Hi Kira,
I am thrilled to hear your baked version turned out delicious. Steaming is the traditional method but baking works too. Here is my recipe for the baked version: http://runawayrice.com/desserts/honeycomb-cake-eggless-vegetarian-recipe/ if you want to give it a try. This will yield lots of honeycomb. Enjoy! 🙂
Hey Trang,
I’ve been living an ocean away from my family home for a couple of years now and have missed my mom’s traditional Vietnamese cooking. I asked my mom to share her recipes, but she always describes measurements so vaguely, like “use one spoon of fish sauce” when she’s actually referring to a giant soup spoon! Your recipes have helped bring home to where I am. So far, I’ve successfully cooked the banh xeo, banh bo hap, banh day and che ba mau. I also eat goi cuon everyday – it’s so easy! Definitely gaining a lot of weight from the carbs, haha. Also appreciating my mom more for all the effort she put into every dish to make it fresh and healthy. Thanks for sharing all of these, Trang!
Hi Mary,
Aww, sorry to hear you’re so far from home. It’s tough being away from our beloved family. Our Viet Moms are the best, aren’t they? I didn’t appreciate how much time my Mom spent preparing our meals until I started cooking for myself. So much love in every dish! I am so happy to hear you’ve been able to recreate some of your favorite Vietnamese dishes. Don’t worry about the carbs! LOL..it’s all worth it 🙂 Take care and please stop by to say hi anytime!
Hey girl! I’ve tried so many Banh Bo recipes without much success and was so glad to come across your recipe. It was really easy to follow and guess what? It worked! My cakes had beautiful honeycombs and they were so yummy! Thanks a bunch! This one’s a keeper. 🙂
Hi Tracey,
That’s wonderful! So glad to hear that. Thanks for trying my recipe. 🙂
Hi,
My steamed banh bo came out dry. Is there a way I can fix it?
Hi Nancy, if you have batter left, try steaming it for less time. Also, make sure to stir the batter well before pouring in the pans so the flour mixture is evenly distributed. If the batter seems really thick, add some water to loosen it up a bit. Good Luck!
Hi Trang,
Thank you so much for your recipe! Do you know what happens to make the cake very dense? Mine is a bit hard/mushy and lacks the honeycomb texture.
Much thanks!
Hi Cindy,
It sounds like the batter didn’t rise properly if the cakes are dense without the honeycomb texture. Did your batter rise during the resting period?
Hi, Kim. I accidentally stumbled across your recipe for rice cakes and would love to try it. But I have to ask if there is something I can substitute for the coconut milk (due to an allergy to nuts)?
Hi, I would like to try with a smaller amount, Could you give me the measurement in cup or grams, And a recipe for 1 cup rice flour? Can I divide your recipe for 1 cup?
Hi, you can use this recipe online recipe converter http://www.mykitchencalculator.com to figure out the measurements. Simply divide my original recipe by 3, which is the smallest portion of rice flour I recommend using. Good Luck!
What if is electric steamer? I follow the same procedure? I also want to ask how long it takes the steamer if I make one big cake rather than many small. Thank you very much!
Hi,
An electric steamer will work well. The recipe is the same. For a single cake, a 9″ round pan takes about 15-20 minutes. Test the cake for doneness using a toothpick. Good Luck!
Hello, Trang,
Another question. Your instructions say to let the batter proof for 2 hours, then add food color and let set another 30 minutes. I plan not to color so do I let the batter set 2 or 2-1/2 hours? Will it be a problem if it sets longer than that? Thank you.
Hi Kim,
If you’re not adding color, you can steam the cakes after letting the batter rest for 2 hours. Don’t let the batter rest for more than 3 hours as the yeast “eats” all of the sugar and your cake will not be so sweet. Enjoy the recipe!
Hi, Trang,
Followed the instructions very carefully. Let rest 2 hrs & steamed in 2-8″ cake pans which was perfect for the recipe. in a two tier steamer.
At 20 minutes it had puffed beautifully but the toothpick came out covered with a gummy, clear coating. It wasn’t “clean”. So I continued to steam and check every 5 min until I got to 45 min and gave up; the toothpick was always gummy. I knew they were overdone.
The cake in the top basket had good vertical honeycomb on bottom but there was a dense layer on top of it with no honeycombs. The cake in the bottom was totally solid. They were gummy when first taken out and when I cut them when they were slightly warm. BUT fully cooled the texture is amazing, even the dense cake, and love the flavor.
My questions are:
1. Was the cake done at 20 min even though the toothpick came out gummy?
2. How do I keep the cake in the bottom tray from getting dripped on and all wet? Tying a dish towel on the lid is a super idea and kept the top cake totally drip less!!
3. Can I steam one pan at a time? Will the second cake still be able to rise and honeycomb after waiting 20-30 min before it can be steamed.
I don’t want to give up! It is a wonderful recipe and process. I feel I just need to get the steaming right. Sorry for the lengthiness. Thank you!
Hi Kim,
I would suggest steaming just one cake at a time for even steaming. The cake will be done faster and have a consistent texture. It should take about 20 minutes for a 8″ pan rather than 45 minutes. Remember the steam needs to be strong and steady.
1. I think your cake was done after 20 minutes. A bit of gumminess on the toothpick is fine but it should not be completely wet.
2. Steam just one cake at a time.
3. The batter for the second cake will be just fine as you steam the first one. Don’t forget to stir it well before pouring into the pan and steaming.
Give it another try. You are really close. Good Luck!
Thank you, Trang. Can’t wIt to try again. Will let you know results.
Awesome! Good Luck Kim!
Hi, Trang,
Cakes so much better this time. Taste & texture very good. So close! My favorite. I am determined!!!
Bottom layer very good vertical honeycomb. Top much less honeycomb, some parts solid. Made sure to stir well. Wish I could send a pic.
1. After 2 hr. & mixing in milk mixture, maybe let set 30 min before steaming?
2. Put less in the pans?
3.what would happen if mixed everything at once, rest 2 hrs then steam?
Thank you for your help and patience. Sooooooo close.
Hi Kim,
I am thrilled to hear about the improvements. You are very close. Regarding the top portion have less honeycomb, make sure the lid is on securely and the steam isn’t escaping. The steam needs to surround the entire cake to get an even honeycomb texture.
1. Yes, this is what I do
2. You can try putting in less to see if you get an even honeycomb
3. I haven’t tried this.
Good Luck! I want to see pictures one you perfect this recipe! You can share via Facebook, Instagram #runawayrice or via email.
Hi, Trang,
Can’t wait to use your recipe. Tried others unsuccessfully.
I want to make single, large cakes. How many 9″ or 8″ or 6″ pans will I need for this recipe yield?
Can cornstarch or anything else be used as a substitute for the tapioca starch?
I love that we can contact you with questions and help!
Hi Kim,
You can make two cakes using 8″ round pans with this recipe. I have tried cornstarch in the past but did not think it had the right chewy consistency. Tapioca starch is really the best. Good luck with the recipe!
Hi Trang, I made your recipe today and l’m here to say you have the BEST recipe out there! The rice cakes were a HUGE success! They were moist, full of honeycombs which made them light and fluffy with the perfect sweetness. Thank you so very much for sharing! To anyone out there looking for the perfect rice cake THIS is the recipe to follow and take note of her “tips and tricks” they are extremely helpful!
Hi Mo,
I am so happy to hear this recipe was a success for you! Great job to you! Thanks for taking the time to share your results 🙂
I did not have vanilla sugar and used 1/2 teaspoon vanilla extract as Trang suggested. I thought it made it flavorful and fragrant. Next time I will use coconut extract to amplify the flavor. I love anything coconut!